Introduction to Checkerboard Cake
When it comes to celebrating special occasions or simply impressing friends and family, nothing says “I’m serious about dessert” quite like a checkerboard cake. This strikingly beautiful cake is not only a feast for the eyes but also offers a delightful combination of flavors that everyone will love.
Why a Checkerboard Cake is a Showstopper
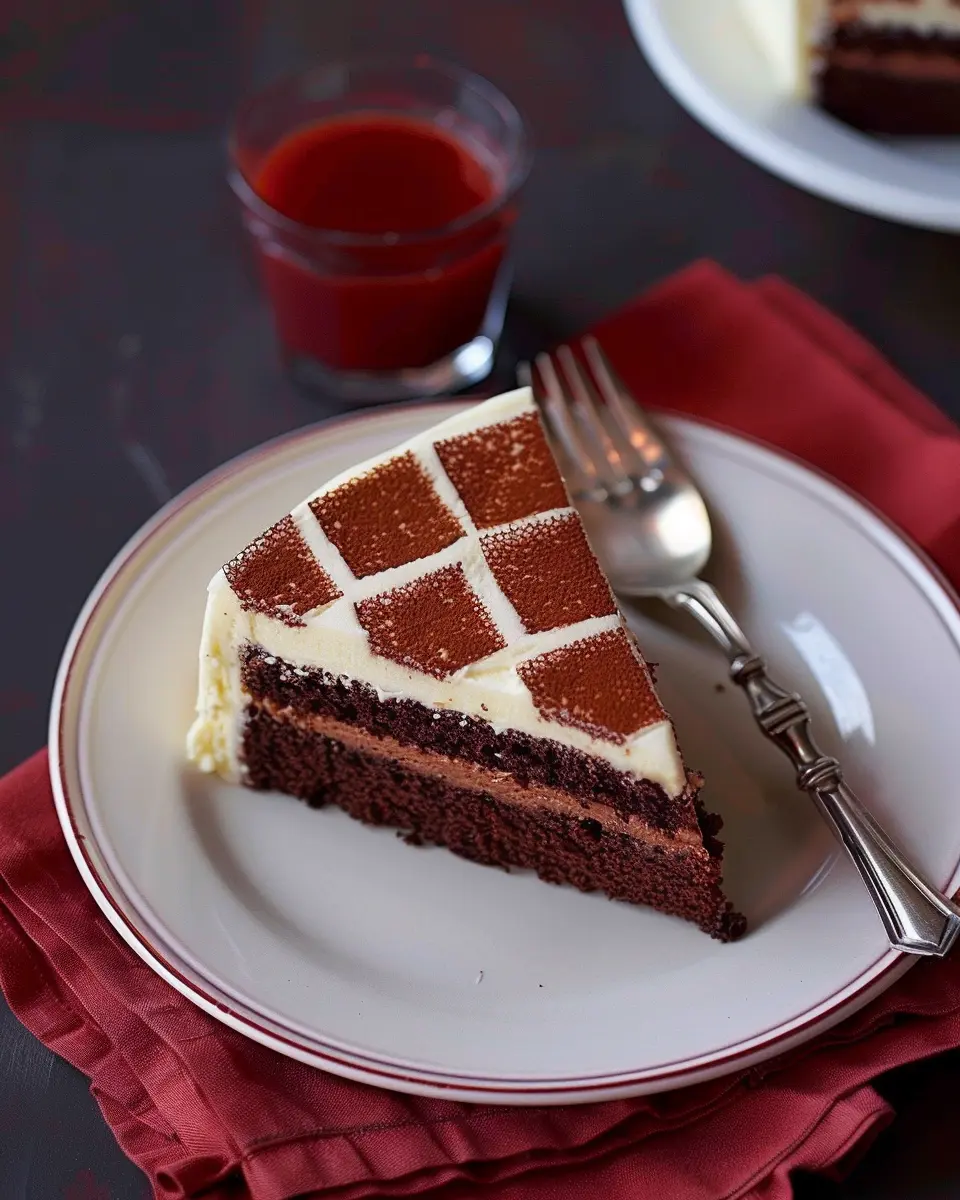
The appeal of a checkerboard cake lies in its unique visual presentation. The alternating colors create a stunning pattern that will leave your guests in awe. Imagine slicing into the cake to reveal a surprise of alternating layers of rich chocolate and vanilla — it’s like a magic trick in dessert form! This cake isn’t just for show; the flavors complement each other beautifully, ensuring that every bite is as delicious as it is pretty.
Making a checkerboard cake is also a wonderful opportunity to express your creativity. You can customize the flavors, colors, and even the frosting to match the theme of your event. Plus, it’s an engaging activity for bakers of all skill levels. Whether you’re an experienced home baker or a novice just starting out, the process can be a fun and rewarding experience.
From birthdays to anniversaries, a checkerboard cake can elevate any celebration. According to a study by the American Bakers Association, cakes are the most popular choice for party desserts, and a visually appealing cake can significantly enhance the overall mood of an event. Just think about it — a cake that looks stunning not only provides a delicious treat but also makes for great photos, ensuring memories that last a lifetime.
If you’re interested in creating this masterpiece at home, you’ll find that the technique isn’t as difficult as it seems. There are plenty of tutorials available online like this one from Sally’s Baking Addiction, guiding you step by step through the process. So, are you ready to dive into the world of layered cakes and culinary artistry? Your friends and family are going to be so impressed!
Ingredients for Checkerboard Cake
Creating a delightful checkerboard cake begins with some essential ingredients to ensure that your layers are moist and delicious. Let’s dive into what you’ll need for both the cake itself and its fabulous frosting.
Essential ingredients for the cake
To achieve that stunning checkerboard effect, you’ll need the following for the cake layers:
- 2 cups all-purpose flour
- 1 ½ cups granulated sugar
- ½ cup unsweetened cocoa powder (for the chocolate layer)
- 1 cup unsalted butter, softened
- 4 large eggs
- 1 cup whole milk
- 2 teaspoons baking powder
- 1 teaspoon vanilla extract
- A pinch of salt
These ingredients will work together to create a rich, moist cake. Don’t forget to check out more about baking techniques on Baking Basics to elevate your baking skills!
Ingredients for the frosting
Now, let’s talk about what will make your checkerboard cake truly shine — the frosting! You’ll want:
- 1 ½ cups unsalted butter, softened
- 4 cups powdered sugar
- ½ cup heavy cream
- 2 teaspoons vanilla extract
- A pinch of salt
This combination will give you a smooth, creamy frosting perfect for layering and decorating your cake. You might consider experimenting with flavors by adding some fresh fruit or even a splash of coffee for a unique twist. Need more tips? Check out Frosting Techniques on Serious Eats for ideas and inspiration!
With these ingredients, you’ll be well on your way to crafting an irresistible checkerboard cake that’s sure to impress your friends and family.
Preparing Checkerboard Cake
When it comes to impressive baked goods, the checkerboard cake stands out not only for its stunning visual appeal but also its delightful flavor. That said, the process of making this layered masterpiece can be simplified with a bit of organization and patience. Let’s walk through the steps together.
Prepping your baking pans and ingredients
Before diving into the mixing bowl, take a moment to prepare your workspace. You’ll need two 9-inch round cake pans for this recipe, preferably non-stick. Grease them thoroughly with butter or vegetable oil and sprinkle a little flour to prevent sticking. You can also line the bottoms with parchment paper for extra assurance.
Gather your ingredients:
- Flour
- Sugar
- Baking powder
- Salt
- Eggs
- Milk
- Vanilla extract
- Unsalted butter
- Food coloring (optional for added flair)
A well-organized kitchen makes the process more enjoyable. It’s like creating a masterpiece; having your brushes and colors at the ready makes all the difference! If you need tips on measuring correctly, check this guide from King Arthur Baking.
Mix the dry ingredients
Once your ingredients are ready, start by mixing the dry ones. In a large bowl, whisk together:
- 2 cups of all-purpose flour
- 1 ½ teaspoons of baking powder
- ½ teaspoon of salt
This step is crucial as it ensures even distribution of the leavening agent, leading to a beautifully risen cake. Get your whisking arm warmed up—you want these ingredients to blend thoroughly!
Create the cake batter
Next, it’s time to make the checkerboard cake batter. In another bowl, cream together 1 cup of unsalted butter and 2 cups of granulated sugar until the mixture is light and fluffy. You can do this by hand with a spatula, or use an electric mixer for speed. Add in 4 eggs, one at a time, and then mix in 1 cup of milk and 2 teaspoons of vanilla extract.
When well combined, slowly add your dry ingredient mixture to the wet one, stirring gently until just combined. If you want to get creative, you can separate the batter into two bowls, tinting one with food coloring to create a fun color contrast in your checkerboard cake!
Bake the cakes
Preheat your oven to 350°F (175°C) while you’re mixing the batter. Pour the batter evenly into the prepared pans, smoothing the tops with a spatula. Bake for 25-30 minutes, but start checking for doneness around the 25-minute mark. A toothpick inserted in the center should come out clean!
Let the cakes cool in their pans for about 10 minutes before transferring to wire racks to cool completely.
Make the frosting
While your cakes cool, whip up a delicious frosting to tie it all together. A classic buttercream works wonderfully:
- 1 cup of unsalted butter (at room temperature)
- 4 cups of powdered sugar
- 1-2 tablespoons of milk
- 1 teaspoon of vanilla
Beat the butter until creamy, then gradually add in the powdered sugar. Once combined, splash in the milk and vanilla, continuing to beat until it reaches your desired consistency. Smooth and fluffy is the name of the game here!
Assemble the checkerboard layers
Now for the fun part! Trim the tops of your cakes if they have domed for even stacking. Using a round cutter (like a biscuit cutter), cut out circles from the center of the cakes. Layer the cakes alternating between the light and dark colored cakes, filling in with frosting in between layers.
Once stacked, coat the entire cake with a thin layer of frosting to seal in the crumbs, followed by a final, thicker layer of frosting for a smooth finish. You can use any leftover frosting for swirls or decorations on top—why not make it your own?
Embrace the joy of baking with this checkerboard cake; it’s a delightful way to impress friends and family. Happy baking, and remember, every slice is a piece of art!
Variations on Checkerboard Cake
If you’re already enamored with the classic checkerboard cake, why not take it a step further and explore some delightful variations? Here are two splendid options to tantalize your taste buds.
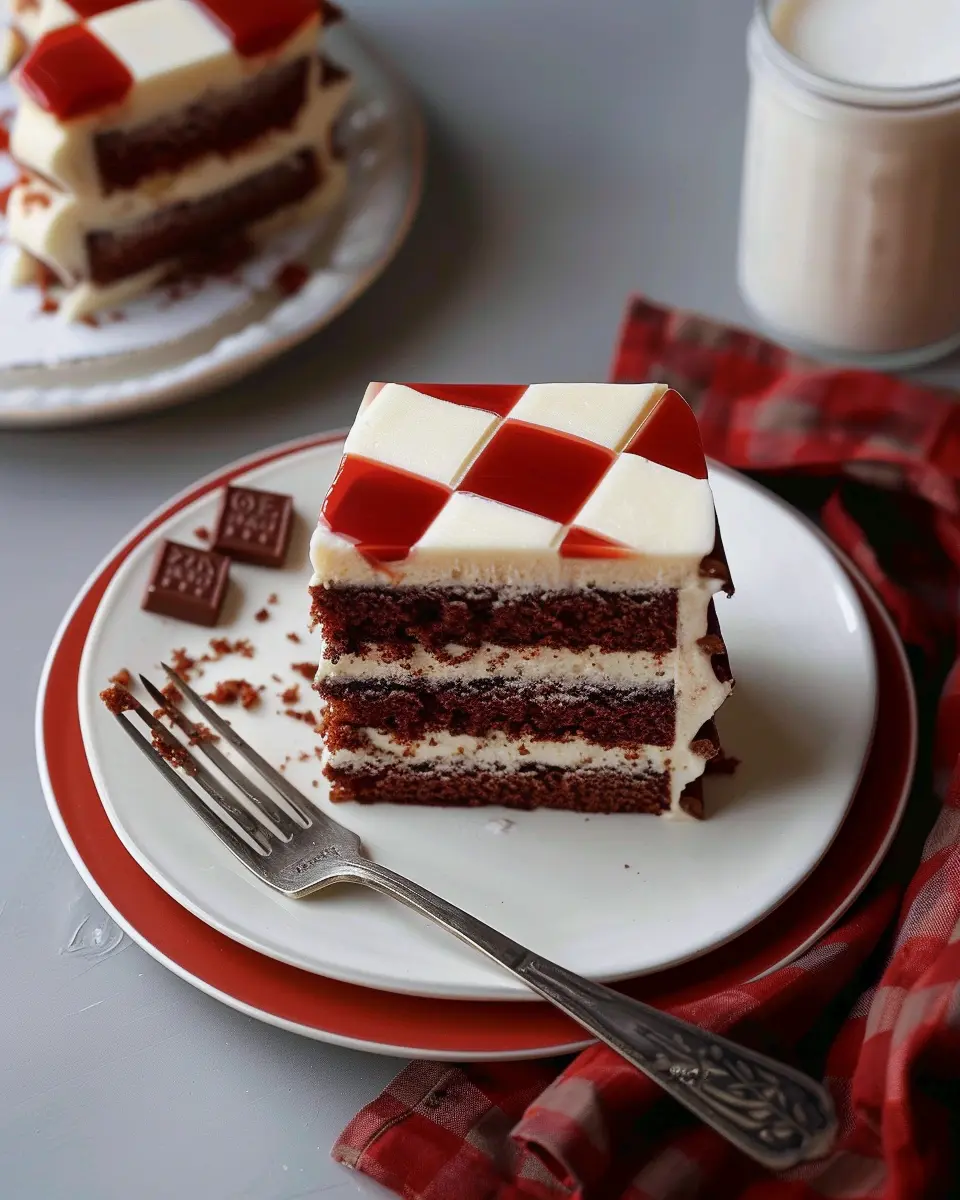
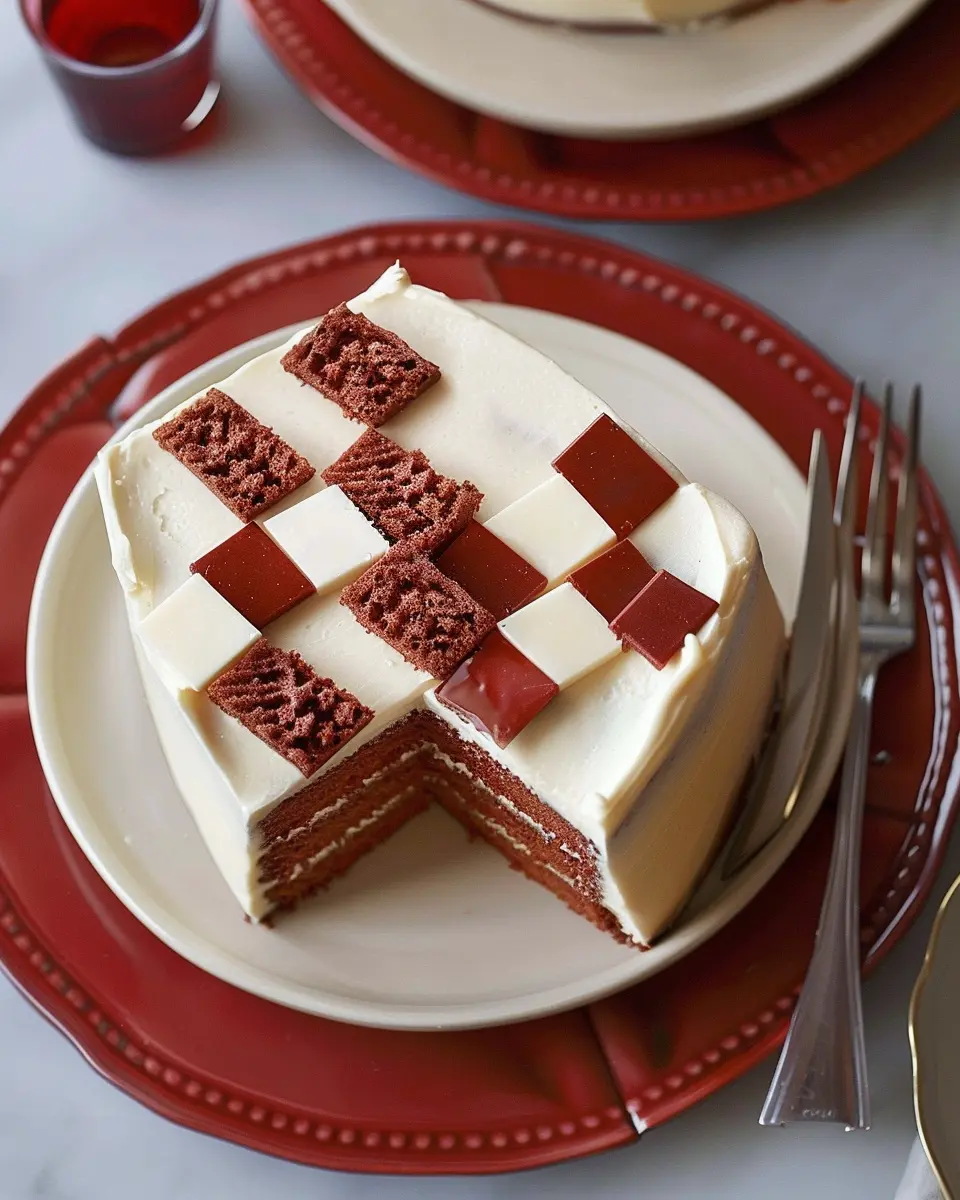
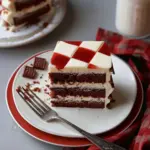
Red Velvet Checkerboard Cake
For fans of the rich color and decadent taste of red velvet, the red velvet checkerboard cake is a stunning choice. To prepare it, simply use a traditional red velvet cake recipe for one of the sets of layers. The deep crimson hue contrasts beautifully with white cream cheese frosting and creates a striking visual effect.
Tips to enhance your red velvet variation:
- Incorporate cocoa powder for that classic chocolatey note.
- Consider pairing with a tangy frosting, such as cream cheese, to balance the sweetness.
This version not only shines in presentations but brings a flavor experience that’s both familiar and unique.
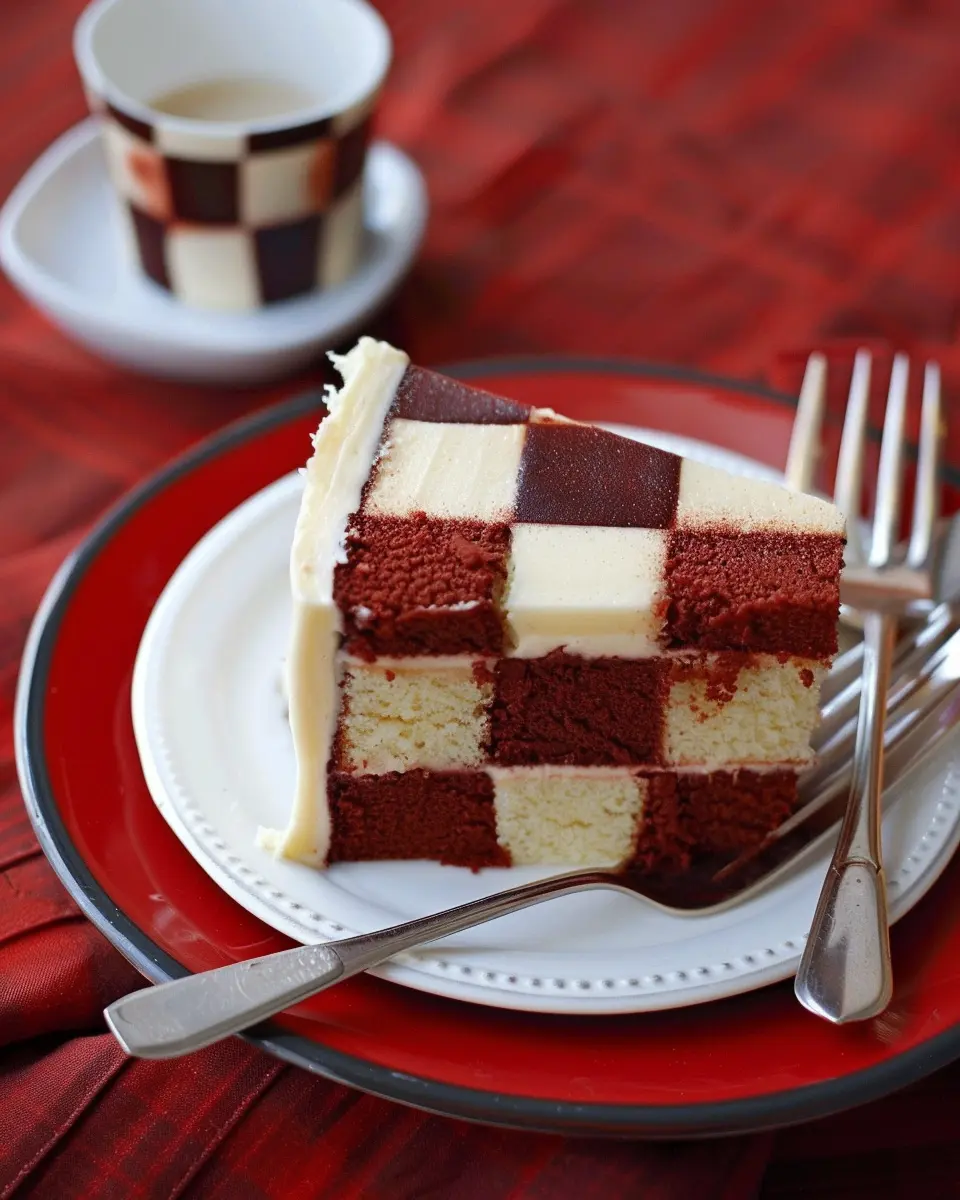
Chocolate and Vanilla Checkerboard
If you’re torn between chocolate and vanilla, why not have both? A chocolate and vanilla checkerboard cake brings together two of the most beloved flavors. You can easily alternate between rich chocolate cake and light vanilla cake layers.
Here’s how you can elevate this classic pairing:
- Use high-quality cocoa powder for a deeper chocolate flavor.
- Try adding some espresso powder to intensify the chocolate cake.
The beautiful pattern created with these contrasting flavors is sure to impress friends during gatherings or casual celebrations.
Explore these variations, and don’t hesitate to share how they turn out. For more delightful cake recipes, visit sites like King Arthur Baking or Sally’s Baking Addiction for expert tips! The world of checkerboard cakes is rich with possibilities—get creative and enjoy the baking journey!
Baking Notes for Checkerboard Cake
Tips for Achieving the Perfect Texture
Creating a stunning checkerboard cake is as much about texture as it is about appearance. To achieve that light and airy crumb:
- Room temperature ingredients: Ensure your butter and eggs are at room temperature. This helps with even mixing and creates a fluffy batter.
- Sift your flour: Sifting not only removes lumps but also aerates the flour, giving your cake a lighter texture.
- Don’t overmix: Once you add your dry ingredients to the wet, mix just until combined to avoid a dense cake.
Common Pitfalls to Avoid
Even seasoned bakers can face challenges when crafting a checkerboard cake. Here are some common pitfalls and how to steer clear of them:
- Incorrect oven temperature: Always preheat your oven. Investing in an oven thermometer can help ensure accuracy.
- Uneven layers: Use a kitchen scale to ensure each layer has the same weight, which will keep your cake balanced.
- Skipping the cooling: Allow layers to cool completely before stacking to prevent a soggy bottom.
For more tips on baking techniques, consider checking out resources like the American Baking Guild or King Arthur Baking Company. Happy baking!
Serving suggestions for Checkerboard Cake
Pairing with Fresh Fruit
One delightful way to elevate your checkerboard cake is by serving it alongside seasonal fresh fruit. Think about vibrant strawberries, sweet blueberries, or tart kiwi slices that not only add color but also refresh the palate after a rich bite of cake. You can create a beautiful fruit platter or even macerate the fruit to enhance its natural sweetness. Did you know a serving of mixed berries can provide essential vitamins and antioxidants? It’s a win-win!
Serving with Coffee or Tea
For those cozy afternoons or casual gatherings, a slice of checkerboard cake pairs exceptionally well with coffee or tea. The rich flavors of a medium roast coffee or a flavorful chai can enhance the cake’s chocolate and vanilla layers. If you’re hosting friends, why not set up a mini coffee station with different brew styles? Studies have shown that coffee can improve focus and mood, making it the perfect companion for a slice of joy.
Whether you’re enjoying it at a picnic or celebrating a special occasion, these serving suggestions will make your checkerboard cake an even more delightful experience.
Tips for Making a Perfect Checkerboard Cake
Importance of Room Temperature Ingredients
One of the simplest yet most crucial tips for achieving a flawless checkerboard cake is to ensure all your ingredients are at room temperature. This includes eggs, butter, and milk. Using room temperature ingredients helps to create a smoother batter, which results in a more even rise while baking. Think about it: cold butter doesn’t cream well and can lead to a dense, uneven texture in your cake. So, take a few minutes to pull out your ingredients ahead of time—your cake will thank you!
Decorating Ideas Beyond Frosting
While frosting is classic, think outside the cake box for decorating your checkerboard cake! Consider using fresh fruits like sliced strawberries or blueberries for a pop of color. Edible flowers can also add an elegant touch. For a fun twist, drizzling melted chocolate or caramel over the cake creates a beautiful glazed effect. If you’re looking for a bit of crunch, sprinkle some chopped nuts or crushed cookies on top.
Do you want an extra layer of flavor? Try a fruit compote between the layers or a tangy cream cheese filling for a delightful surprise. With these ideas, your cake will be as beautiful as it is delicious.
For more creative decorating inspiration, check out resources from baking experts like King Arthur Baking or BBC Good Food.
Time details for Checkerboard Cake
Preparation time
Getting ready for your checkerboard cake is half the fun! You’ll spend about 20-30 minutes gathering your ingredients, prepping your baking pans, and mixing your batter. Don’t rush this part; it’s when your cake starts to take shape!
Baking time
The actual baking time is approximately 30-35 minutes. Keep an eye on your cakes, as oven temperatures can vary. I always recommend checking for doneness by inserting a toothpick—if it comes out clean, you’re ready for the next step!
Total time
From start to finish, you’re looking at around 1-1.5 hours to create this eye-catching masterpiece. Can you think of a more satisfying reward than a slice of this beautiful checkerboard cake after all that effort? It’s worth it!
For tips on perfecting your baking technique, check out resources like Fine Cooking and The Cake Blog. Happy baking!
Nutritional Information for Checkerboard Cake
Understanding the nutritional details of your favorite treats, like checkerboard cake, is essential for making informed dietary choices. Here’s a quick look at the basics:
Calories
A typical slice of checkerboard cake can range from 350 to 450 calories, depending on the ingredients and portion size. If you’re trying to balance your sweet tooth with your calorie intake, moderation is key!
Fat Content
Most recipes yield around 15-25 grams of fat per slice, largely influenced by the butter and cream in the frosting. Opting for lighter alternatives can help reduce this number if you’re keeping an eye on your fat intake.
Sugar Content
With about 25-35 grams of sugar per slice, the sweet temptation is real! Consider using natural sweeteners or reducing the sugar in your recipe for a healthier twist.
For more about balanced eating, check out resources like the American Heart Association. When enjoying treats like checkerboard cake, it’s all about balance!
FAQs about Checkerboard Cake
How can I keep my cake moist?
Keeping your checkerboard cake moist can be a game changer. Here are a few tricks to ensure every slice is deliciously tender:
- Use oil instead of butter: While butter adds flavor, oil keeps the cake moist for longer.
- Avoid overbaking: Check for doneness a few minutes before the suggested time. A toothpick should come out with a few moist crumbs.
- Syrups and simple sugar solutions: Brushing the layers with a simple syrup (made of equal parts sugar and water) can add moisture and enhance flavor.
Can I prepare the batter in advance?
Absolutely! You can prepare the checkerboard cake batter a day in advance. Just keep it covered in the refrigerator. When you’re ready to bake, allow the batter to sit at room temperature for about 30 minutes before pouring it into the pans. This helps with even baking and a better rise.
What can I substitute for cake flour?
If you’re in a pinch without cake flour but still want to create that light texture typical of a checkerboard cake, consider these options:
- All-purpose flour with cornstarch: For every cup of cake flour needed, measure out one cup of all-purpose flour and remove 2 tablespoons. Add 2 tablespoons of cornstarch to replace the removed flour.
- Self-rising flour: If you don’t have cake flour, using self-rising flour can work, but be sure to adjust for the baking powder in your recipe.
For more tips on baking and ingredient substitutions, check out this resource from BBC Good Food. Happy baking!
Conclusion on Checkerboard Cake
Final thoughts on creativity in baking
Baking a checkerboard cake is not just a delightful endeavor; it’s a fantastic way to express your creativity in the kitchen. Whether you’re a seasoned baker or a novice, the striking visual of this cake combined with its delicious flavors makes it a showstopper. The process of swirling batter and arranging the layers allows for personal touches—think about incorporating your favorite flavors or experimenting with different frosting styles!
Remember, baking is as much about the journey as it is about the destination. The joy you find in creating and sharing your checkerboard cake will surely be as sweet as the cake itself. For more inspiration, check out resources like Food52 or Bakerella to spark your imagination! Embrace the fun of baking and let your creative instincts shine.
PrintCheckerboard Cake: The Best Homemade Indulgence for Any Occasion
Learn how to make a delicious Checkerboard Cake that impresses at any celebration.
- Prep Time: 20 minutes
- Cook Time: 30 minutes
- Total Time: 50 minutes
- Yield: 8 servings
- Category: Dessert
- Method: Baking
- Cuisine: American
- Diet: Vegetarian
Ingredients
- 2 cups all-purpose flour
- 1 ½ cups granulated sugar
- ½ cup unsweetened cocoa powder
- 1 cup unsalted butter, softened
- 4 large eggs
- 1 cup whole milk
- 2 teaspoons vanilla extract
- 1 tablespoon baking powder
- ½ teaspoon salt
Instructions
- Preheat your oven to 350°F (175°C).
- Grease and flour two 9-inch round cake pans.
- In a large bowl, cream the butter and sugar together until light and fluffy.
- Add the eggs one at a time, mixing well after each addition.
- Stir in the vanilla extract.
- In another bowl, combine the flour, cocoa powder, baking powder, and salt.
- Gradually add the dry ingredients to the wet mixture, alternating with the milk.
- Divide the batter evenly between the prepared pans.
- Bake for 25-30 minutes or until a toothpick comes out clean.
- Let the cakes cool in the pans for 10 minutes before transferring to wire racks.
Notes
- For a richer flavor, use dark cocoa powder.
- Ensure eggs are at room temperature before starting.
Nutrition
- Serving Size: 1 slice
- Calories: 350
- Sugar: 25g
- Sodium: 200mg
- Fat: 15g
- Saturated Fat: 9g
- Unsaturated Fat: 4g
- Trans Fat: 0g
- Carbohydrates: 50g
- Fiber: 2g
- Protein: 5g
- Cholesterol: 60mg