Introduction to Stained Glass Cookies
If you’ve ever marveled at the beauty of stained glass windows, you’ll adore the whimsical charm of stained glass cookies. These delightful treats merge artistry with baking, creating visually stunning and delicious cookies that are truly unforgettable. But what exactly are they?
What are Stained Glass Cookies?
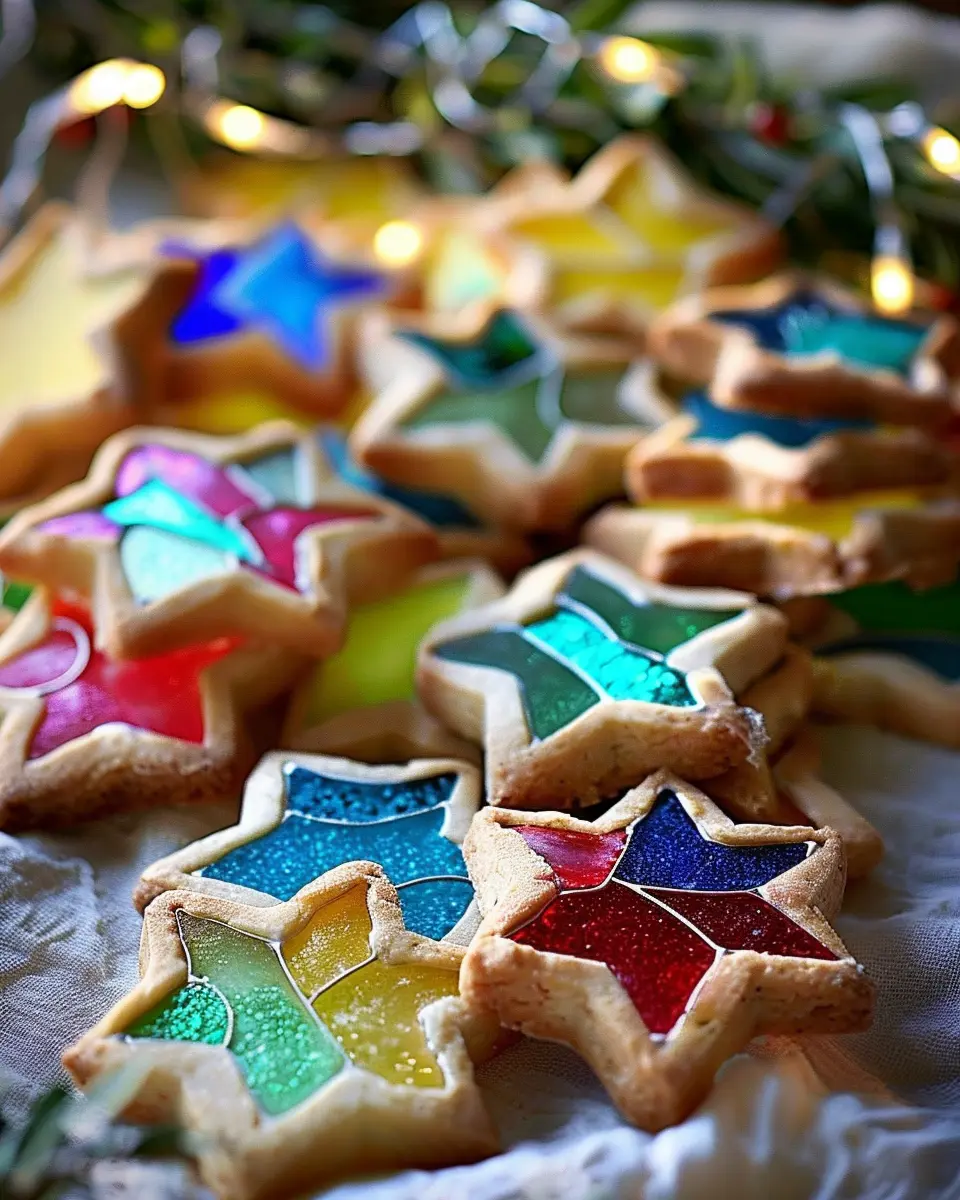
Stained glass cookies are essentially sugar cookies with a twist—quite literally! They feature a cut-out design filled with crushed hard candies that melt while baking, mimicking the look of lovely stained glass. The result is a colorful, translucent center surrounded by a golden, crisp cookie. They’re not just a feast for the eyes; the mix of buttery cookie and fruity, sweet candy provides a satisfying treat that will delight anyone who tries them.
Making stained glass cookies can be a delightful weekend project, whether you’re hosting friends or celebrating a special occasion. Did you know that these cookies can be customized to match any theme? From holidays to birthdays, the candy colors you choose can create a fun and festive mood. Plus, they’re perfect for gift-giving or as a charming addition to any dessert table.
To get started, you’ll need some basic ingredients: flour, sugar, butter, vanilla extract, and, of course, a variety of colorful hard candies. As you mix and roll out the dough, feel free to let your creativity shine! Choose shapes that match your theme, and don’t forget to use cookie cutters for fun designs.
For some inspiration and guidance, check out resources like Cooking Light for tips on the best types of candies or techniques to make your cookies stand out. And remember, the beauty of stained glass cookies lies not only in their appearance but also in the joy they bring. Perhaps invite friends over for a baking day, where everyone can create their own designs. Who doesn’t love to share a little bit of their artistic flair?
So, are you ready to bring a splash of color to your baking repertoire? Stay tuned for the full recipe and step-by-step instructions that will help you create these delicious masterpieces!
Ingredients for Stained Glass Cookies
When it comes to making stained glass cookies, the right ingredients can make all the difference. Let’s break it down into two parts: the cookie dough and the vibrant window panes that create those lovely stained glass effects.
Cookie Dough Ingredients
Creating the perfect base for your stained glass cookies is essential. You’ll need:
- 2 ¾ cups all-purpose flour: This gives your cookies structure.
- 1 teaspoon baking powder: This helps them rise beautifully.
- ½ teaspoon baking soda: A crucial player for that perfect chewy texture.
- ¼ teaspoon salt: Essential for flavor enhancement.
- 1 cup unsalted butter, softened: For a rich and buttery taste.
- 1 ¼ cups granulated sugar: Sweetness is key!
- 1 large egg: Acts as a binding agent.
- 1 teaspoon vanilla extract: For added flavor depth.
Window Pane Ingredients
Now, onto the fun part: the window panes! These colorful elements will dazzle once your cookies are baked. Gather the following:
- 1 cup crushed hard candies: Use a mix of colors for a truly stained-glass effect. Popular choices include Jolly Ranchers or Life Savers.
- Optional food coloring: A little can brighten up your crystals if you want to customize colors further.
With your ingredients ready, you’re just a step away from creating eye-catching stained glass cookies that are as delightful to look at as they are to eat! For additional tips on how to crush candies without a mess, check out this helpful resource.
Happy baking, and let your creativity shine!
Preparing Stained Glass Cookies
Stained glass cookies are not just a delightful treat; they’re also a fantastic way to showcase your baking skills and creativity. They look stunning on any dessert table, and making them can be a fun experience for bakers of all levels. Let’s dive into the preparation process step-by-step, ensuring that you’ll have a batch of colorful, beautiful cookies to share (or keep for yourself!).
Gather and Measure Ingredients
Before we start mixing up some cookie magic, it’s essential to gather all of your ingredients and measure them accurately. For stained glass cookies, you’ll need:
- 2 ¾ cups all-purpose flour
- 1 cup unsalted butter, softened
- 1 cup powdered sugar
- 1 large egg
- 1 teaspoon vanilla extract
- ½ teaspoon almond extract (optional, but recommended)
- ½ teaspoon baking powder
- A variety of hard candies (like Jolly Ranchers or Lifesavers for that stained glass effect)
Preparation starts when you have everything laid out and organized. Clear off your countertop or baking space and get into a relaxed baking mindset. Did you know that measuring accurately can make or break your cookie game? A perfect balance of ingredients ensures your cookies will spread just the right way.
Make the Cookie Dough
Now it’s time to whip up the cookie dough! In a large mixing bowl, combine the softened butter and powdered sugar. Beat them together until the mixture is light and fluffy—this usually takes about 3-5 minutes. Add the egg, vanilla extract, and almond extract, mixing until everything is well blended.
In a separate bowl, whisk together the flour and baking powder. Gradually add the dry ingredients into the wet mixture, mixing until just combined. Over-mixing can lead to tough cookies, so be gentle here! Your dough will likely be a bit crumbly at first, but don’t worry—it should come together as you knead it a bit on a floured surface. If it’s too sticky, sprinkle just a touch more flour.
Chill the Dough
Chilling the dough is a crucial step in making perfect stained glass cookies. After you’ve shaped the dough into a ball, wrap it in plastic wrap and pop it into the refrigerator for at least an hour. This allows the fats to solidify, which helps with keeping the cookie shapes intact when baking. While you wait, you could even prepare the colorful candy pieces by crushing them into smaller bits (but be careful not to make a powder).
Chilling your dough not only affects the texture but also deepens the flavors—so be patient! If you want to learn more about the science of chilling dough, check out resources like King Arthur Baking.
Shape the Cookies
After the dough has chilled, it’s time to bring your cookie designs to life. Roll out the dough on a floured surface to about ¼-inch thick. Using your cookie cutters, cut out various shapes. Once you make the initial cuts, you’ll want to cut out smaller areas in the center of each shape where the candy will go. Think of it as creating a window in your cookie!
Make sure to place the shaped cookies on a parchment-lined baking sheet, leaving enough space between them, as they may spread a little while baking.
Prepare the Window Pane and Bake
Now comes the fun part—creating that stained glass effect! Fill the cut-out areas of your cookies with the crushed candies. Don’t be shy; the candies will melt during baking and fill the gaps, forming that gorgeous window-like look.
Preheat your oven to 375°F (190°C), and once the time has come, carefully place your trays in the oven. Bake for about 8-10 minutes or until the edges are lightly golden and the candy pieces have melted.
After baking, allow them to cool completely on the tray before transferring them to a wire rack. This helps maintain their structure, ensuring your gorgeous stained glass cookies will impress anyone lucky enough to try them!
These cookies don’t just look stunning—they are also a talking point! So whether it’s a festive gathering or just a sweet weekend project, enjoy making and sharing your beautiful stained glass cookies!
Variations on Stained Glass Cookies
Stained glass cookies are a delightful treat that you can customize in so many creative ways. Whether you’re preparing for a holiday gathering or simply want to impress friends, these variations will spark your imagination.
Seasonal Stained Glass Cookies
For each season, you can adapt your stained glass cookies to bring a festive spirit to your baking.
- Spring: Use pastel-colored candies to reflect the blooming flowers and vibrant colors of nature. Think light pinks, soft yellows, and gentle greens to conjure feelings of renewal.
- Summer: Incorporate bright, tropical candies like citrus-flavored gummies. They add vibrant color and a zesty twist to your cookies, perfect for summer barbecues or beach parties.
- Fall: Opt for autumn hues with candies in shades of orange, red, and brown. Add flavors like cinnamon or nutmeg to the dough to capture the essence of cozy fall days.
- Winter: For the holiday season, stick to traditional red and green candies and consider adding a hint of peppermint extract to the dough for that festive kick.
Unique Flavor Combinations
While stained glass cookies are often enjoyed in their classic form, don’t hesitate to play with unique flavors. Have you considered pairing vanilla dough with lime-flavored candies? Or maybe even chocolate cookies with berry-flavored gummies? The possibilities are endless!
When you explore these unique combinations, your cookies won’t just look stunning; they’ll also surprise and delight your taste buds. Utilize this resource for more flavor inspiration.
Get creative, and remember that baking is an art—your stained glass cookies are just the canvas!
Baking Notes for Stained Glass Cookies
Common Pitfalls and How to Avoid Them
When it comes to making stained glass cookies, there are a few hiccups that could turn your vibrant vision into crumbled chaos. Here are some tips to ensure your cookie adventure is smooth sailing:
-
Overbaking Woes: It’s tempting to leave those cookies in just a minute longer, but keep an eye on them! They should just be set around the edges but still soft in the center. This will keep them chewy and ensure those sugary windows don’t melt away.
-
Sugar Window Troubles: Using hard candies is a key part of creating the colorful stained glass effect. To avoid disappointment, crush them carefully and fill the cookie cutouts completely, letting them shine through once baked. Not enough candy? You may end up with empty spots!
-
Chilling is Key: Don’t skip chilling the dough! It helps the cookies hold their shape and prevents spreading. A little patience goes a long way when achieving that perfect design.
For more on cookie making tips, consider checking out King Arthur Baking. Happy baking!
Serving suggestions for Stained Glass Cookies
Perfect pairings for your cookies
When it comes to stained glass cookies, the magic doesn’t just stop at their beautiful appearance; serving them with the right accompaniments can elevate the entire experience. Here are some delightful ideas to consider:
-
Beverage Choices: While traditional options like tea or coffee can be great, consider a refreshing lemon or berry-infused sparkling water. The acidity and fizz can beautifully contrast the sweetness of the cookies, creating a balanced treat.
-
Dips and Spreads: Think outside the box! Pair your cookies with a light cream cheese frosting or a tangy yogurt dip. These can add a luscious creaminess that complements the crunch and sweetness of the cookie.
-
Festive Displays: For special occasions, place your stained glass cookies on a decorative platter surrounded by colorful fruit, like strawberries or kiwi slices. This not only adds color but also provides a refreshing palate cleanser.
Have you ever tried to combine sweet and savory? Consider serving your cookies with a slice of Turkey Bacon or Chicken Ham. The contrasting flavors can create a delightful tasting adventure.
For more ideas on unique cookie pairings, check out this article for inspiration.
Tips for Making Perfect Stained Glass Cookies
Essential Tools for Success
To achieve beautifully crafted stained glass cookies, there’s an essential toolkit you should consider. A few handy items will make your baking experience smoother:
- High-quality rolling pin: Opt for a smooth one to effortlessly roll out dough. A marble rolling pin can maintain an even temperature, keeping your dough manageable.
- Cookie cutters: Choose fun shapes that work well with a stained glass effect—stars, hearts, or simple circles are great options.
- Parchment paper: This will not only ease cleanup but also help your cookies cook evenly. You can find some tips on how to use it effectively here.
- Clear hard candies: Opt for varieties that melt well without burning, like Jolly Ranchers. They create that stunning glass-like finish!
Creative Decorating Ideas
Now that your stained glass cookies are perfectly baked, let your imagination run wild. Think beyond the basics:
- Add edible glitter: A sprinkle of edible sparkle can elevate your cookies, making them look even more festive.
- Use royal icing: Outline your cookies with a piping bag filled with royal icing. This not only enhances the design but also helps bring your cookie’s artistic flair to life.
- Color combinations: Mix different colors of hard candies to create a custom look. Layering colors can result in a breathtaking stained glass effect that’s bound to impress.
Baking isn’t just about the taste; it’s a canvas for creativity! By utilizing these tools and decorating ideas, you’ll create stunning stained glass cookies everyone will love. Want to dive deeper into cookie decorating techniques? Check out this fantastic resource.
Time details for Stained Glass Cookies
Preparation time
Making these delightful stained glass cookies is a breeze! You’ll need about 30 minutes to gather your ingredients, mix the dough, and cut out those fun shapes. While you’re prepping, don’t forget to preheat your oven — it saves time later!
Baking time
Once your cookies are cut and ready, they only take about 8 to 10 minutes to bake to golden perfection. Keep an eye on them to ensure that they don’t over-bake, as every oven behaves slightly differently.
Total time
In total, you’re looking at approximately 40 to 50 minutes from start to finish. This makes for a fun afternoon activity, especially if you want to add your favorite stained glass cookie icing design. Enjoy the process, and remember, it’s all about having fun in the kitchen! For more inspiration on baking timings, check out resources on reliable culinary sites like Serious Eats or Food Network.
Nutritional information for Stained Glass Cookies
Calories per cookie
When indulging in stained glass cookies, you might wonder about their nutritional impact. Generally, each cookie contains around 80-100 calories. While they are a delightful treat, it’s essential to keep portion sizes in mind, especially if you’re mindful of your calorie intake.
Key nutritional values
Here’s a closer look at the key nutritional values of stained glass cookies:
- Total Fat: Approximately 3 grams
- Saturated Fat: 1.5 grams
- Carbohydrates: About 13 grams
- Sugar: Roughly 7 grams
- Protein: 1 gram
These cookies do include sugar, primarily from the candy that forms their stunning centers. For a healthier alternative, consider swapping in natural sweeteners or using whole-grain flour. Remember, these cookies are rich in flavor and style, making them a festive treat for special occasions. Curious about tweaking the recipe? Explore options on sites like Healthline for healthier baking tips!
FAQs about Stained Glass Cookies
When it comes to making beautiful stained glass cookies, you may have a few questions. Here are some common queries that can help make your baking experience smoother and more enjoyable.
How can I prevent my cookies from spreading?
One of the top concerns when baking stained glass cookies is that they might spread out too much. Here are a few tips to keep your cookies in shape:
- Chill the dough: After mixing the cookie dough, let it chill in the refrigerator for at least an hour. This firmens up the fats and helps maintain the cookie’s shape during baking.
- Use parchment paper: Line your baking sheets with parchment paper, which provides a non-stick surface and soaks up some moisture, keeping the cookies from spreading too much.
- Avoid overworking the dough: Mix just until the ingredients are combined to maintain their structure.
What types of hard candies work best?
For the stained glass effect, not all hard candies are created equal. Here are some that work particularly well:
- Jolly Ranchers: These are vibrant and melt beautifully to create that stained glass look.
- Life Savers: Their perfect ring shape makes for fun designs.
- Werther’s Originals: They melt smoothly and provide a lovely golden hue.
If you’re curious about the science behind melting candies, you can read more here.
Can I make the dough ahead of time?
Absolutely! Making the dough for stained glass cookies in advance can save you time. Here’s how:
- Refrigerate: Wrap the dough tightly in plastic wrap or place it in an airtight container and store it in the fridge for up to three days.
- Freeze: If you want to keep the dough longer, you can freeze it for up to three months. Just be sure to thaw in the fridge before rolling out.
These tips allow you to have your dough ready for a festive gathering or just a cozy baking session at home!
By addressing these common questions, you’re one step closer to making stunning stained glass cookies that will impress your friends and family. Happy baking!
Conclusion on Stained Glass Cookies
Embrace your creativity with stained glass cookies!
As we wrap up our journey into the enchanting world of stained glass cookies, remember that baking is as much about creativity as it is about technique. These cookies not only look stunning but also provide a delightful activity to share with friends or family. Experiment with different shapes, colors, and combinations—why not try using seasonal candies or unique cookie cutters?
Once you’ve mastered the classic recipe, consider adding personal touches to make each batch your own. This playful approach to baking can spark joy, and who knows, you might just create a new holiday tradition! For more tips and inspiration, check out sites like Taste of Home or Baking Basics to keep the baking fun going. Happy baking!
PrintStained Glass Cookies: Easy and Whimsical Treats for Everyone

These Stained Glass Cookies are both easy to make and fun to decorate, perfect for any occasion!
- Prep Time: 30 minutes
- Cook Time: 10 minutes
- Total Time: 40 minutes
- Yield: 24 cookies
- Category: Dessert
- Method: Baking
- Cuisine: American
- Diet: Vegetarian
Ingredients
- 2 3/4 cups all-purpose flour
- 1/2 teaspoon baking powder
- 1 cup unsalted butter, softened
- 1 1/2 cups granulated sugar
- 1 large egg
- 1 teaspoon vanilla extract
- 1 teaspoon almond extract
- 1 cup crushed hard candies (like Jolly Ranchers)
Instructions
- Preheat the oven to 350°F (175°C).
- In a bowl, mix the flour and baking powder.
- In another bowl, cream together the butter and sugar until light and fluffy.
- Add the egg, vanilla extract, and almond extract, mixing until well combined.
- Slowly add the flour mixture to the creamed mixture, blending until smooth.
- Chill the dough for at least 30 minutes.
- Roll out the dough on a floured surface and cut out shapes.
- Cut out the centers of each shape and fill with crushed candies.
- Bake for 8-10 minutes until the edges are golden.
Notes
- For vibrant colors, use a variety of candy colors.
- Store the cookies in an airtight container to keep them fresh.
Nutrition
- Serving Size: 1 cookie
- Calories: 150
- Sugar: 8g
- Sodium: 30mg
- Fat: 7g
- Saturated Fat: 4g
- Unsaturated Fat: 2g
- Trans Fat: 0g
- Carbohydrates: 20g
- Fiber: 0g
- Protein: 1g
- Cholesterol: 30mg