Introduction to No Bake Protein Balls
When you’re a young professional, it can sometimes feel like there are not enough hours in the day. Between demanding work schedules, social commitments, and maintaining a healthy lifestyle, finding quick and nutritious snacks can be a challenge. This is where no bake protein balls come into play. These little power-packed snacks are not just delicious; they are incredibly convenient, making them an essential addition to your busy life.
What are No Bake Protein Balls?
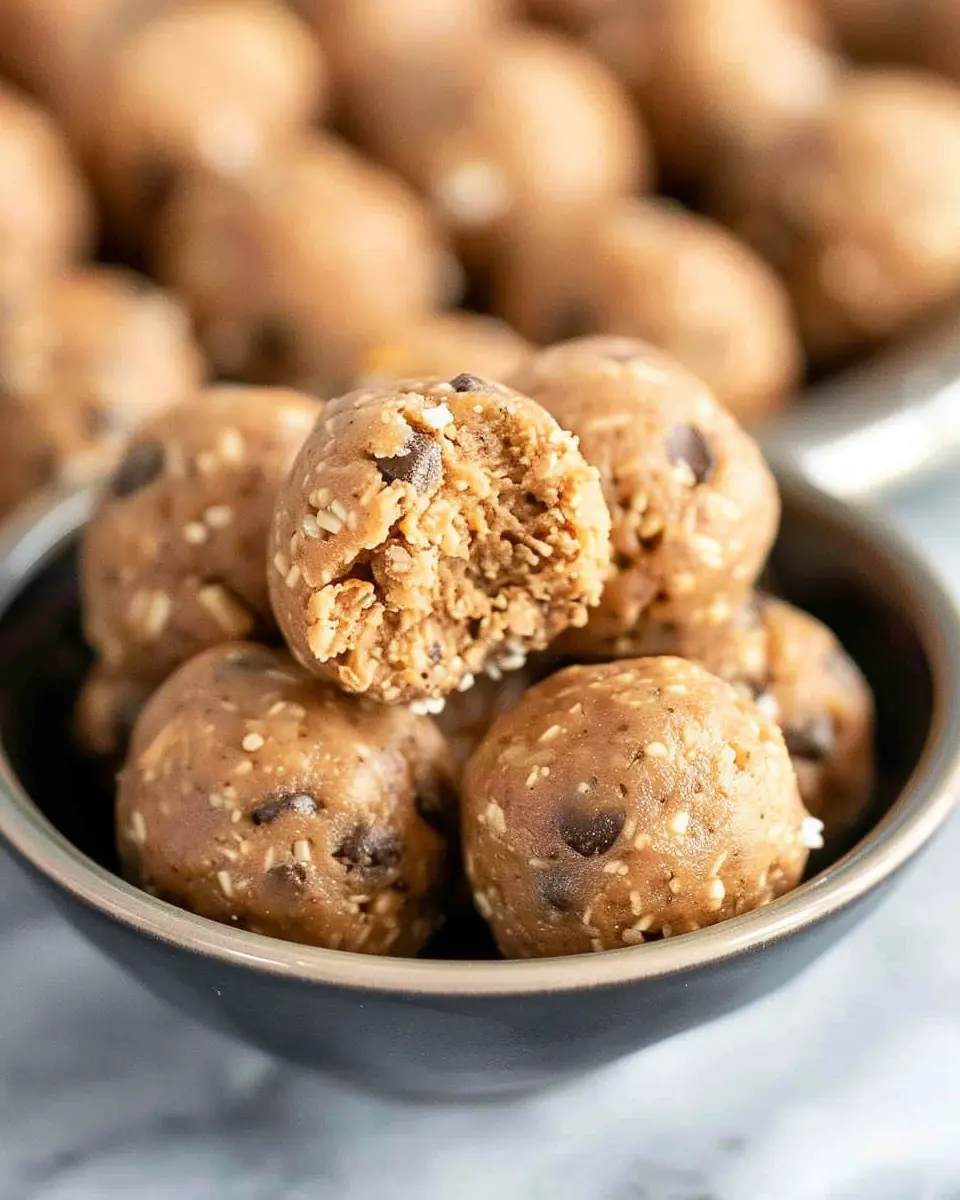
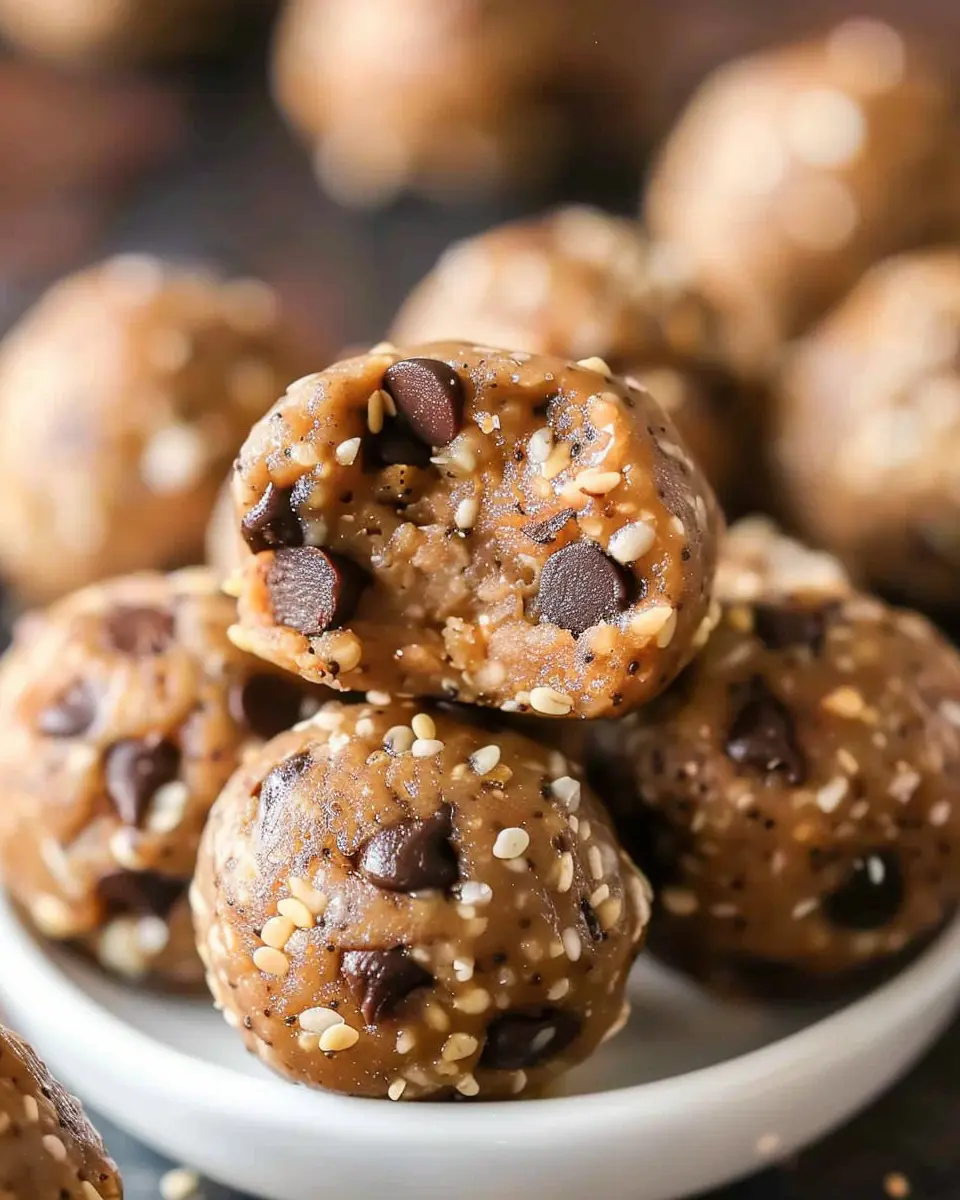
No bake protein balls are a delicious blend of natural ingredients such as oats, nut butter, honey, and various mix-ins like chocolate chips or dried fruits. The beauty of these snacks lies in their simplicity—no oven required! Just combine the ingredients in a bowl, roll them into bite-sized balls, and you’re ready to go. They offer a perfect balance of protein, healthy fats, and carbohydrates, ideal for fueling your day.
Why are they essential, you ask? Well, studies show that incorporating protein into your diet can help enhance focus and sustain energy levels throughout the day, especially when you’re juggling multiple tasks at work. According to the American Journal of Clinical Nutrition, protein consumption can improve satiety and help reduce unnecessary snacking.
The Convenience Factor
Imagine a hectic morning where you barely have time for breakfast. Having a stash of no bake protein balls in your fridge can save you. Grab one (or two), and you’re not only satisfying hunger but also ensuring you’re getting the nutrients needed to keep you sharp and productive.
- Quick to make: Prep time is minimal—around 10 minutes.
- Customizable: You can adapt them to your taste, whether you prefer chocolate, nuts, or even seeds.
Young professionals can also find these tasty snacks handy for lunch breaks or mid-afternoon slumps. With a couple of no bake protein balls on hand, you’ll be less tempted to reach for those less nutritious snack options.
Incorporating no bake protein balls into your diet not only enriches your meals but also supports your bustling lifestyle. Grab your ingredients, and let’s dive into how to make these wonderful snacks that fit perfectly into a busy schedule!
Ingredients for No Bake Protein Balls
Essential Ingredients
Creating your own no bake protein balls is not only a fun kitchen project but also a chance to fuel your body with nutritious goodness. To get started, you’ll need a few essential ingredients:
- Protein powder: This is the cornerstone of your balls, offering the protein boost you desire. Popular choices include whey, pea, or hemp protein.
- Nut butter: Almond, peanut, or cashew butter works wonders for both flavor and texture while providing healthy fats.
- Oats: Rolled oats give structure and additional fiber to keep you feeling full longer.
- Honey or maple syrup: These natural sweeteners add just the right amount of sweetness to your no bake protein balls.
Each of these ingredients plays a crucial role in delivering a delicious and nutritious snack.
Optional Add-ins for Customization
Don’t be afraid to get creative! You can easily customize your no bake protein balls with add-ins based on your taste preferences:
- Choco chips or dark chocolate: For that indulgent touch.
- Nuts and seeds: Like almonds or chia seeds, adding crunch and extra nutrition.
- Dried fruits: Go for cranberries, raisins, or apricots for a fruity burst.
- Spices: A dash of cinnamon or vanilla extract can elevate the flavor profile.
With these base ingredients and optional add-ins, you’re well on your way to perfecting your personal no bake protein balls recipe. So, why not experiment and find your ideal combination?
Preparing No Bake Protein Balls
Crafting your own no bake protein balls is not only simple but also a fun culinary adventure that lets you customize flavors to fit your taste preferences. These delicious bites are a great way to fuel up post-workout or grab a quick snack during the day. And the best part? You don’t need to turn on your oven! Let’s walk through the process step by step to ensure your protein balls turn out amazing.
Gather Your Ingredients
Before diving into the mixing bowl, it’s essential to gather all your ingredients. Having everything on hand will make the process smooth and enjoyable. Here’s what you’ll typically need:
-
Base Ingredients:
-
1 cup of rolled oats (a fantastic source of fiber)
-
1/2 cup of natural nut butter (think almond or peanut butter for creaminess)
-
1/3 cup of sweetener (honey or maple syrup works wonders)
-
1/2 cup of protein powder (choose your favorite flavor)
-
Add-Ins:
-
1/4 cup of chocolate chips or dried fruits for a hint of sweetness
-
1/4 cup of seeds or chopped nuts for added crunch (like chia seeds or almonds)
-
A pinch of salt to elevate flavors
These ingredients can be effortlessly modified based on what you have at home. For instance, swap peanut butter for sunflower seed butter if you want a nut-free option. To delve into more ingredient variations, check out resources like NutritionData for insights on your choices.
Mix the Base Ingredients
Now that you’ve rounded up your ingredients, it’s time to mix the base. In a large mixing bowl, combine the rolled oats, nut butter, sweetener, and protein powder. I find that using a sturdy spatula or wooden spoon helps in achieving a consistent mix, but you can also use your hands for better control.
Start off slowly to prevent an oatmeal explosion in your kitchen! Gradually combine the ingredients until you achieve a sticky yet manageable dough. If the mixture seems too dry, you can add a splash of water or additional nut butter. On the flip side, if it’s too wet, sprinkle in some more oats. The goal is to have a consistent mixture that will hold together when shaped.
Incorporate Add-Ins and Mix
Once the base is well combined, it’s time to add in those fun extra ingredients. Toss in your chosen chocolate chips, seeds, or dried fruit and mix thoroughly to ensure an even distribution throughout the dough. It’s amazing how a tiny handful of add-ins can transform the flavor profile.
Feel free to get creative! You might try adding a dash of cinnamon for warmth or some vanilla extract for an aromatic boost. The world is your oyster (or should I say protein ball?), so tailor it to your cravings.
Form the Protein Balls
With everything mixed, it’s time to create your no bake protein balls. Using your hands, scoop out small portions of the mixture (about a tablespoon-sized) and roll them into balls. I recommend pressing them a bit firmer to ensure they hold their shape. If they eventually crumble, don’t worry too much; you can press them into a bar shape instead!
For added flair, roll your protein balls in cocoa powder, shredded coconut, or crushed nuts to coat them. These little enhancements not only make them appealing but also add a delightful texture and flavor.
Chill and Store
After you’ve rolled all the protein balls, place them on a baking sheet lined with parchment paper and pop them into the fridge for about 30 minutes. This chilling step helps them firm up and makes them easier to handle.
Once they’re ready, transfer your no bake protein balls to an airtight container. They can be stored in the fridge for about a week or frozen for up to three months. Trust me; they make an excellent grab-and-go snack for those busy days.
As you dive into making your own protein balls, remember that you can always tweak the recipe, and the more you make them, the better you’ll become at crafting your favorites. Enjoy the process, and happy snacking!
Variations on No Bake Protein Balls
Looking to shake things up with your no bake protein balls? You’re in luck—there are plenty of delightful variations to explore. Whether you’re craving something rich and indulgent or prefer a lighter treat, there’s a version just for you.
Chocolate Peanut Butter Protein Balls
If you’re a fan of that classic chocolate and peanut butter combo, these no bake protein balls will be your new obsession.
- Combine 1 cup of rolled oats, 1/2 cup of natural peanut butter, and 1/4 cup of honey or maple syrup for sweetness.
- Stir in 1/4 cup of chocolate protein powder, and toss in some dark chocolate chips for extra flavor.
- Roll into bite-sized balls and refrigerate for a quick, energy-boosting snack!
Every little bite bursts with flavor, and you’ll enjoy the added protein boost from the powder. Need more ideas? Check out this chocolate protein powder guide for variety!
Nutty Coconut Protein Balls
For a tropical twist, try making no bake protein balls with coconut!
- Mix 1 cup of oats, 1/2 cup of almond butter, and 1/3 cup of shredded coconut.
- Sweeten with honey or agave syrup, then fold in some chopped nuts or seeds of your choice.
- These will transport your taste buds straight to the beach!
The combination of textures from the nuts and the soft coconut lends itself to a delightful snacking experience.
Vegan-Friendly Options
Don’t worry, vegan friends—you can join in on the fun too! By substituting honey for maple syrup or agave and using a plant-based protein powder, you can whip up your very own batch of no bake protein balls.
- Use 1 cup of oats, 1/2 cup of almond or cashew butter, and 1/4 cup of maple syrup.
- Add your favorite mix-ins like chia seeds or dried fruits to customize your snack.
With the rise of plant-based diets, these options not only satisfy cravings but also offer a nutritious alternative for everyone.
Experimenting with these variations can keep your snack game exciting while packing a nutritional punch! Which one will you try first?
Tips for Making the Best No Bake Protein Balls
Creating the perfect no bake protein balls is about achieving a delightful balance in texture and flavor. Keep these tips in mind for stellar results every time.
Consistency Check
When mixing your ingredients, the right consistency is crucial. Aim for a dough that’s firm enough to hold its shape but sticky enough to mold without crumbling. If your mixture feels too dry, a splash of nut butter or a drizzle of honey can work wonders. On the flip side, if it’s too wet, add a touch of oats or protein powder to absorb some moisture. You want those energy bites to be delightful delights, not dry disappointments!
Storage Tips for Freshness
To keep your no bake protein balls fresh, store them in an airtight container in the fridge. They’ll typically last about a week, making them a perfect snack for busy weekdays. For longer storage, consider freezing them; just be sure to separate them with parchment paper so they don’t stick together. Need an idea for a long-lasting snack? Try storing them with some nutrient-dense nuts or dried fruits for an easy grab-and-go option!
For more storage strategies, check out this article on food preservation techniques by Healthline.
Serving Suggestions for No Bake Protein Balls
When it comes to incorporating no bake protein balls into your daily routine, there are many fun and nutritious ways to enjoy them! Let’s explore some easy serving suggestions.
Snack Ideas
These protein-packed bites work perfectly as a quick snack anytime during the day:
- Morning Boost: Pair a no bake protein ball with a piece of fruit like a banana or apple for a quick breakfast on the go.
- Midday Pick-Me-Up: Enjoy them alongside a handful of nuts or yogurt for a well-balanced afternoon snack, fueling your productivity.
- Post-Workout Fuel: After a workout, consider having two no bake protein balls to help with muscle recovery—they’re easier on your stomach than heavy meals.
Pairing with Beverages
Balancing your snacks with the right beverages can enhance the experience:
- Smoothies: Blend your favorite fruits and greens with almond or coconut milk, and have a no bake protein ball on the side to satisfy your hunger.
- Herbal Tea: An invigorating cup of herbal tea complements the flavors of your protein balls beautifully, perfect for a calming evening treat.
By getting creative with how you serve no bake protein balls, you can enjoy them at any time of the day! For more ideas about healthy snacks, you might want to check out Healthline’s snack tips for further inspiration.
Time Breakdown for No Bake Protein Balls
Preparing no bake protein balls is a breeze, and here’s how you can manage your time effectively:
Preparation Time
For the actual assembly, set aside about 15 minutes. You’ll simply mix ingredients, scoop them out, and roll them into delightful little balls. It’s quick, fun, and perfect for multitaskers!
Chilling Time
Once shaped, allow your protein balls to chill in the fridge for at least 30 minutes. This helps them firm up and develop that perfect texture we all crave.
Total Time
In total, you’re looking at around 45 minutes from start to finish—ideal for those busy weeknights or a grab-and-go snack before a workout.
For more tips on meal prep, check out Healthline’s guide on efficient meal planning!
Ready to indulge in these tasty, nutritious bites? The time you spend is well worth it!
Nutritional Facts for No Bake Protein Balls
Understanding the nutritional profile of no bake protein balls can help you enjoy them guilt-free while fitting them into your daily regimen. Let’s break it down:
Calories
A serving of no bake protein balls typically contains around 100 calories. This makes them a satisfying snack without significantly swinging your daily caloric intake.
Carbohydrates
These delightful bites are packed with healthy carbs, averaging about 12 grams per serving. Most of these come from oats and natural sweeteners like honey or maple syrup, providing a steady energy boost.
Protein
What truly makes no bake protein balls shine is their protein content, which can range from 5 to 10 grams per ball, depending on your chosen protein powder. This makes them an excellent post-workout snack, aiding in muscle recovery and supporting your fitness goals.
For a deeper dive into nutrition basics, consider checking resources like the USDA FoodData Central, which offers detailed nutrient information. Remember, these protein packs can be customized to suit your dietary needs while maintaining their delicious taste!
FAQs about No Bake Protein Balls
How long do they last in the fridge?
Once you’ve whipped up a batch of your delicious no bake protein balls, you’ll want to know how long you can keep them fresh. Typically, they can last in the fridge for about 1 to 2 weeks when stored in an airtight container. For maximum freshness, it’s best to consume them within the first week. Just make sure to check for changes in texture or smell; they should still have that delightful taste you originally made.
Can I freeze them?
Absolutely! Freezing your no bake protein balls is a fantastic way to enjoy them later. They can be stored in the freezer for up to 3 months. Simply place them in a freezer-safe container or bag, and when you’re ready to eat one, just take it out and let it thaw in the fridge or at room temperature for a few minutes. Having these nutrient-packed snacks on hand really makes healthy eating effortless during busy weeks.
Are there alternative sweeteners I can use?
When it comes to sweetening your no bake protein balls, there are plenty of options! If you’re looking to cut down on sugar, consider using:
- Stevia: A natural zero-calorie sweetener that won’t spike your blood sugar.
- Agave nectar: A great alternative with a lower glycemic index.
- Maple syrup: For a natural, rich flavor and sweetness.
Feel free to play around with these options to find the perfect sweetness level for your palate!
If you want to explore more about healthy sweeteners, you can check out articles from Healthline for more insights.
Remember, the best part about making no bake protein balls is that they are versatile. Happy snacking!
Conclusion on No Bake Protein Balls
Why you should incorporate them into your diet today!
No bake protein balls are more than just a trend; they are a nutritious snack that fits seamlessly into any busy lifestyle. Packed with protein, healthy fats, and fiber, they can help keep your energy levels stable throughout the day, making them an ideal choice for young professionals on the go.
Imagine reaching for a delicious protein ball instead of that sugary snack—your body will thank you! Not only are they easy to whip up, but they can also be tailored to your taste with various ingredients.
Ready to elevate your snacking game? Check out sources like the Academy of Nutrition and Dietetics for more on the benefits of incorporating these super snacks into your diet!
PrintNo Bake Protein Balls: Easy, Healthy Snacks for Every Craving
No Bake Protein Balls are a delicious and convenient snack option that requires no baking.
- Prep Time: 10 minutes
- Total Time: 40 minutes
- Yield: 12 balls
- Category: Snacks
- Method: No Bake
- Cuisine: American
- Diet: Vegan
Ingredients
- 1 cup rolled oats
- 1/2 cup nut butter
- 1/3 cup honey or maple syrup
- 1/2 cup chocolate chips
- 1/4 cup protein powder
Instructions
- In a large bowl, combine all the ingredients.
- Mix until well combined.
- Roll the mixture into small balls.
- Chill in the refrigerator for at least 30 minutes.
- Enjoy your no bake protein balls!
Notes
- Store in an airtight container for up to a week.
- Substitute ingredients based on dietary preferences.
Nutrition
- Serving Size: 1 ball
- Calories: 120
- Sugar: 5g
- Sodium: 50mg
- Fat: 6g
- Saturated Fat: 1g
- Unsaturated Fat: 4g
- Trans Fat: 0g
- Carbohydrates: 15g
- Fiber: 2g
- Protein: 4g
- Cholesterol: 0mg