Introduction to Mini Cannoli Cups
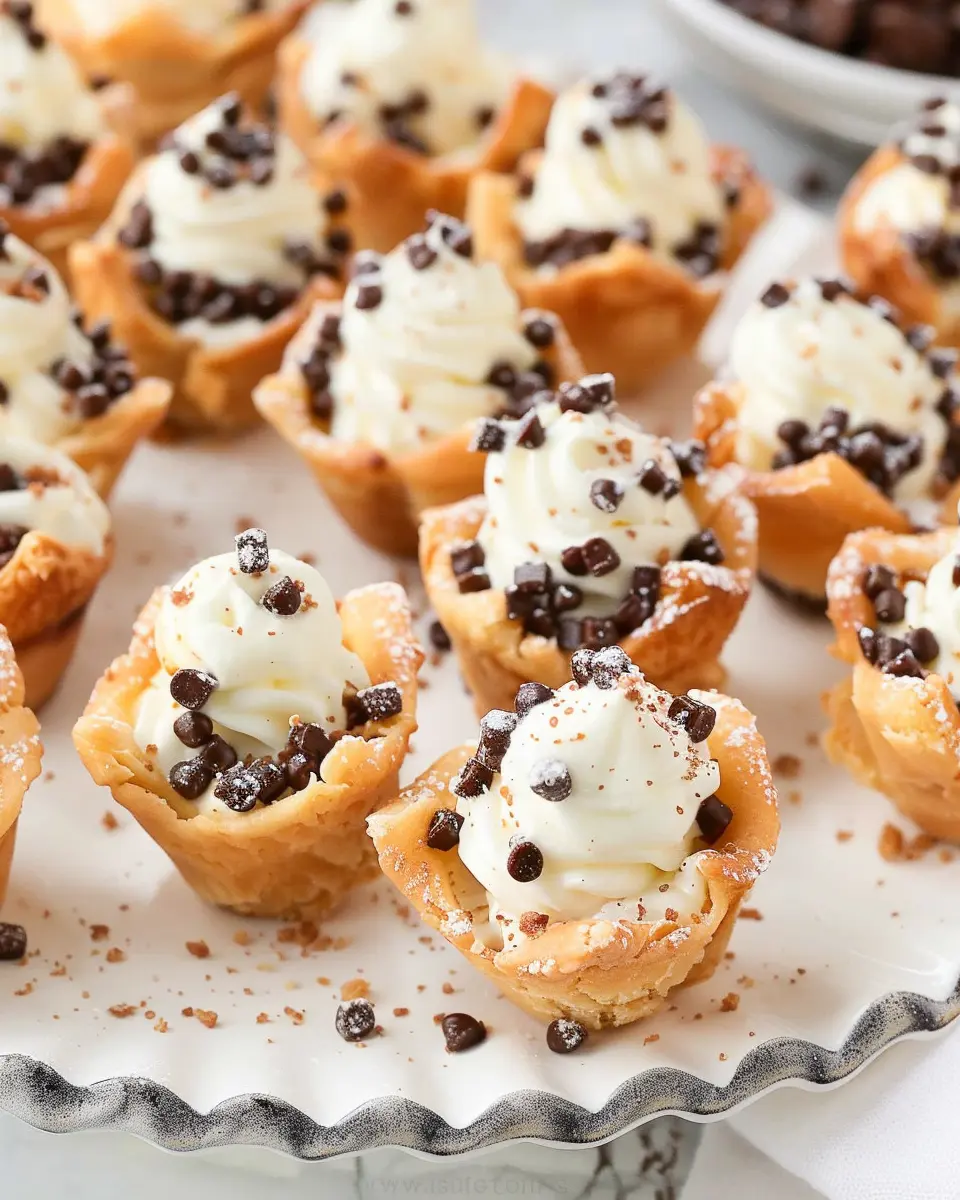
When it comes to Italian desserts, cannoli rank high on the list of favorites. But if you’re looking for a delightful twist on this classic treat, mini cannoli cups are a game-changer. Imagine crispy, delicate shells filled with rich, sweet cream — but in an adorable mini size that makes them perfect for any occasion!
What are Mini Cannoli Cups and Why are They a Must-Try?
Mini cannoli cups are essentially bite-sized versions of the traditional cannoli. Instead of the traditional tube shape, these delightful cups take on a more modern form that not only makes them easier to serve but also adds a stylish touch to your dessert table.
Here are a few reasons why you should consider whipping up these sweet treats:
-
Portability: These mini cups are perfect for parties or gatherings where guests can easily pick them up and indulge without the mess. Less mess means more fun!
-
Flavor Variety: The filling can be customized in numerous ways, allowing you to get creative. Think chocolate chips, citrus zest, or even a splash of coffee for an added punch of flavor.
-
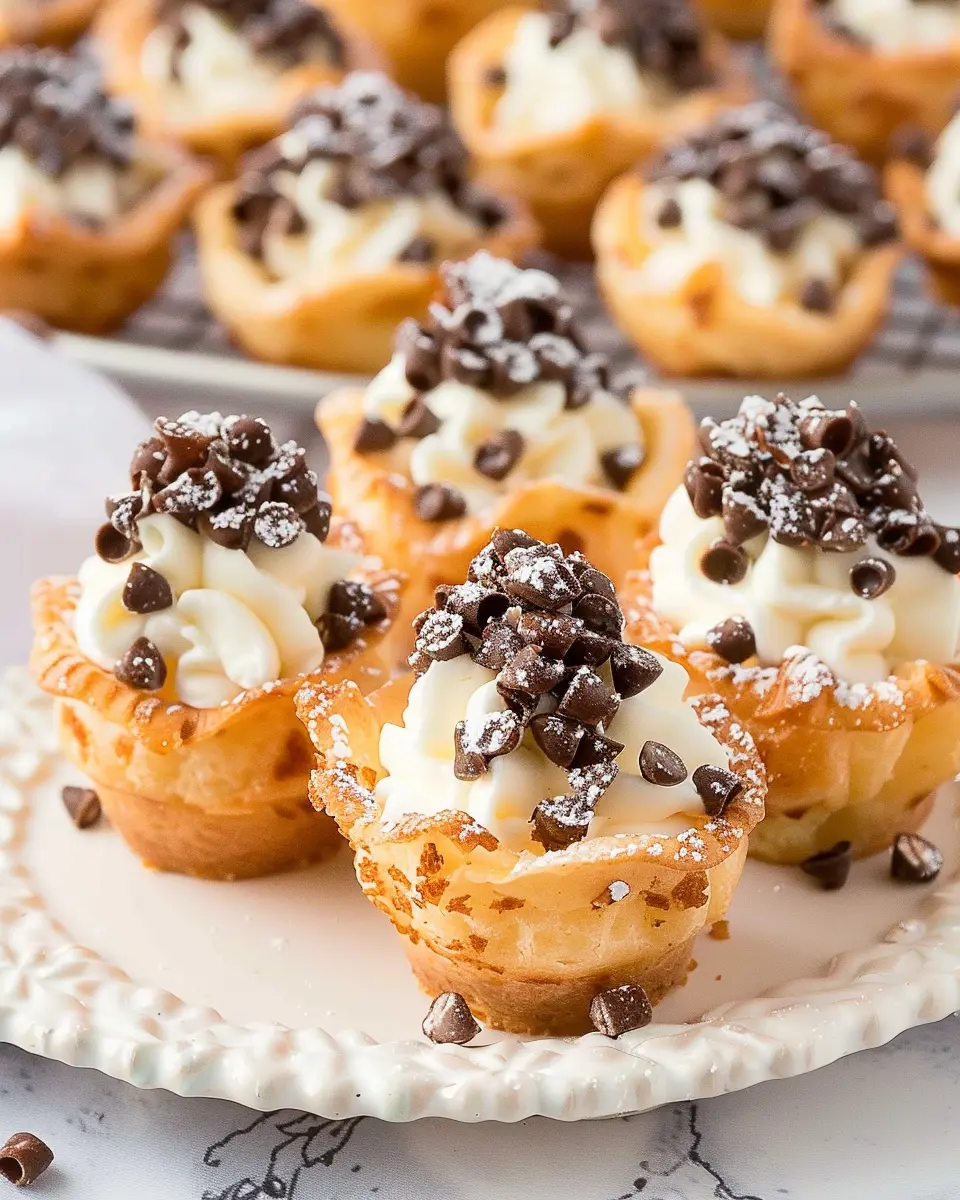
Pretty Presentation: These mini treats look stunning when arranged on a platter. You can even garnish them with fresh fruit or a sprinkle of powdered sugar for that extra touch.
As a bonus, making mini cannoli cups at home can be a fun weekend project. Gather your friends or family, roll out the dough, and fill them up with a luscious ricotta mixture. It’s definitely a great way to bond over cooking and enjoy delicious desserts afterward!
For more on the rich history of cannoli and how they became a beloved staple in Italian-American cuisine, check out this interesting article.
Whether you’re planning a dinner party or simply want to treat yourself, mini cannoli cups are sure to impress. Trust me; once you taste the creamy filling nestled in that crisp shell, you’ll be hooked! So, let’s dive into the delicious world of making these delectable little delights.

Ingredients for Mini Cannoli Cups
Creating mini cannoli cups is a delightful experience that combines flavor and creativity. To get started, gather the following ingredients for the perfect treat:
For the Shells:
- 1 package of mini phyllo pastry cups: These serve as the base and can be found in the freezer aisle at your local grocery store.
- Cooking spray: For easy removal of any leftovers and to prevent sticking.
For the Filling:
- 15 oz ricotta cheese: Choose a smooth, creamy variety for the best texture. This is the heart of your filling.
- 1 cup powdered sugar: Adds just the right amount of sweetness to balance the ricotta.
- 1 teaspoon vanilla extract: Enhances the flavor profile beautifully.
- 1/2 cup mini chocolate chips: For a delightful crunch and extra sweetness.
Optional Toppings:
- Chopped pistachios or hazelnuts: For a bit of extra texture and visuals.
- Dusting of cocoa powder or more powdered sugar: A lovely final touch that’s sure to impress.
Once you have these ingredients laid out, you’re one step closer to indulging in your mini cannoli cups! Remember to check this resource for even more tips and techniques on mastering your dessert game. Enjoy the process and have fun experimenting with flavors!
Preparing Mini Cannoli Cups
Whether you’re planning a dinner party, a special celebration, or just want to treat yourself to a delightful dessert, mini cannoli cups are a wonderful choice. With their crispy shells and creamy filling, these beauties are a crowd-pleaser. Let’s dive into how to prepare your own irresistible mini cannoli cups, breaking it down into manageable steps.
Gather your ingredients and equipment
To get started, you’ll want to gather all your essentials. Here’s what you need:
Ingredients:
- 1 package of pre-made pie crusts
- 1 cup of ricotta cheese (strain to remove excess liquid)
- 1 cup of mascarpone cheese
- 1 cup of powdered sugar (adjust to taste)
- 1 tsp vanilla extract
- 1/2 cup mini chocolate chips
- Optional: Chopped pistachios or candied orange peel for garnish
Equipment:
- Muffin tin
- Rolling pin
- Mixing bowls
- Piping bag or plastic zip-top bag (with a corner snipped off)
- Baking paper
Having everything prepped will streamline your process and make it much easier, especially if you’re juggling multiple recipes.
Prepare the pie crusts for baking
Now that you’re ready to roll (pun intended), it’s time to prep those pie crusts! Here’s how:
- Roll out the dough: Lightly flour your surface and use the rolling pin to slightly thin each crust. This ensures they’ll be crispy once baked.
- Cut into rounds: Use a round cookie cutter or the rim of a glass to cut out circles from the rolled dough. Aim for about 3-4 inches in diameter; this size will fit nicely in your muffin tin.
- Shape the cups: Gently press each round into the muffin tin, making sure to create a little cup shape. If your crusts are thin, you can layer two rounds for added sturdiness.
- Chill: Place the muffin tin in the refrigerator for about 15-20 minutes before baking. This will help the crust hold its shape.
Create the cannoli filling
While your pie crusts are chilling, it’s time to create that scrumptious filling that makes mini cannoli cups shine. Here’s how to do it:
- Mix the cheeses: In a mixing bowl, blend the strained ricotta and mascarpone until smooth. This combination gives you that rich, creamy texture that is quintessential to cannoli.
- Sweeten it up: Gradually add in the powdered sugar, followed by the vanilla extract. Whisk until everything is well incorporated and creamy.
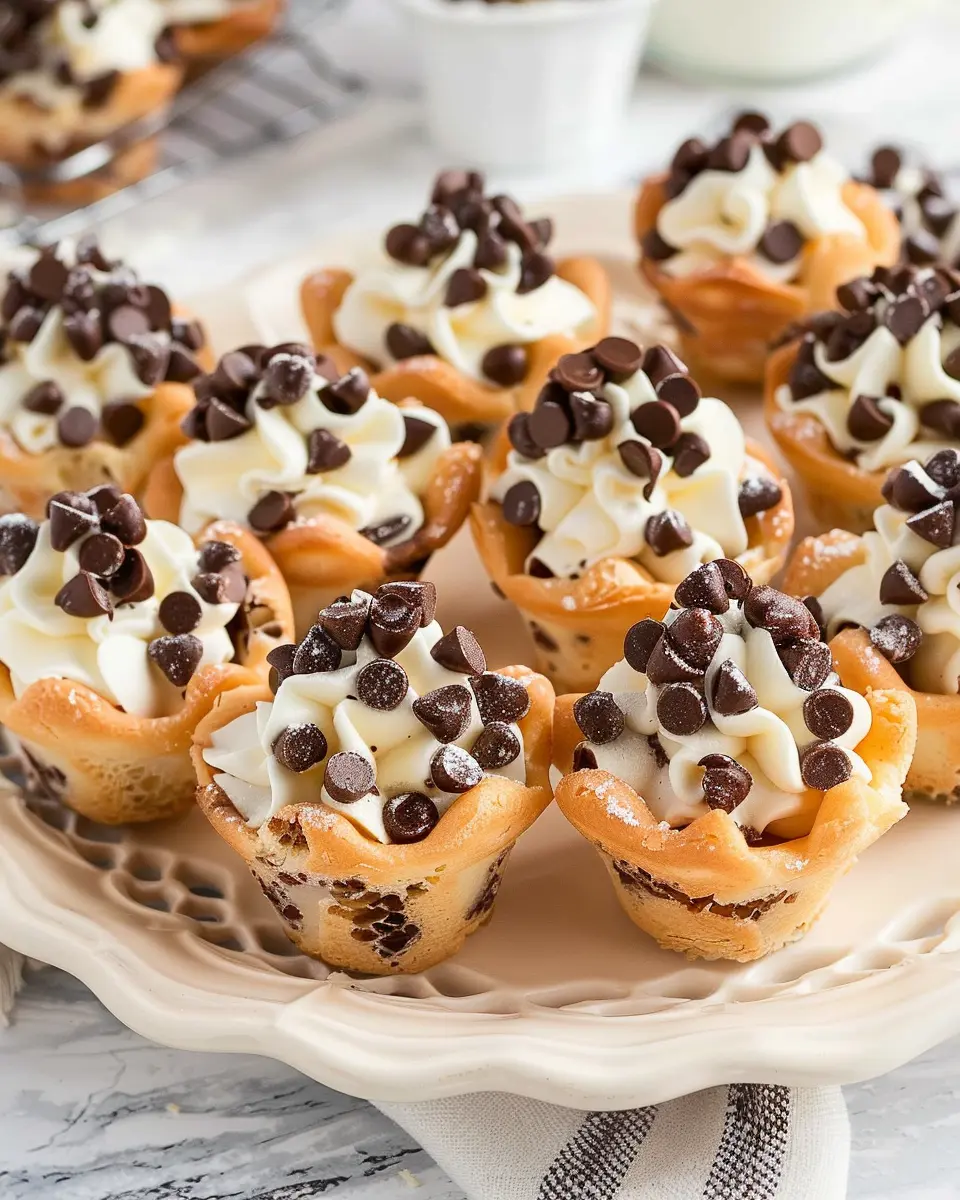
- Fold in chocolate chips: Gently mix in the mini chocolate chips. These add a little burst of sweetness and texture, making your filling irresistible.
For a little extra flair, consider adding some citrus zest or spices like cinnamon—many chefs swear by its ability to elevate flavors!
Bake the cannoli cups to perfection
With the filling ready and pie crusts shaped, we’re ready to bake!
- Preheat your oven: Set it to 375°F (190°C).
- Bake the cups: Place the muffin tin in the oven and bake for about 10-12 minutes or until golden brown. Keep an eye on them to avoid overbaking; you want a nice crispy texture.
- Cool down: Once baked, remove the muffin tin from the oven and allow the cups to cool completely in the tin before removing. They will collapse if you take them out too soon!
Pipe the filling into the baked cups
Once your cannoli cups are thoroughly cooled, it’s time for the fun part: piping in the filling!
- Prepare your piping bag: If you’re using a zip-top bag, fill it with your cheese mixture and snip off a corner for piping.
- Fill the cups: Carefully pipe the filling into each mini cannoli cup, making sure to fill them generously for that delightful surprise when bitten into.
- Garnish: Top with chocolate chips, or sprinkle on some pistachios or candied orange peel for added texture and visual appeal.
And there you have it! Your delightful mini cannoli cups are complete, and they are sure to impress anyone fortunate enough to indulge. Enjoy with a warm beverage or serve alongside a fresh fruit plate for a simple yet elegant dessert. Happy baking!
For more incredible dessert ideas, you may find inspiration in resources like Food & Wine or Bon Appétit for additional tips and tricks to elevate your culinary creations.
Variations on Mini Cannoli Cups
Mini cannoli cups are incredibly versatile and a fun twist on the classic Italian dessert. With a few fun modifications, you can create variations that suit any taste or dietary preference. Here are some delightful options to consider.
Chocolate-dipped Mini Cannoli Cups
If you’re a chocolate lover, why not elevate your mini cannoli cups with a chocolate-dipped twist? Melt semi-sweet or dark chocolate, then dip the tops of your filled cannoli cups into the chocolate. Allow them to set on parchment paper for a luxurious finish. The combination of the cream filling with chocolate adds a rich layer of flavor that’s hard to resist. Plus, you can even sprinkle some crushed nuts or colorful sprinkles on top before the chocolate hardens for a bit of flair!
Fruit-topped Mini Cannoli Cups
For a fresher take, consider topping your mini cannoli cups with seasonal fruits. Think strawberries, blueberries, or diced mango, which can add vibrant color and a burst of juicy flavor. Simply arrange the fruits beautifully on top of the filling for a stunning presentation. This version not only looks appealing but also balances the sweetness of the cream, making each bite a delightful experience. Explore more about seasonal fruits here, ensuring your dessert aligns with what’s fresh at the market!
Vegan Mini Cannoli Cups
Craving something a little lighter? Vegan mini cannoli cups are an excellent option. Substitute traditional ricotta with a blend of blended tofu, a splash of lemon juice, and a bit of maple syrup for natural sweetness. Use dairy-free chocolate for dipping, and opt for plant-based whipped cream to achieve that delightful creaminess. These mini cannoli cups provide all the pleasure of the original without dairy, making them great for gatherings where you’ll have both vegan and non-vegan guests.
Experimenting with these variations allows you to tailor your mini cannoli cups to suit any celebration, whether it’s a casual brunch or a sophisticated dinner party!
Cooking Tips and Notes for Mini Cannoli Cups
Ensuring the Crusts are Crispy
To achieve perfectly crispy mini cannoli cups, start by rolling out your dough thinly. A thinner crust allows for better frying and creates that delightful crunch. Make sure your oil is hot enough before frying—around 350°F (175°C)—to avoid sogginess. Fry them in small batches, so the temperature stays consistent. After frying, let them cool on paper towels, which helps absorb any excess oil. You can also try baking the shells for a healthier option; just make sure to keep an eye on them!
Tips for Making the Filling Creamy
For a lush, creamy filling, opt for whole milk ricotta cheese and remember to drain it well before mixing. A fine-mesh sieve can do wonders to remove excess moisture. Incorporate powdered sugar gradually for optimal sweetness and mix in a dash of vanilla extract for extra depth. Adding a bit of mascarpone can elevate the creaminess even further. To add a twist, consider flavoring with citrus zest or mini chocolate chips for a delightful surprise!
With these tips, your mini cannoli cups will surely impress at any gathering! For more insight on Italian desserts, check out Serious Eats for expert advice.
Serving Suggestions for Mini Cannoli Cups
When to Serve Mini Cannoli Cups
Mini cannoli cups are perfect for a variety of occasions, making them a versatile treat! Whether you’re hosting a casual get-together, celebrating a birthday, or simply indulging after dinner, these delightful desserts are sure to impress. Their bite-sized nature means they’re also great for potlucks or picnics. You can make a batch for a cozy movie night with friends or serve them as a sweet finale at a dinner party.
Flavor Pairings for Drinks and Snacks
When pairing snacks and drinks with your mini cannoli cups, think light and refreshing! Here are some delightful ideas:
- Coffee or Tea: A rich espresso or a calming herbal tea can beautifully complement the sweet and creamy flavor of the cannoli filling.
- Sparkling Water: For a refreshing option, serve your mini cannoli cups with flavored sparkling water. The effervescence can cleanse the palate between bites.
- Fruit Platters: Add some vibrant fruit to the spread! Fresh berries, citrus slices, or a melon medley can bring a lightness that balances the creaminess of the cannoli.
Mixing and matching these suggestions can lead you to your perfect treat experience! For more pairing inspiration, check out resources like Food & Wine or Bon Appétit. Have fun experimenting!
Time Breakdown for Mini Cannoli Cups
Creating delightful mini cannoli cups is a satisfying process that doesn’t have to take all day. Let’s break it down:
Preparation Time
The prep is quick and easy, taking about 20 minutes. This includes gathering your ingredients and mixing the creamy filling—which is often my favorite part!
Cooking Time
Next, add in about 10 minutes of cooking. If you’re making the shells from scratch, keep an eye on them to get that perfect golden brown.
Total Time
All in all, you’re looking at approximately 30 minutes from start to finish before indulging in these sweet treats!
These little delights are perfect for gatherings or just a treat for yourself after a long week. Curious to learn more about crafting the perfect mini cannoli? Check out these baking tips for a smoother experience!
Nutritional Facts for Mini Cannoli Cups
When indulging in mini cannoli cups, it’s good to be aware of their nutritional profile. Here’s what you need to know about these delightful treats.
Calories per serving
Each mini cannoli cup packs approximately 150-200 calories. This can vary slightly depending on your filling and crust choices, but it’s a great option when you crave something sweet without overdoing it.
Sugar content
These delicious cups have about 10-12 grams of sugar each. While they’re a delightful treat, keeping an eye on sugar intake is wise, especially for those managing their health or watching their sugar consumption.
Protein content
You can expect around 3 grams of protein per serving, thanks to the ricotta and other dairy ingredients. Pairing your mini cannoli cups with a protein-rich snack can help round out your meal beautifully.
For more insights on balanced snacking, consider checking out Nutrition.gov for a wealth of information. Eat well and enjoy your mini cannoli cups!
FAQs about Mini Cannoli Cups
Can I make Mini Cannoli Cups ahead of time?
Absolutely! One of the great benefits of mini cannoli cups is their versatility in planning. You can prepare the crusts and the filling separately in advance. Bake the shells a day before serving and store them in an airtight container to keep them crisp. The filling can also be made up to a week in advance; just be sure to store it in the fridge. When you’re ready to serve, simply fill the shells to preserve their crunchy texture. This method is perfect for parties when you want to impress without all the last-minute stress.
What should I do if my filling is too runny?
If your filling ends up a bit runny, don’t worry! There are a few creative ways to salvage it. First, try adding more ricotta cheese or mascarpone, as these can help thicken the mixture without sacrificing flavor. Another option is to incorporate powdered sugar gradually, which can help absorb excess moisture. You could also add a touch of cream cheese to create a creamier texture. If you’re looking for ideas on how to handle runny fillings, check out this helpful baking tips article for some insightful solutions.
Are there gluten-free options for the crust?
Yes, there are definitely gluten-free alternatives for your mini cannoli cups! You can use gluten-free flour blends that are readily available at most grocery stores, or experiment with almond flour for a nutty flavor. Just make sure to follow the same measurements as the regular flour to maintain the right texture. For even more ideas on gluten-free baking, sites like Gluten Free Baking offer fantastic resources and recipes.
With these tips, your mini cannoli cups will be the star of your next gathering, no matter the dietary restrictions!
Conclusion on Mini Cannoli Cups
In wrapping up our journey through mini cannoli cups, it’s clear these delightful treats are the perfect solution for any occasion—from casual gatherings to elegant dinner parties. The blend of rich ricotta cheese with chocolate chips and seasonal fruit creates a balance that’s both decadent and refreshing. Plus, their individual servings make it easy to share without the fuss of traditional cannoli.
Whether you decide to stick to the classic recipe or sprinkle in your unique twist, these little wonders will surely impress your guests. So why not give them a try in your next culinary adventure? For more delicious desserts, check out Joy of Baking and Serious Eats for inspiration. Your taste buds will thank you!
PrintMini Cannoli Cups: Easy Indulgence for Homemade Dessert Lovers

These Mini Cannoli Cups are a delightful, easy-to-make dessert that brings the classic Italian treat into a fun and shareable form. Perfect for any occasion!
- Prep Time: 15 minutes
- Cook Time: 0 minutes
- Total Time: 30 minutes
- Yield: 12 servings
- Category: Dessert
- Method: No-bake
- Cuisine: Italian
- Diet: Vegetarian
Ingredients
- 1 cup ricotta cheese
- 1/2 cup powdered sugar
- 1 teaspoon vanilla extract
- 1/2 cup mini chocolate chips
- 12 mini phyllo cups
Instructions
- In a mixing bowl, combine the ricotta cheese, powdered sugar, and vanilla extract. Mix until smooth.
- Fold in the mini chocolate chips gently.
- Using a piping bag, fill each mini phyllo cup with the ricotta mixture.
- Chill in the refrigerator for at least 30 minutes before serving.
- Enjoy your Mini Cannoli Cups!
Notes
- For added flavor, consider mixing in a pinch of cinnamon.
- These cups can be made a day in advance for convenience.
Nutrition
- Serving Size: 1 cup
- Calories: 150
- Sugar: 10g
- Sodium: 50mg
- Fat: 7g
- Saturated Fat: 3g
- Unsaturated Fat: 4g
- Trans Fat: 0g
- Carbohydrates: 20g
- Fiber: 1g
- Protein: 4g
- Cholesterol: 20mg