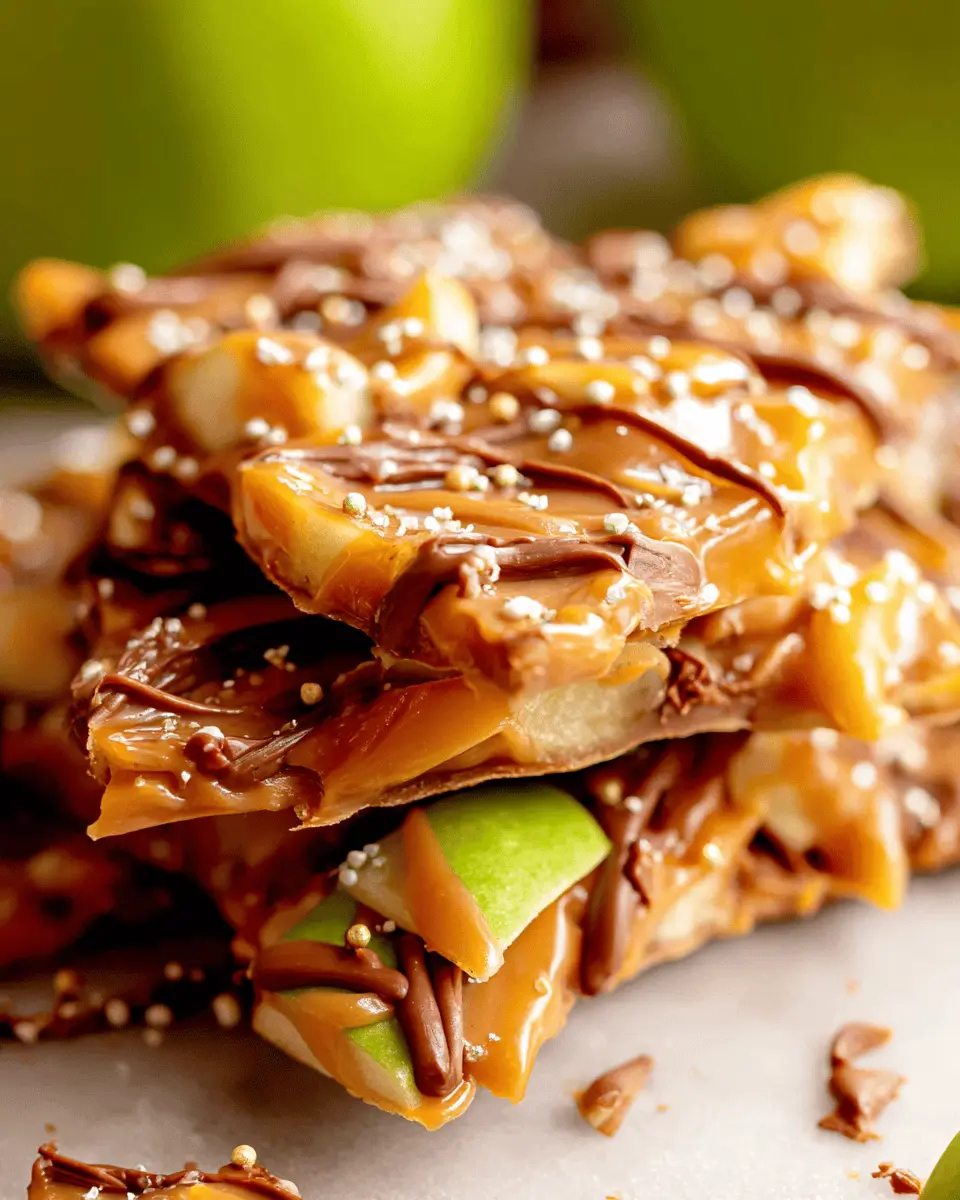
Introduction to Caramel Apple Bark
Why Homemade Snacks Beat Fast Food Every Time
In today’s fast-paced world, the temptation to grab a quick snack from a drive-thru is ever-present. But have you ever pondered the benefits of homemade snacks? When you whip up something in your kitchen, you’re not just avoiding processed ingredients; you’re crafting a treat that’s customized to your taste. Take caramel apple bark, for example. It’s quick, simple, and bursting with flavors that you control. Plus, studies indicate that home-cooked meals tend to be healthier and can even boost your mood. A little effort goes a long way in nurturing not just your body but also your mind.
The Joy of Creating Something Delicious in Your Kitchen
There’s something incredibly satisfying about the process of creating a delicious snack from scratch. Picture this: your kitchen fills with the aroma of melting chocolate, the tangy scent of fresh apples, and the rich sweetness of caramel. Just thinking about it makes you want to dive right in!
Creating caramel apple bark is not only about the end result—though the delightful mix of flavors and textures will certainly please your taste buds—but it’s also about the journey. It’s a chance to experiment, to taste as you go, and perhaps to even share your creation with friends or family. The best part? You don’t need to be a master chef to succeed; as long as you can melt chocolate and mix in some toppings, you’re golden!
Imagine inviting your friends over for a movie night, presenting them with your homemade caramel apple bark, and witnessing their delighted reactions. It’s those moments—when you bring people together with food—that make cooking such a rewarding experience.
If you’re new to the kitchen, don’t fret! There are plenty of resources out there. Websites like AllRecipes and Food Network offer user-friendly guides that will help you every step of the way. Ready to embark on this culinary adventure? Let’s get started!

Ingredients for Caramel Apple Bark
Breakdown of what you need to make this sweet treat
Creating caramel apple bark is both simple and delicious. Here’s what you’ll need for this indulgent snack:
- Apples: You can use your favorite variety. Granny Smith adds a nice tartness, while Honeycrisp brings sweetness.
- Chocolate Chips: Choose between milk or dark chocolate, depending on your taste preference.
- Caramel Sauce: Store-bought works wonders for convenience, but homemade caramel can elevate the flavor.
- Nuts: Chopped walnuts or pecans provide a delightful crunch. If you’re nut-free, you can skip this ingredient entirely.
- Sea Salt: A sprinkle enhances the overall flavor; it’s a perfect contrast to sweetness.
- Optional Mix-ins: Think about adding turkey bacon bits for a unique twist or a drizzle of peanut butter for extra richness.
Special mentions for ingredient options and substitutions
Feel free to customize your caramel apple bark! Using apple slices instead of whole apples is an excellent option if you want smaller bites. In place of chocolate chips, you could try yogurt-covered raisins for a fruity complement. If you want a healthier version, consider substituting caramel sauce with a date paste or maple syrup.
For more ideas on ingredient substitutions, check out Epicurious for inspiration! Your kitchen is your playground; make it work for you!
Preparing Caramel Apple Bark
Making caramel apple bark is not just about throwing ingredients together; it’s about creating a delightful treat that can wow your friends at gatherings or simply satisfy your sweet tooth. Here’s a step-by-step guide to help you craft this delectable treat.
Prepare your workspace
First things first: get your kitchen ready. An organized workspace will make the process smoother and more enjoyable. Start by gathering all your ingredients and tools. You’ll need:
- Good quality white chocolate (around 1.5 pounds)
- Caramel sauce (store-bought or homemade)
- Chopped apples (Granny Smith works well for a tangy contrast)
- Chopped nuts (optional, but pecans or walnuts add a lovely crunch)
- Parchment paper or a silicone baking mat
- Double boiler or microwave-safe bowl
Take a moment to clear your counter and grab a few bowls for mixing. Make sure your tools are clean and dry; melted chocolate is finicky and doesn’t mix well with moisture. Having everything at your fingertips will help you create your caramel apple bark without unnecessary interruptions.
Melt the white chocolate to perfection
Next, you’ll want to focus on melting the white chocolate. This step is crucial because if the chocolate seizes up or burns, it can ruin your bark. If you have a double boiler, use it! Fill the bottom pot with water, ensuring that it doesn’t touch the chocolate in the top pot. This gentle heat melts the chocolate smoothly. If you prefer the microwave, place your chocolate in the bowl and heat in 30-second intervals, stirring between each until it’s completely melted.
- Keep an eye on the chocolate to avoid overheating, as it can easily turn thick and clumpy.
- Once it’s completely smooth and glossy, give it a quick taste. This melted white chocolate is your canvas, so feel free to add a dash of vanilla extract for enhanced flavor.
Create the caramel sauce
While your chocolate is cooling slightly, turn your attention to the caramel sauce. You can buy pre-made caramel sauce for convenience, or you might want to challenge yourself with a homemade version. The latter is simple and allows you to control the sweetness.
To make homemade caramel:
- In a saucepan, combine sugar, corn syrup, and a pinch of salt.
- Cook over medium heat, stirring until the mixture turns amber.
- Slowly add heavy cream while stirring continuously until smooth.
Homemade caramel adds an irresistible homemade touch to your caramel apple bark. Plus, it’s incredibly satisfying to create something from scratch!
Assemble your delicious bark masterpiece
Now comes the fun part: assembly! Line a baking sheet with parchment paper or use a silicone mat. Pour the melted white chocolate onto the sheet and spread it evenly to your desired thickness, about a quarter of an inch is ideal.
Next, drizzle the caramel sauce on top of the melted chocolate. Use a spatula to swirl the caramel through the white chocolate gently, creating a marbled effect that’s as beautiful as it is tasty.
Once you’ve achieved a lovely look, sprinkle the chopped apples and nuts, if desired, evenly over the top. The vibrant apples not only look appealing but also add a delightful crunch and tartness.
Let it set and break it into delightful pieces
After assembling your masterpiece, it’s time to let it set. You can either place your tray in the refrigerator for approximately 30 minutes or until firm, or you can leave it out at room temperature for about an hour.
Once the chocolate has completely hardened, grab a sharp knife or your hands and break the bark into bite-sized pieces. Store it in an airtight container to keep your caramel apple bark fresh.
And there you have it! With just a few steps, you’ve created a charming treat that’s perfect for sharing or for simply indulging yourself. Whether it’s during fall festivities or a cozy night in, caramel apple bark will surely be a hit! Share your creations on social media and tag your friends; they’ll be clamoring for the recipe in no time. Happy cooking!

Variations on Caramel Apple Bark
Exploring different takes on caramel apple bark not only sparks creativity in the kitchen, but it also allows you to tailor each variation to your taste preferences. Here are a few delightful ideas to get you started!
Add an Apple Pie Twist with Graham Crackers
Why not take your caramel apple bark to the next level by incorporating that classic apple pie flavor? Start with a base of crushed graham crackers mixed with melted butter for an irresistible crunch. Layer this at the bottom of your bark before adding the usual caramel and chocolate toppings. For an even bolder flavor, sprinkle in some cinnamon and nutmeg—just like Grandma’s pie! A splash of vanilla extract can elevate the taste further, ensuring that each bite feels like a hug from home.
Go Adventurous with Dark Chocolate
If you’re a chocolate lover, consider swapping out milk chocolate for rich, dark chocolate. The intense flavor of dark chocolate beautifully complements the sweetness of the caramel and apples. Plus, dark chocolate is often touted as a healthier option due to its higher cocoa content and lower sugar levels. You can also enhance the mix by adding nuts, like walnuts or pecans, for an extra crunch and a boost of healthy fats. For a more in-depth look at the health benefits of dark chocolate, check out Healthline’s article on dark chocolate benefits.
Fresh vs. Dried Apples: Which to Choose?
When crafting your caramel apple bark, you might wonder whether to use fresh or dried apples. Fresh apples give a crisp, juicy bite, while dried apples offer a chewy texture that packs a concentrated flavor. If you opt for fresh, it’s best to use tart varieties like Granny Smith for that perfect sweet-and-sour balance. If you lean towards dried, make sure to select unsweetened options to control the overall sweetness of your bark. Each choice brings unique qualities to the table!
Explore these variations to make your caramel apple bark uniquely yours, and enjoy the flavors of fall.
Cooking tips and notes for Caramel Apple Bark
Key techniques for perfect melting and mixing
To achieve delightful caramel apple bark, mastering the art of melting is crucial. Begin by chopping your chocolate or caramel into small, uniform pieces to facilitate even melting. Consider using a microwave-safe bowl and employing short bursts of heat, stirring every 30 seconds. This method not only avoids seizing but also helps maintain a silky texture. You could also try the double boiler technique, a foolproof way to ensure gentle heat—just remember to keep water from touching the bowl!
When mixing your melted chocolate and toppings, don’t rush. Fold the ingredients gently to prevent air bubbles, creating a smooth blend that will enhance the overall appearance and taste of your bark.
Storing your bark to maintain freshness
Once your caramel apple bark is set and broken into pieces, keep it fresh by storing it in an airtight container at room temperature. Avoid exposing it to moisture, as it can ruin that delightful crunch. If you want to keep it longer, consider refrigerating it, though that may slightly alter the texture. For an extra layer of protection, layer your bark pieces between parchment paper to prevent sticking.
For more tips on storing chocolate treats, check out resources like Food Network. Happy baking!

Serving suggestions for Caramel Apple Bark
Creating a Stunning Presentation
To truly elevate your caramel apple bark, presentation is key. Start by breaking the bark into irregular, rustic pieces, and arrange them on a slate or wooden board for a chic, artisan look. Scatter a few sliced apples and sprinkle some crushed nuts or sprinkles around the bark for color and texture. Consider using small, clear bags tied with twine for individual servings, perfect for sharing at parties or giving as gifts. A touch of cinnamon or drizzles of extra caramel can add a finishing flair—after all, we eat with our eyes first!
Perfect Pairings for Snacking Delight
Complement the sweetness of your caramel apple bark with delightful pairings that will enhance your taste experience. Here are a few ideas:
- Fresh fruit: Serve alongside slices of crisp pears or juicy grapes for a refreshing contrast.
- Salty snacks: Think lightly salted turkey bacon or chicken ham to balance the sweetness.
- Hot beverages: Pair with your favorite spiced tea or a rich hot chocolate for a cozy moment.
These combo ideas will not only elevate your snacking experience but also add a personal touch to any gathering. For more inspiration, check out Food & Wine for additional snacking tips!
Time breakdown for Caramel Apple Bark
When you’re ready to whip up some delightful caramel apple bark, knowing the time commitment can be a game changer. Here’s a simple breakdown to guide you as you prepare.
Preparation time
Getting started on your caramel apple bark only takes about 15-20 minutes. This is when you will be melting the chocolate, mixing in those tantalizing apple bits, and drizzling on that luscious caramel. It’s an exciting part of the process, filled with delightful aromas. Just make sure to gather all your ingredients ahead of time!
Setting time
After preparation, the caramel apple bark needs to chill and set for about 30-45 minutes. You’ll want to ensure it firms up nicely so you can achieve those perfect, crunchy pieces. Use this time to clean up the kitchen or maybe even prep a cozy spot for enjoying your tasty creation later.
Total time
All in all, you’re looking at about 1 to 1.5 hours from start to finish. That’s a small investment for the deliciousness that awaits! Plus, the reward is well worth it; you’ll have a batch of sweet, crunchy, and chocolaty bark to share at your next gathering. For more variations or creative ideas on caramel desserts, check out this guide.
Creating caramel apple bark is not just about the timing—it’s about enjoying the process. Happy baking!
Nutritional facts for Caramel Apple Bark
Calories and key nutritional info
Indulging in caramel apple bark is a delightful treat! A typical serving provides around 150 calories, featuring a blend of flavors from sweet caramel, tart apples, and rich chocolate. Plus, it packs handy nutrients like:
- Total Fat: 7g
- Saturated Fat: 4g
- Sugars: 12g
- Protein: 1g
- Fiber: 1g
These figures may vary based on ingredient choices—opt for dark chocolate to increase antioxidants, or choose sugar-free options for a lighter version. For more details on calories in similar snacks, check out this nutrition guide.
Considerations for dietary restrictions
If you or your guests have dietary restrictions, don’t worry! Caramel apple bark can be easily modified. Try the following alternatives to make it suitable for everyone’s needs:
- Gluten-Free: Use gluten-free chocolate and ensure your caramel is gluten-free as well.
- Dairy-Free: Swap regular chocolate for dairy-free varieties and use vegan caramel.
- Nut-Free: Always check that your ingredients are nut-free, especially the chocolate.
Whether you’re preparing a treat for a gathering or just satisfying your sweet tooth, these adjustments make caramel apple bark an inclusive snack option. Who doesn’t love a little sweetness that everyone can enjoy?
FAQs about Caramel Apple Bark
How can I make my bark more chewy or crunchy?
To get that perfect texture in your caramel apple bark, you have a couple of fun options. If you prefer a chewier treat, try adding more melted caramel to the mixture. This extra caramel will bind ingredients together, yielding a delightful chewiness. Alternatively, if crunch is what you crave, consider incorporating crispy elements like broken pretzels or various types of toffee pieces. These can give your bark that satisfying crunchy texture that everyone loves.
What’s the best storage method for homemade bark?
Storing your caramel apple bark correctly is crucial to keeping it fresh! The best practice is to place the bark in an airtight container, layering pieces with parchment paper to prevent sticking. This method helps maintain flavor and texture for up to two weeks. If you want to keep it even longer, you can freeze the bark. Just make sure it’s well-wrapped to prevent freezer burn. When ready to enjoy, let it thaw at room temperature for optimum taste.
Can I use other fruits or nuts in the bark?
Absolutely! The beauty of caramel apple bark is its versatility. Feel free to experiment with other fruits like dried cranberries, cherries, or even bananas. As for nuts, consider adding almonds, pecans, or even some sunflower seeds for a delightful crunch. Each addition can change the flavor profile, making it your own signature treat. Think of it as your creative canvas—let your tastebuds guide you!
For more tips on candy-making, check out resources like The Spruce Eats for inspiration and techniques. Happy cooking!
Conclusion on Caramel Apple Bark
Making your own snacks, like caramel apple bark, is a genuinely rewarding experience. Not only do you have complete control over the ingredients, ensuring they’re fresh and to your taste, but you also get to enjoy the satisfaction of creating something delicious from scratch. Plus, it’s a great way to experiment with flavors and impress friends!
Sharing homemade treats can foster connections, creating delightful moments over sweet bites. So next time you’re in the mood for a guilt-free snack, remember that your caramel apple bark is just a recipe away! For additional inspiration, check out sources like Food Network and BBC Good Food. Happy snacking!
PrintCaramel Apple Bark: The Best Easy Recipe for Fall Indulgence

A delicious recipe for Caramel Apple Bark that captures the flavors of fall.
- Prep Time: 15 minutes
- Cook Time: 10 minutes
- Total Time: 25 minutes
- Yield: 12 servings
- Category: Dessert
- Method: Baking
- Cuisine: American
- Diet: Vegetarian
Ingredients
- 2 cups chopped apples
- 1 cup caramel candies
- 2 tablespoons butter
- 1 cup semi-sweet chocolate chips
- 1 cup chopped nuts (optional)
Instructions
- Preheat the oven to 350°F.
- Line a baking sheet with parchment paper.
- Melt the caramel candies with butter over low heat, stirring until smooth.
- Spread the chopped apples on the prepared baking sheet.
- Pour the caramel mixture over the apples, then sprinkle with chocolate chips and nuts.
- Let cool and set before cutting into pieces.
Notes
- For extra flavor, add cinnamon to the apples before caramelizing.
Nutrition
- Serving Size: 1 piece
- Calories: 150
- Sugar: 10g
- Sodium: 50mg
- Fat: 8g
- Saturated Fat: 5g
- Unsaturated Fat: 3g
- Trans Fat: 0g
- Carbohydrates: 18g
- Fiber: 1g
- Protein: 2g
- Cholesterol: 15mg