The Ultimate Guide to Blackout Cake
Why is Blackout Cake a Chocolate Lover’s Dream?
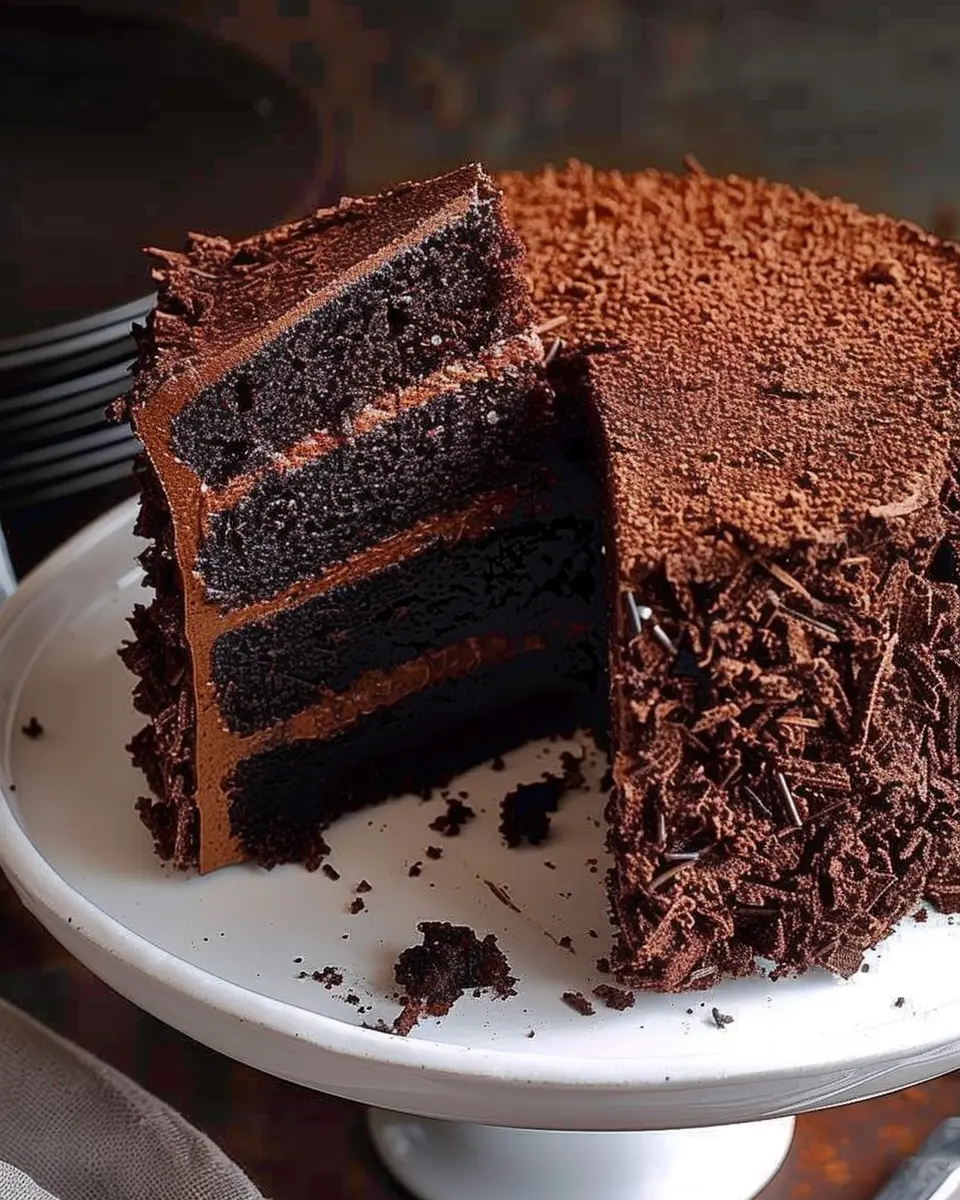
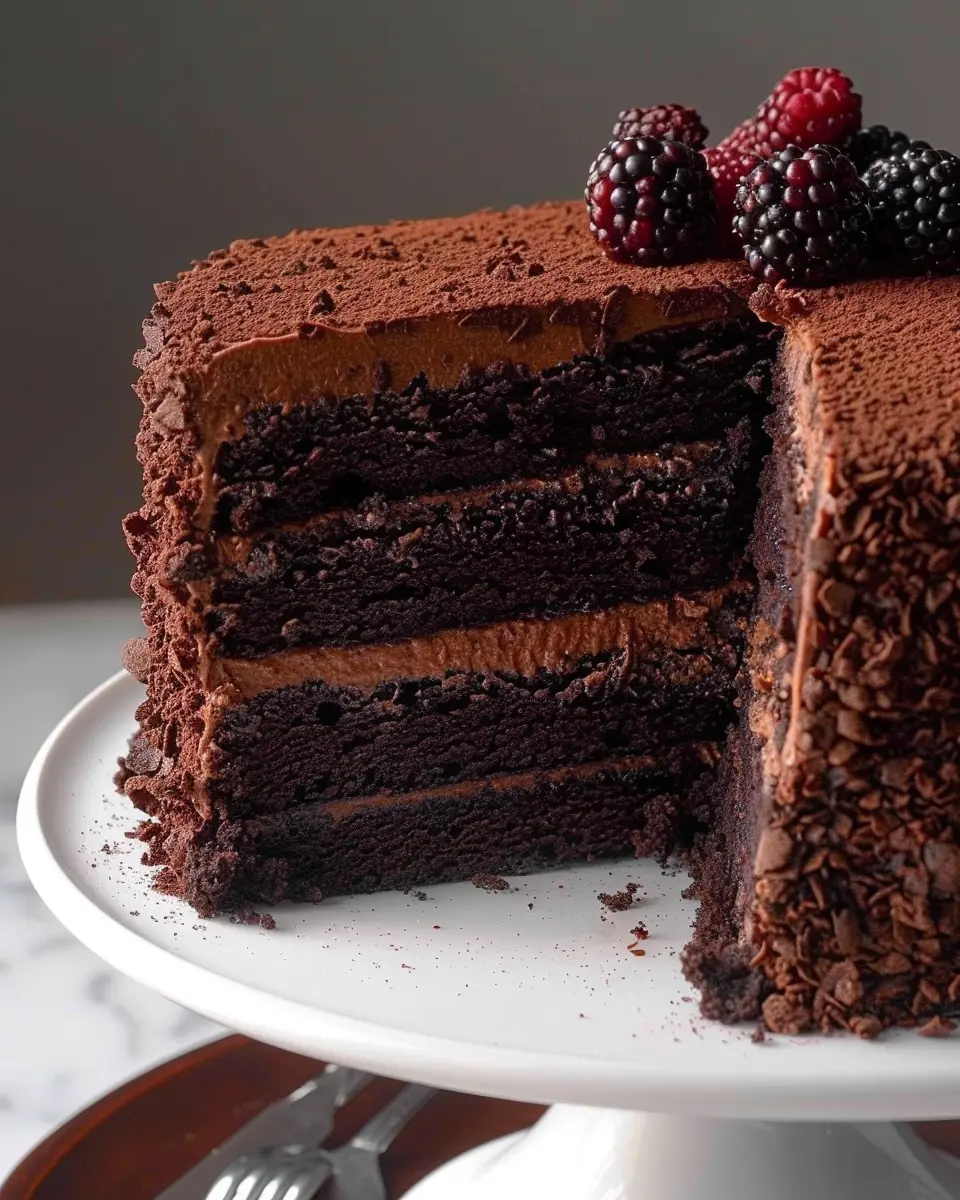
If you’ve ever found yourself dreaming of a dessert that encapsulates richness and decadence, then look no further than blackout cake. Originating from Brooklyn in the 1920s, this cake is a chocolate lover’s ultimate fantasy. Imagine layers of moist, chocolate cake filled with fudgy frosting, creating a symphony of textures that dance on your palate.
So, what makes blackout cake so special? The key is in its intensity. Each slice delivers an explosion of deep chocolate flavor that is both satisfying and indulgent. According to experts, the balance of cocoa and sugar in the recipe is crucial; it’s what gives this cake its signature taste. Plus, the thick layers of chocolate frosting amplify that choco-licious experience. If you’re looking for a cake that makes an impression, blackout cake does just that.
Here are a few reasons why blackout cake reigns supreme:
- Layers of Heaven: The cake’s multi-layered structure creates delicious depth, enhancing every bite.
- Frosting Overload: The luxurious frosting isn’t just for decoration; it brings an extra touch of sweetness that complements the richer cake.
- Versatile Pairings: Whether enjoyed with a cup of coffee or a soothing herbal tea, blackout cake pairs beautifully, making it perfect for any occasion.
But perhaps the best part of making your own blackout cake is the sheer joy of baking. You can control the ingredient quality and personalize it according to your taste. Try using top-notch cocoa powder—brands like Valrhona or Guittard can elevate your cake from good to unforgettable.
If you’re thinking of whipping up this chocolaty masterpiece, check out this great guide on cocoa varieties by Cooking Light. Their insights can help you select the ideal cocoa that will make your blackout cake truly shine.
Remember, it’s not just about the finished product—it’s about the process and the memories you create while baking! So gather your ingredients, and embrace the joy of creating a dessert that can satisfy even the most discerning chocolate enthusiasts.
Ingredients for Blackout Cake
Creating a delicious blackout cake is an indulgent experience that combines rich flavors of chocolate with an irresistible texture. Here’s a handy guide to the essential elements you’ll need for both the velvety chocolate pudding and the moist chocolate cake.
Essential Ingredients for Chocolate Pudding
To whip up the perfect chocolate pudding, you’ll need:
- Bittersweet chocolate: This is the star of the show, delivering a deep chocolate flavor.
- Granulated sugar: For sweetness, bringing balance to the bitterness of the chocolate.
- Cornstarch: A thickening agent for that luscious texture.
- Milk: Whole milk is best, but you can opt for alternatives such as almond or soy milk.
- Vanilla extract: A splash of this elevates the overall flavor, combining beautifully with chocolate.
Did you know that making homemade pudding can take only about 15 minutes? It’s worth the slight effort for fresh flavor!
Essential Ingredients for Chocolate Cake
Now, for the cake itself, gather these essentials:
- All-purpose flour: The base for your cake—use high-quality flour for better results.
- Cocoa powder: Unsweetened cocoa will give your cake that rich chocolatey depth.
- Baking powder and baking soda: These will help your cake rise to fluffy perfection.
- Butter: Using unsalted butter provides rich flavor without added salt.
- Eggs: They bring moisture and help bind the ingredients together.
- Coffee: A little brewed coffee enhances the chocolate flavor tremendously.
Combining these ingredients results in a rich and moist cake that’s sure to impress at any gathering. Whether you’re a baking novice or a seasoned pro, this blackout cake is a fun project that yields great rewards. Looking for more tips? Check out resources like Serious Eats for expert baking insights!
Preparing Blackout Cake
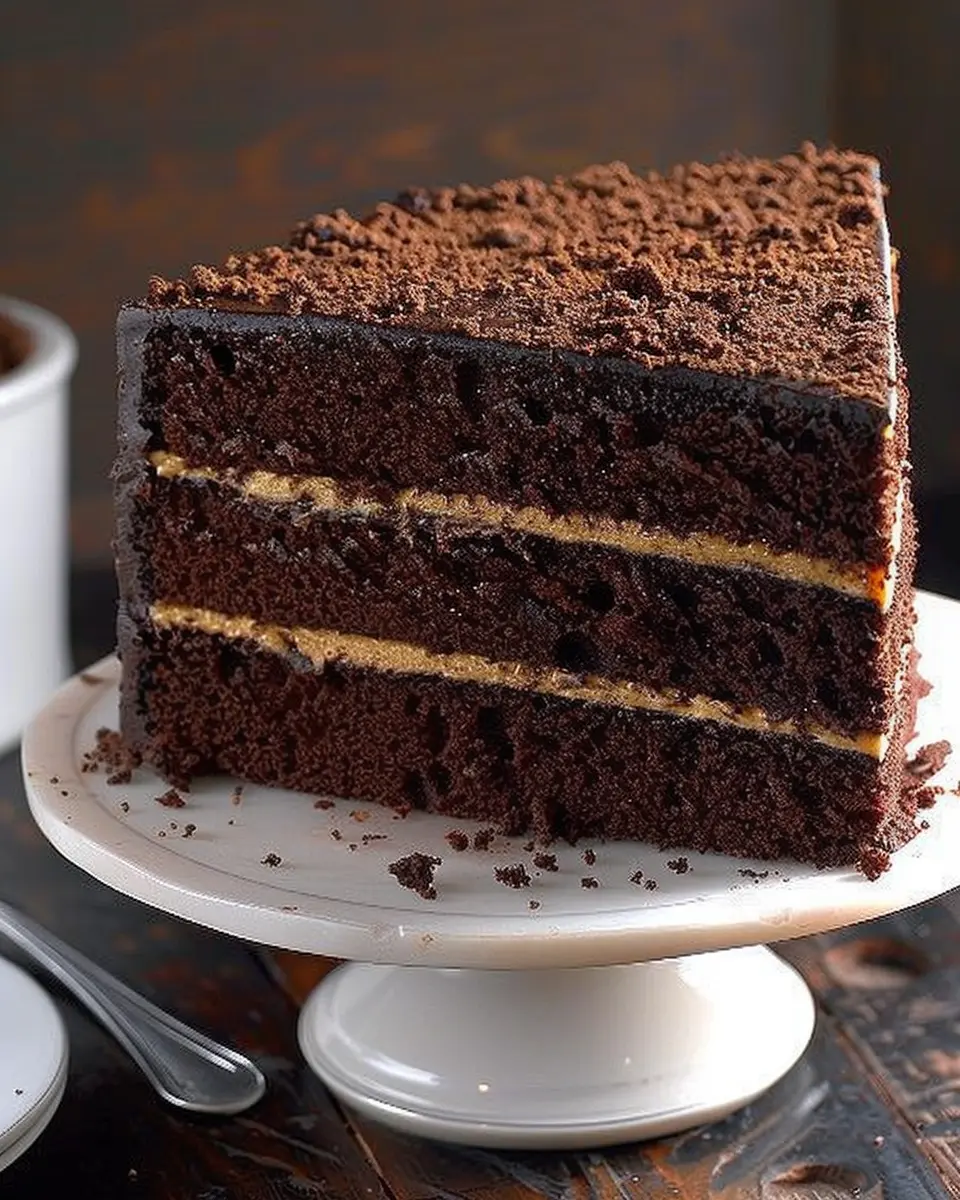
Creating a blackout cake in your kitchen is not only a satisfying endeavor but also a deliciously indulgent experience that can amaze your friends and family. This rich, layered dessert features a dense chocolate cake filled with creamy chocolate pudding and covered in velvety frosting. Here’s how to create it step-by-step, ensuring your process is as delightful as your end result.
Step 1: Prepare the Chocolate Pudding
The chocolate pudding is the heart of your blackout cake, delivering that creamy, rich texture. Here’s how to make it:
- Gather Your Ingredients: You’ll need high-quality cocoa powder, sugar, cornstarch, milk, and a pinch of salt.
- Combine Dry Ingredients: In a saucepan, mix together 1/2 cup cocoa powder, 1 cup sugar, 1/4 cup cornstarch, and a pinch of salt.
- Heat the Milk: Gradually whisk in 2 3/4 cups milk over medium heat. Make sure to keep stirring to avoid any lumps.
- Cook Until Thickened: Continue to heat until the mixture simmers and thickens—this could take about 10 minutes. As it thickens, your kitchen will start to smell heavenly.
- Cool the Pudding: Once thick, remove it from heat, stir in a tablespoon of vanilla extract, and let it cool at room temperature before refrigerating.
For more pudding tips, check out this pudding guide.
Step 2: Prepare the Chocolate Cake
Next, you need the perfect chocolate cake to complement the pudding.
- Ingredients List: Gather flour, sugar, cocoa powder, baking soda, baking powder, eggs, milk, and vegetable oil.
- Mix the Dry Ingredients: In a large bowl, combine 1 3/4 cups flour, 1 1/2 cups sugar, 3/4 cup cocoa powder, 1 1/2 teaspoons baking soda, and 1 1/2 teaspoons baking powder.
- Combine Wet Ingredients: In another bowl, whisk together 2 large eggs, 1 cup milk, and 1/2 cup vegetable oil.
- Blend Together: Slowly mix the wet ingredients into the dry, blending until smooth.
- Bake: Pour the batter into two greased 9-inch round cake pans. Bake in a preheated oven at 350°F for about 30-35 minutes, or until a toothpick inserted in the center comes out clean.
Feel free to check these baking tips for best practices on achieving that perfect bake.
Step 3: Assemble the Layers
Now comes the fun part: assembly!
- Layer the Cake: When the cakes have cooled completely, place one layer on your serving plate.
- Add Pudding: Spread a generous layer of chilled chocolate pudding on top of the first cake layer.
- Stack: Gently place the second cake layer on top of the pudding.
This method creates an impressive visual and taste experience.
Step 4: Crumb the Cake for Decoration
To make your blackout cake extra special, let’s create a delightful crumb trail.
- Crumb the Cake: As you trim any excess from the cake layers to level them, collect those crumbs. You can also put the scraps into a food processor to create a fine crumb.
- Save it for Later: You’ll use this crumb mixture for decoration.
Decorating with crumbs adds a rustic charm.
Step 5: Frost and Serve
Now it’s time to frosted nirvana!
- Prepare the Frosting: You can whip up a chocolate buttercream with softened butter, cocoa powder, powdered sugar, milk, and vanilla.
- Frost the Cake: Using a spatula, spread a thick layer of frosting over the top and sides of the cake.
- Sprinkle Crumbs: Gently press the chocolate crumbs onto the sides of the cake for that true “blackout” effect.
- Slice and Serve: Let the cake sit for 10 minutes before slicing into it as this helps the layers set.
And voila, your homemade blackout cake is ready to impress!
Consider pairing it with a glass of cold milk or a cup of coffee for a delightful experience. Enjoy every rich, chocolatey bite!
Variations on Blackout Cake
Blackout Cake with Unique Flavors
Blackout cake traditionally dazzles with its rich chocolate layers and decadent frosting, but why not shake things up a bit? Incorporate unique flavors to craft a signature version of this beloved dessert. Here are a few ideas to get those creative juices flowing:
- Coffee Infusion: Add a shot of espresso to your batter for an elegant mocha twist that coffee lovers will adore.
- Citrus Zest: A touch of orange or lemon zest can enhance the chocolate flavor, providing a refreshing contrast.
- Nutty Undertones: Try adding finely ground almonds or hazelnuts to the cake mix for a delightful crunch.
By exploring these variations, you can customize your blackout cake to suit any palate and occasion.
Gluten-Free Blackout Cake Option
Worried about dietary restrictions? Not to fret! A delicious gluten-free blackout cake can easily be achieved. Simply swap out all-purpose flour for a gluten-free blend or almond flour. These alternatives retain moisture and flavor while ensuring that everyone can partake in the indulgence.
Here’s how to make it gluten-free:
- Flour Substitute: Use a 1:1 gluten-free baking flour that includes xanthan gum for better structure.
- Ensure Ingredients Are Gluten-Free: Always double-check packaging, especially for ingredients like baking powder, which can sometimes contain gluten.
For added inspiration, check out trusted gluten-free baking resources, like King Arthur Baking. They offer tips and tricks to ensure your cake is both delicious and gluten-free.
With just a few tweaks, you can create endless variations of your blackout cake, keeping things fresh and exciting whenever you bake!
Cooking Tips and Notes for Blackout Cake
Troubleshooting Common Issues
Even the best bakers encounter hiccups when making a blackout cake. Here are some common issues and how to fix them:
-
Dense Texture: If your cake turns out too dense, make sure you’re measuring your flour correctly. Too much flour can lead to a heavy cake. Weighing ingredients can help achieve perfect consistency.
-
Dry Cake: This often happens when cakes are overbaked. Keep an eye on your blackout cake during the final minutes of baking. Use a toothpick; it should come out clean but not completely dry.
Best Practices for Storage
Proper storage ensures your blackout cake stays moist and delicious. Here are some tips:
- Room Temperature: If you plan to enjoy it within a couple of days, keep your cake in an airtight container at room temperature.
- Refrigeration: For longer storage, refrigerate your cake, but remember to wrap it in plastic to prevent it from drying out.
For the ultimate tips on baking techniques, check out resources from the American Baking Association or King Arthur Baking.
Happy baking! You’ve got this!

Serving Suggestions for Blackout Cake
Perfect Pairings for Your Blackout Cake
When it comes to savoring a delicious blackout cake, think of pairing it with something that balances the richness. A scoop of vanilla or coffee ice cream can really elevate your dessert experience, providing a creamy contrast to the chocolatey goodness. Or, consider serving it with a refreshing dollop of freshly whipped cream and seasonal berries; the tartness of the berries can really cut through the sweetness and enhance every bite.
For drinks, a steaming cup of rich black coffee or a delightful herbal tea, like chamomile or mint, complements the cake perfectly. Essentially, you want something that refreshes your palate while enjoying that decadent chocolate.
Presentation Tips for Parties
Your blackout cake deserves a presentation as dynamic as its flavor! When hosting, consider dusting the top of the cake with a light sprinkle of powdered sugar or cocoa powder for an elegant touch.
- Use a cake stand to elevate its presence.
- Garnish with chocolate shavings or fresh mint leaves.
- Slice into generous pieces, and don’t shy away from adding a vibrant berry alongside each slice for a pop of color.
Setting up a dessert table with themed decorations can create an inviting atmosphere. Who could resist a slice of your stunning blackout cake when it’s beautifully displayed? For more engaging ideas on cake presentations, check out sites like Food Network or Kitchn, which offer tons of creative inspiration.
Time Breakdown for Making Blackout Cake
When you set out to create a classic blackout cake, it’s helpful to plan your time efficiently. Let’s break it down!
Preparation Time
Getting everything ready takes about 20-30 minutes. This includes gathering your ingredients like flour, cocoa powder, and the perfect touch of buttermilk. Make sure to read through the recipe in full to avoid unexpected surprises!
Baking Time
Once you’re prepped, the baking process typically takes 30-35 minutes. Keep an eye on your cakes as they rise to that perfect, decadent height—your kitchen will smell amazing!
Cooling and Assembly Time
After baking, let your cakes cool for about an hour. Once they’re cool, you’ll need an additional 30 minutes to assemble and frost. Patience is key here; the more care you take in this step, the more beautiful—and delicious—your blackout cake will be!
For more baking tips, check out Joy of Baking for inspiring recipes and expert advice!
Nutritional Facts for Blackout Cake
When indulging in a decadent blackout cake, it’s good to know what you’re treating yourself to. Here’s a quick rundown of its nutritional profile.
Calories per Slice
A typical slice of blackout cake clocks in around 400 calories. While it’s certainly a dessert meant for special occasions, it can be worth every calorie if you savor every bite!
Sugar Content
This cake is sweet and rich, containing approximately 50 grams of sugar per slice. If you’re watching your sugar intake, consider enjoying a smaller piece to satisfy your cravings without going overboard.
Protein and Fat Content
You can expect about 5 grams of protein and 24 grams of fat per slice of blackout cake. The fat primarily comes from butter and cream used in the recipe, adding that luxurious texture we all love.
Understanding these nutritional facts can help you make informed choices. Enjoy your slice with a cup of coffee or tea, and check out the USDA’s nutrition database for more insights on dessert nutrition.
FAQs about Blackout Cake
How can I make Blackout Cake less sweet?
If you find traditional blackout cake a bit on the sweet side, don’t fret! There are simple strategies to tone down the sweetness without sacrificing flavor. One effective method is to reduce the amount of sugar in both the cake batter and frosting. You can safely cut the sugar by about one-third without a noticeable drop in flavor. Additionally, consider incorporating unsweetened cocoa powder to the cake mix, which adds richness and balances sweetness. For the frosting, using a slightly tangy cream cheese frosting instead of a super-sweet buttercream can also help.
Can I make this cake a day in advance?
Absolutely! In fact, the flavors of blackout cake often improve overnight, allowing the ingredients to meld beautifully. Just make sure to store it in an airtight container or wrap it well with plastic wrap to keep it fresh. If you’re making the cake layers in advance, you can even freeze them for up to a month. Just remember to let them cool completely before wrapping them to prevent moisture loss.
What’s the best way to store leftovers?
Storing leftovers of your delectable blackout cake is easy! Place it in an airtight container and store it in the refrigerator for up to a week. If you prefer, you can also freeze individual slices wrapped tightly in plastic wrap for up to three months. When you’re ready to enjoy, simply thaw it in the refrigerator overnight or let it sit at room temperature for a few hours.
For more tips on baking storage, check out this helpful guide from the USDA. Enjoy your cake to the fullest!
Conclusion on Blackout Cake
Why You’ll Love Making This Recipe
Creating a blackout cake at home is an immensely rewarding experience for both novice and seasoned bakers. This recipe not only showcases rich flavors with its decadent layers of chocolate but also provides a delightful journey through the baking process. The combination of moist cake and velvety frosting gives you a dessert that will surely impress friends and family alike.
What’s more, making your own blackout cake allows you to customize it to your liking—incrementally adding your twist ensures it’s uniquely yours. Plus, the celebration of creating something from scratch is unparalleled! For more inspiring dessert recipes, check out this collection of chocolate treats. Enjoy the process, and watch as your cake becomes a showstopper at any gathering!
PrintBlackout Cake: The Best Indulgent Delight for Chocolate Lovers
Indulge in the rich and decadent flavors of Blackout Cake, a chocolate lover’s dream.
- Prep Time: 15 minutes
- Cook Time: 35 minutes
- Total Time: 50 minutes
- Yield: 8 servings
- Category: Dessert
- Method: Baking
- Cuisine: American
- Diet: Vegetarian
Ingredients
- 1 cup all-purpose flour
- 1 cup unsweetened cocoa powder
- 1 teaspoon baking powder
- 1/2 teaspoon baking soda
- 1/2 teaspoon salt
- 1 cup sugar
- 1/2 cup unsalted butter, softened
- 2 large eggs
- 1 teaspoon vanilla extract
- 1 cup milk
- 1 cup chocolate chips
Instructions
- Preheat the oven to 350°F (175°C) and grease two 9-inch round cake pans.
- In a bowl, whisk together the flour, cocoa powder, baking powder, baking soda, and salt.
- In a separate bowl, cream the sugar and butter until light and fluffy.
- Add the eggs one at a time, mixing well after each addition. Stir in the vanilla.
- Gradually add the dry ingredients to the wet mixture, alternating with the milk.
- Fold in the chocolate chips.
- Pour the batter into the prepared pans and smooth the top.
- Bake for 30-35 minutes or until a toothpick comes out clean.
- Let the cakes cool in the pans for 10 minutes, then transfer them to a wire rack.
Notes
- Serve with chocolate frosting for an extra indulgent treat.
- Make sure to let the cake cool completely before frosting.
Nutrition
- Serving Size: 1 slice
- Calories: 450
- Sugar: 35g
- Sodium: 300mg
- Fat: 20g
- Saturated Fat: 10g
- Unsaturated Fat: 8g
- Trans Fat: 0g
- Carbohydrates: 60g
- Fiber: 3g
- Protein: 5g
- Cholesterol: 50mg