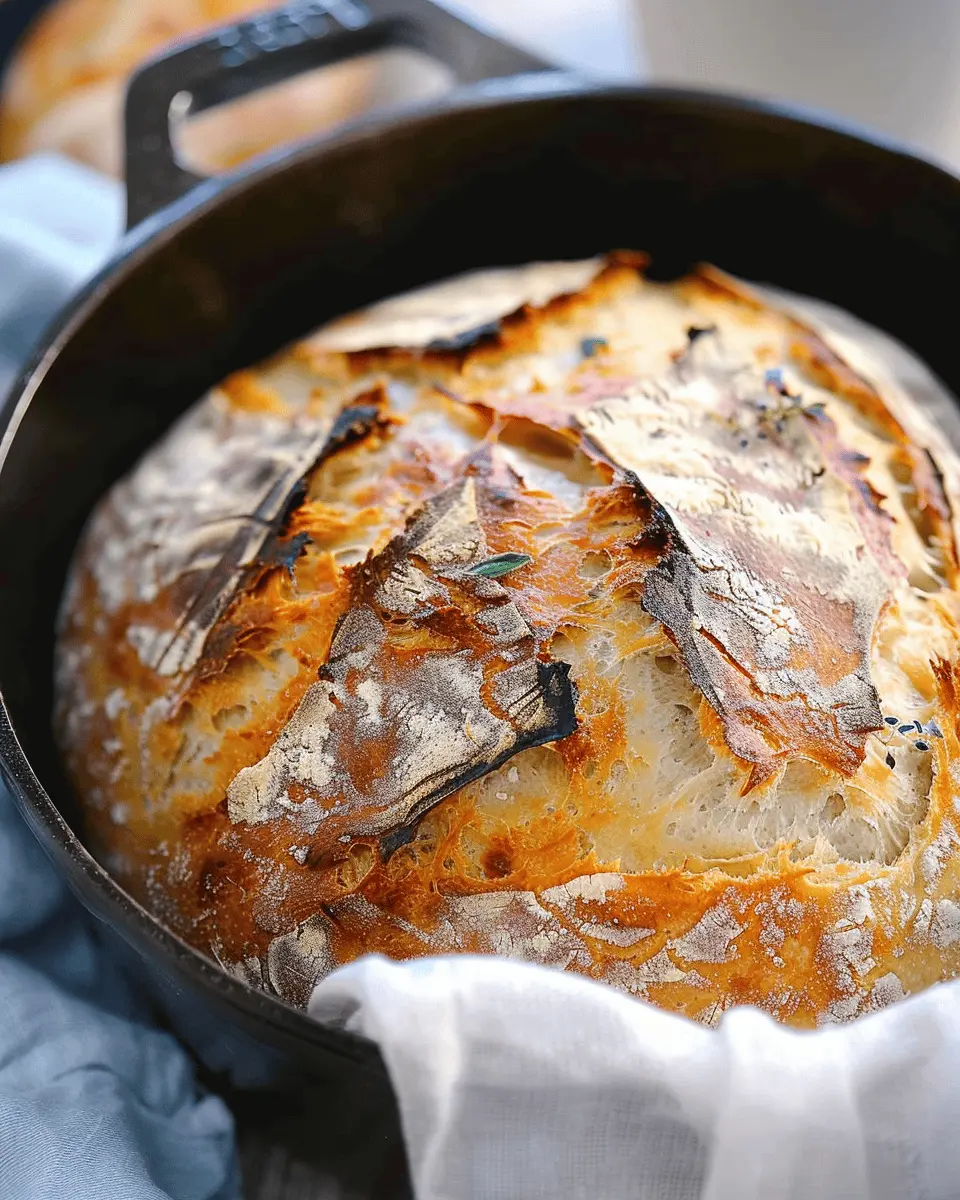
Introduction to Dutch Oven No Knead Bread
Why No Knead Bread?
If you’ve ever dreamed of baking your own bread but felt intimidated by the thought of kneading, you’re in good company. The beauty of Dutch Oven No Knead Bread lies in its simplicity. This method allows you to create a wonderfully crusty loaf without the elbow grease typically required for traditional bread-making. Just imagine: minimal effort, no messy countertops, and best of all, the results are downright impressive.
In essence, no-knead bread relies on a longer fermentation process, which develops flavor and creates beautiful, airy bubbles without the need for kneading. According to expert bakers, this time-consuming method is the secret to achieving that perfect crust and chewy crumb. If you’re curious about the science behind the process, you can delve deeper in articles by well-respected culinary sites such as Serious Eats.
The Joy of Homemade Bread
There’s something truly special about pulling a freshly baked loaf from the oven and experiencing that warm, comforting aroma wafting through your kitchen. Homemade bread brings an unparalleled sense of accomplishment, especially when you realize that it’s accessible to everyone—even those of us with busy schedules.
Imagine setting aside just a few minutes to mix flour, water, and salt, and then letting time work its magic. With just a little patience, you can have a loaf that rivals any artisan bread found at your local bakery. Plus, baking your own bread allows you to customize ingredients to suit your taste. You can experiment with adding herbs, spices, or even chunks of cheese or olives to the dough.
Beyond the practical, there’s a psychological benefit to baking your own Dutch Oven No Knead Bread. In our fast-paced lives, taking the time to engage with a simple, rewarding task can be incredibly gratifying. So why not give it a try? Grab your ingredients, and let’s dive into the delightful world of homemade bread!
In the next sections, I’ll walk you through the step-by-step process to create your own delicious loaf. Trust me, once you try this method, you may find it hard to go back to store-bought bread!
Ingredients for Dutch Oven No Knead Bread
Making Dutch Oven No Knead Bread is not just simple but also rewarding. Let’s dive into the essential components you’ll need to whip up this rustic treat in the comfort of your kitchen.
Basic Ingredients
For the foundation of your bread, you will need the following staples:
- Flour: All-purpose flour works perfectly, but you can also experiment with whole wheat for a heartier loaf.
- Water: Use warm water to help activate the yeast.
- Yeast: A bit of instant yeast will do the trick—no fancy brands required here!
- Salt: This adds flavor and controls the fermentation process, ensuring a perfect rise.
These four ingredients are all you truly need to create a beautiful loaf of your Dutch Oven No Knead Bread. For an in-depth guide on yeast fermentation, check out this comprehensive article.
Optional Add-ins
Want to elevate your Dutch Oven No Knead Bread? Consider these delightful add-ins:
- Herbs: Fresh or dried herbs like rosemary or thyme can add a wonderful aroma.
- Cheese: Shredded cheese, like sharp cheddar or feta, brings richness.
- Seeds: Incorporating sesame or sunflower seeds offers a crunch that contrasts nicely with the bread’s soft texture.
With a few optional ingredients, you can customize this bread to suit your taste and impress your guests. What will you add to make it uniquely yours?
Step-by-Step Preparation of Dutch Oven No Knead Bread
Making Dutch Oven No Knead Bread is a delightful kitchen adventure that offers you the aroma of freshly baked bread with minimal effort. This method is fantastic for young professionals looking to impress friends or simply enjoy a slice of homemade goodness. Let’s dive into the steps!
Mix Ingredients
To kick things off, gather your ingredients. You’ll need:
- 3 cups all-purpose flour
- 1 ½ teaspoons salt
- ½ teaspoon instant yeast
- 1 ½ cups water (room temperature)
In a large mixing bowl, combine the flour, salt, and yeast. This step is as simple as it sounds—just whisk everything together until well-combined. Then, gradually add the water. Mix it all until you have a shaggy, sticky dough. Don’t be surprised if it looks, well, a bit more like a batter than a dough. That’s exactly what we want!
Now, here’s the beauty of this recipe: there’s no need to knead at all! The combination of ingredients and time will work their magic. If you’re looking for more tips on bread baking, the King Arthur Baking Company has fantastic resources.
Let the Dough Rise
Once your dough is mixed, cover the bowl with plastic wrap or a clean kitchen towel. This is where the real magic happens. Set it aside for 12 to 18 hours at room temperature. Yes, you heard that right! It takes time, but this is what gives your bread that gorgeous crust and delightful flavor.
The dough should rise and become bubbly, signaling it’s ready for the next step. Use this time to relax, catch up on your favorite series, or plan your next meal that pairs perfectly with your Dutch Oven No Knead Bread.
Preheat the Dutch Oven
About 30 minutes before you’re ready to bake, place your Dutch oven (yes, you should use a heavy, cast-iron one) in your oven and preheat it to 450°F (230°C). This step is key for achieving that beautifully crispy crust we all crave. It’s also the time to feel a little bit like a magician—everyone loves a dramatic reveal!
Carefully remove the hot Dutch oven using oven mitts, and be cautious—it’s very hot! You can lightly dust the bottom with flour to prevent sticking, although a well-seasoned pot should be fine without it.
Shape the Dough
Once the dough has risen, you’ll want to work it gently. Lightly flour a clean surface and turn the dough out onto it. With floured hands, fold the dough over on itself a couple of times just to shape it into a ball. No pressure here! The idea is to keep as much air inside as possible, so go easy!
Let it rest for about 15 minutes while you prepare your Dutch oven. This step gives you time to catch your breath and maybe even enjoy a sip of your favorite non-alcoholic beverage—think sparkling wine or even homemade iced tea.
Bake and Cool
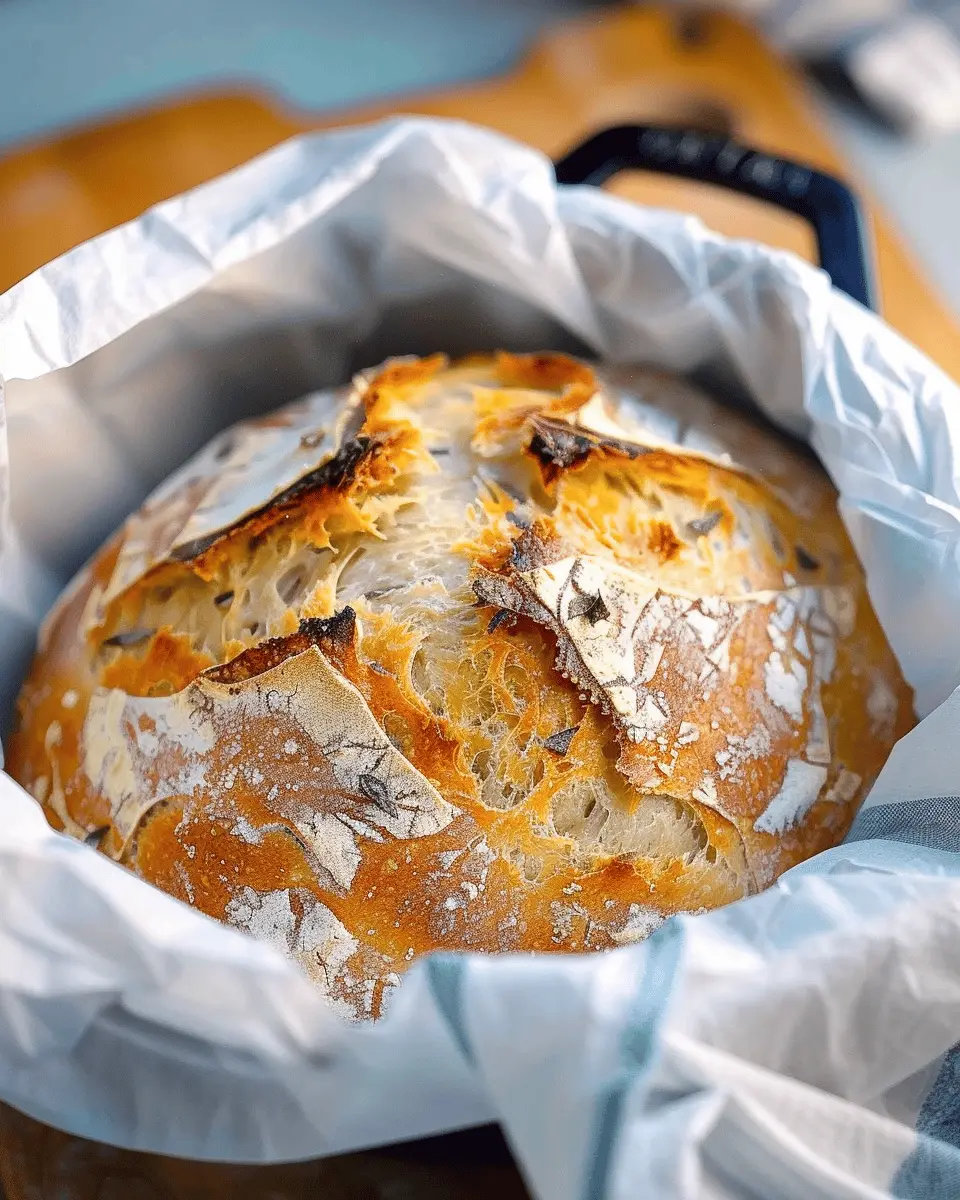
Carefully place the dough into your preheated Dutch oven. If you want to get fancy, you can score the top with a sharp knife to allow for a beautiful, rustic look. Cover it with the lid and bake for 30 minutes. Then, remove the lid and bake for an additional 15-20 minutes until it’s a rich golden brown.
Once your Dutch Oven No Knead Bread is done, carefully transfer it to a wire rack to cool. The hard part? Waiting! Let it cool for at least 30 minutes to avoid gummy bread.
And there you have it! Simple steps to achieve homemade Dutch Oven No Knead Bread that’ll make you the star of your kitchen. Want to shop for essential baking tools? Check out Amazon for great options.
Bread baking is not only a useful skill but also a charming way to bring warmth into your home. Happy baking!
Variations of Dutch Oven No Knead Bread
Flavored Bread Options
One of the best parts about making Dutch Oven No Knead Bread is how easily you can customize the flavor. Here are some ideas to elevate your loaves:
-
Herb-infused Bread: Mix in dried herbs like rosemary, thyme, or oregano for a fragrant twist. These add an aromatic touch that’s perfect for pairing with soups.
-
Savory Add-ins: Experiment with ingredients such as sun-dried tomatoes, olives, or even Turkey Bacon bits. These give your bread a hearty, gourmet feel that’s great for sandwiches.
-
Cheesy Delight: Stir in chunks of your favorite cheese—think sharp cheddar or creamy feta—to create a cheesy pull that’s irresistible.
Want more ideas? Check out related resources here for a deeper dive into flavor combinations.
Alternative Flour Ideas
If you’re feeling adventurous or have dietary restrictions, consider using alternative flours to make your Dutch Oven No Knead Bread even more special. Options include:
-
Whole Wheat Flour: This adds a nuttier flavor and more fiber. Just be aware it may require slightly more water due to higher absorption.
-
Almond Flour: For a gluten-free version, almond flour can be a game-changer. You may need to adjust your liquid levels to get the right dough consistency.
-
Spelt Flour: This is another fantastic option that offers a mild, sweet flavor. It’s easier to digest compared to regular wheat, making it a popular choice!
Which variation will you try first? With so many possibilities, your Dutch Oven No Knead Bread can become a canvas for creativity. Happy baking!
Cooking Tips and Notes for Dutch Oven No Knead Bread
Common Mistakes to Avoid
When diving into Dutch Oven No Knead Bread, it’s easy to make a few rookie mistakes. Here are some to watch out for:
- Overlooking Rest Time: Ensure you let the dough rest for at least 12 hours. This fermentation is crucial for flavor and texture.
- Ignoring Hydration Levels: If your dough appears too sticky, don’t be tempted to add too much flour. A wet dough leads to a beautifully airy loaf.
- Using the Wrong Vessel: Your Dutch oven needs to be a heavy, oven-safe pot with a lid. This retains steam, creating that lovely crust.
Enhancements for Better Flavor
Want to elevate your Dutch Oven No Knead Bread? Here are some tasty ideas:
- Herbs and Spices: Consider adding dried rosemary or garlic powder into the dough for aromatic flavor notes.
- Cheese Addition: Fold in some shredded cheese right before baking for a delightful cheesy crust.
- Alternative Add-ins: Experiment with seeds like sunflower or pumpkin for crunch.
For more bread tips, you might find this King Arthur Baking guide handy! Happy baking!

Serving Suggestions for Dutch Oven No Knead Bread
Pairings with Spreads
Your Dutch Oven No Knead Bread is versatile and pairs beautifully with a variety of spreads. Imagine slathering it with creamy butter or rich olive oil. For something different, a robust hummus or a tangy goat cheese spread can elevate your bread experience. If you enjoy sweet flavors, a light drizzle of honey or a smear of fruit preserves complements the rustic flavor of the bread perfectly.
- Butter with sea salt
- Olive oil infused with herbs
- Hummus or baba ganoush
- Cream cheese with chives
Best Types of Soups or Dishes
The warm and crusty texture of your Dutch Oven No Knead Bread makes it an excellent companion to soups and hearty dishes. Consider pairing it with a classic tomato basil soup or a rich butternut squash soup for a cozy meal. If you’re in the mood for something heartier, a beef chili or a comforting chicken noodle soup can be made even better with a side of this bread.
- Tomato basil soup
- Beef chili
- Butternut squash soup
- Chicken noodle soup
Whether you’re hosting a dinner party or enjoying a quiet night in, your Dutch Oven No Knead Bread is sure to impress and satisfy. Check out more soup pairing ideas here to explore perfect matches for your freshly baked bread!
Time Breakdown for Dutch Oven No Knead Bread
Preparation Time
Getting started with your Dutch Oven No Knead Bread is a breeze! You’ll spend about 10 to 15 minutes mixing your ingredients, which include flour, water, salt, and yeast. This simple process can be a great way to unwind after a busy day. Just make sure to measure everything accurately for the best results!
Rising Time
The magic happens during the rising phase, taking about 12 to 18 hours. Yes, it requires some patience, but that’s what makes the bread so delicious! It’s the perfect time for you to engage in other activities, like catching up on your favorite show or planning your next meal.
Baking Time
When you’re finally ready to bake, set aside about 45 minutes to an hour. Preheating your Dutch oven before baking is essential for achieving that crispy crust we all crave. Trust me, the aroma that fills your kitchen will be worth the wait!
Total Time
All in all, from start to finish, you’re looking at approximately 13 to 19 hours. While this may seem like a significant commitment, much of that time is hands-off, giving you the freedom to enjoy life while your bread develops incredible flavors. For more tips on getting consistent results, check out resources like the King Arthur Baking Company. Happy baking!
Nutritional Facts for Dutch Oven No Knead Bread
When you whip up a batch of Dutch Oven No Knead Bread, it’s not just about the delightful aroma filling your kitchen. Understanding its nutritional values can help you enjoy it even more! Here’s a quick breakdown:
Calories
A slice of this crusty bread typically contains around 200 calories. It’s perfect for a hearty meal without going overboard.
Carbohydrates
With about 40 grams of carbohydrates per serving, your Dutch Oven No Knead Bread offers a satisfying energy boost, especially after a long day.
Protein
You’ll find around 6 grams of protein in each slice, making it a decent partner to toppings like turkey bacon or chicken ham for added nutrition.
Sodium
Keep an eye on the sodium content; roughly 400 milligrams per slice appeals to many health-conscious eaters, so consider enjoying it with a low-sodium spread.
For more in-depth nutritional insights, check out resources like the USDA FoodData Central or NutritionData. Making informed choices will enhance your love for homemade bread. Happy baking!
FAQs about Dutch Oven No Knead Bread
How do I know if my bread is done?
When you make Dutch Oven No Knead Bread, the best indicator of doneness is the crust’s color. Look for a golden-brown hue; you can also knock on the bottom of the loaf—if it sounds hollow, it’s ready. For an extra measure, use a kitchen thermometer to check the internal temperature; it should range between 200°F and 210°F.
Why is my bread too dense?
A dense bread can be a letdown! This might happen if your dough isn’t proofed long enough, or if you didn’t adequately incorporate air into it. Make sure to cover your dough and let it rise in a warm spot for at least 12-18 hours. Factors like the temperature of your environment or using old yeast could also affect the final product. For more troubleshooting tips, check out the King Arthur Baking blog which is a fantastic resource.
Can I use whole wheat flour instead?
Absolutely! You can substitute whole wheat flour for a heartier flavor. However, keep in mind that this might affect the texture, making it denser. If you go this route, consider adding a little more water to balance the hydration the whole wheat flour absorbs.
How should I store the bread?
To keep your Dutch Oven No Knead Bread fresh, store it in a paper bag at room temperature for up to three days. For longer storage, slice it and freeze it in an airtight container. Just pop a slice in the toaster when you’re ready, and you’ll have delicious, fresh-tasting bread in no time!
For more on keeping your bread fresh, feel free to check piecemycake.com!
Conclusion on Dutch Oven No Knead Bread
In summary, Dutch Oven No Knead Bread is not just about baking; it’s about embracing the joy of creating something delicious with minimal effort. This method allows for a crusty exterior and a soft, airy interior—essentially, the perfect loaf. You don’t need to be a professional baker to enjoy homemade bread that rivals anything from a fancy bakery.
If you’ve never tried no knead bread before, I encourage you to give it a go. The simplicity and freedom of the recipe mean you can customize it with herbs, spices, or even cheese. Feel free to unleash your inner artisan. For tips on ingredient substitutions, check out resources like King Arthur Baking for expert advice. And remember, every loaf you bake is a learning experience, so have fun with it!
PrintDutch Oven No Knead Bread: Effortless, Rustic Comfort at Home

Discover how to make delicious Dutch Oven No Knead Bread with minimal effort for a rustic feel at home.
- Prep Time: 15 minutes
- Cook Time: 45 minutes
- Total Time: 12 hours 60 minutes
- Yield: 1 loaf
- Category: Breads
- Method: Baking
- Cuisine: American
- Diet: Vegetarian
Ingredients
- 3 cups all-purpose flour
- 1 ½ teaspoons salt
- ¼ teaspoon instant yeast
- 1 ½ cups water
Instructions
- In a large bowl, mix the flour, salt, and yeast.
- Add water and stir until a shaggy dough forms.
- Cover the bowl and let it rest for 12-18 hours.
- Preheat your Dutch oven to 450°F.
- Shape the dough and transfer it to the pot.
- Bake covered for 30 minutes, then uncovered for an additional 15 minutes.
- Let it cool before slicing.
Notes
- Use parchment paper for easier removal from the pot.
- Experiment with herbs for added flavor.
Nutrition
- Serving Size: 1 slice
- Calories: 120
- Sugar: 0.5g
- Sodium: 190mg
- Fat: 0.5g
- Saturated Fat: 0g
- Unsaturated Fat: 0.5g
- Trans Fat: 0g
- Carbohydrates: 25g
- Fiber: 1g
- Protein: 4g
- Cholesterol: 0mg