Introduction to No-Bake Avalanche Cookies
Are you on the lookout for a dessert that’s not only delicious but also easy to whip up? Enter no-bake avalanche cookies. These treats bring a delightful twist to your standard cookie recipe by eliminating the need for an oven. Perfect for busy professionals or anyone who loves to indulge in something sweet without the fuss, these cookies are sure to become your new go-to treat.
What are No-Bake Avalanche Cookies and Why are They a Must-Try?
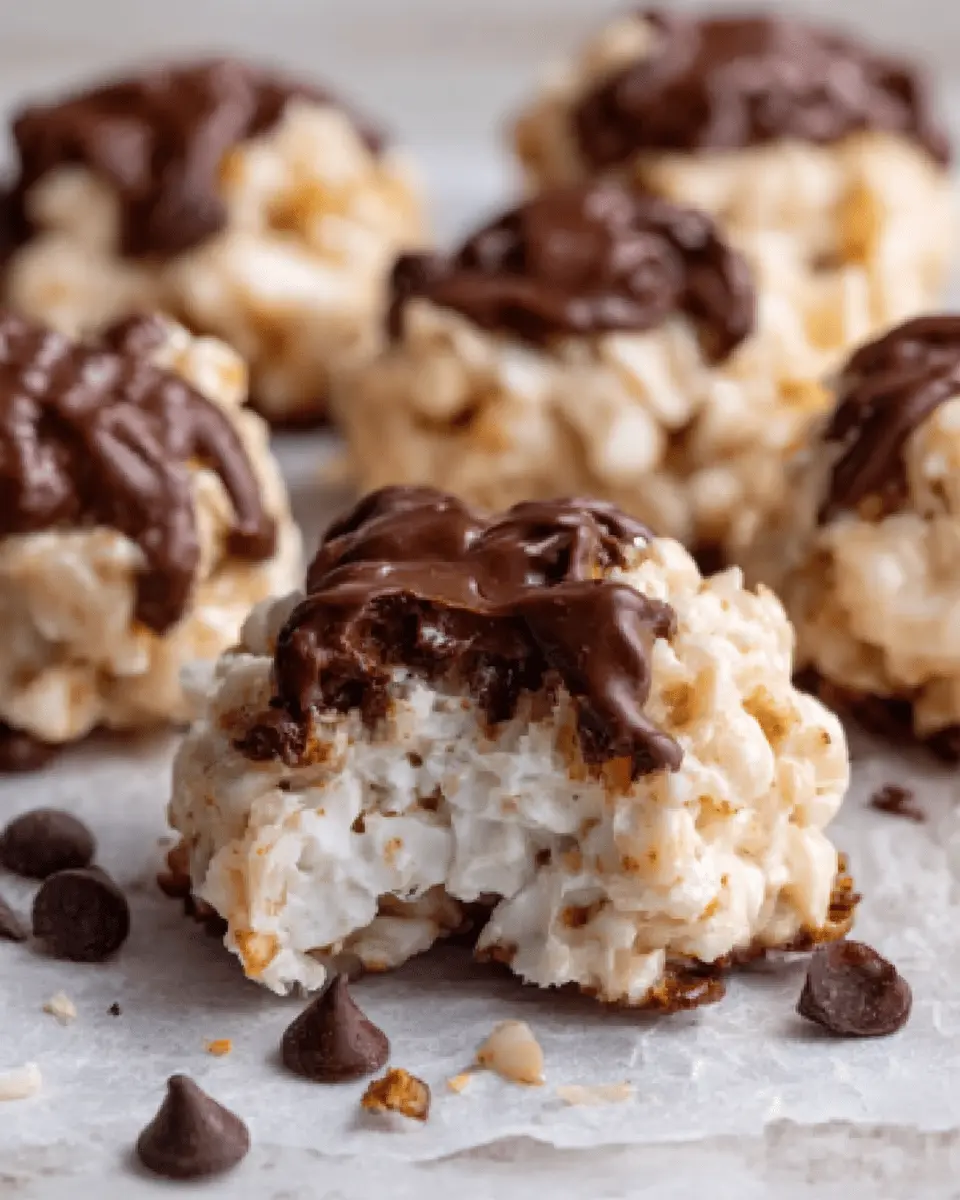
So, what exactly are these no-bake avalanche cookies? Imagine a harmonious blend of creamy peanut butter, crunchy rice cereal, and pools of melted chocolate. Sounds delicious, right? The beauty of these cookies lies in their simplicity—you combine a few key ingredients, chill them, and voilà! You’ve got a delicious dessert that’s ideal for gatherings, celebrations, or even just a quick snack after a long day.
Here’s why you should consider making them:
-
Quick Preparation: These cookies can be made in about 15 minutes. You won’t need to preheat the oven or wait for anything to bake, which is a blessing for those hectic days.
-
Versatile Ingredients: The basic components are customizable. Whether you prefer smooth or chunky peanut butter, dark or milk chocolate, you can tweak the recipe to match your flavor preferences.
-
No Baking Required: This is a great option for those who may not yet feel comfortable in the kitchen or for anyone living in a small space where baking might not be feasible.
-
Fun for All Ages: Making these cookies can be a delightful activity to do with friends, family, or even kids. Get everyone involved in mixing and shaping the cookies for a fun bonding experience.
-
Family-Friendly: Since they don’t require any cooking, you can easily adapt the recipe for various dietary needs by swapping out ingredients.
In short, no-bake avalanche cookies are a delightful treat that you definitely need to try. Not only do they promise indulgence with every bite, but they also save you time and energy in the kitchen. Give them a go and discover why they’re becoming a staple dessert for many.
For more delightful no-bake recipes, consider checking out sources like Delish and Food Network for inspiration!
Ingredients for No-Bake Avalanche Cookies
Essential ingredients for a delicious sweet treat
Creating scrumptious no-bake avalanche cookies is hassle-free, and the ingredients are likely already in your pantry! Here’s what you’ll need:
- Peanut Butter: The key to rich creaminess. Opt for natural peanut butter for a healthier twist.
- Rolled Oats: Use old-fashioned oats for that perfect chewy texture and heartiness.
- Rice Cereal: Think of the crunch! Crisped rice cereal adds that delightful snap.
- Chocolate Chips: I suggest semi-sweet or dark for a decadent touch, but feel free to experiment with milk chocolate for a sweeter flavor.
- Marshmallows: Mini marshmallows melt beautifully and give a fun, gooey quality.
- Turkey Bacon or Chicken Ham: For a surprising salty crunch, these alternatives add unexpected flavor.
Want to take your cookies to the next level? Consider adding nuts like almonds or walnuts for extra protein and crunch. You can read more about the nutritional benefits of oats here. With these simple ingredients, you’ll whip up a treat that’s sure to become a favorite. Enjoy the sweetness!
Preparing No-Bake Avalanche Cookies
No-bake avalanche cookies are a delightful treat, perfect for satisfying those late-night cravings or impressing guests at your next get-together. They’re incredibly easy to make, requiring no oven and minimal fuss. Let’s dive right into the fun of preparing these sweet delights!
Gather Your Ingredients and Tools
The first step in whipping up no-bake avalanche cookies is to collect everything you’ll need. Here’s a straightforward list:
-
Ingredients:
-
1 cup of creamy peanut butter
-
2 cups of white chocolate bark (or chips)
-
3 cups of crispy rice cereal
-
1 cup of mini marshmallows
-
1/2 cup of finely chopped nuts (optional)
-
Additional toppings (such as sprinkles or more chocolate)
-
Tools:
-
A microwave-safe bowl
-
A spatula
-
Baking sheet lined with parchment paper
-
Mixing bowl
Make sure to have everything within arm’s reach, so you can focus on creating your cookies without interruptions!
Melt the White Chocolate Bark
Now we’re entering the fun part — melting that white chocolate bark! In a microwave-safe bowl, add your white chocolate bark and heat it in intervals of 30 seconds. Stir between each round to ensure even melting. It’s important to watch closely, as chocolate can quickly go from melty to burnt. If you’d like tips on melting chocolate perfectly, check out this guide on melting chocolate techniques.
Combine the Peanut Butter with the Melted Chocolate
Once your white chocolate is smoothly melted, it’s time to add the peanut butter. Pour the creamy peanut butter into the bowl with the melted chocolate and mix well. You want a luscious, velvety mixture that blends both flavors smoothly. The delightful combination of chocolate and peanut butter is what makes these no-bake avalanche cookies truly irresistible.
Mix in the Dry Ingredients
Next up, gently fold in your dry ingredients. Add the crispy rice cereal and mini marshmallows, and if you’re feeling adventurous, the chopped nuts too. Use the spatula to combine everything carefully; you want to coat the dry ingredients without crushing them. The goal here is to balance texture and flavor, turning your melty mixture into the cookie dough of your dreams.
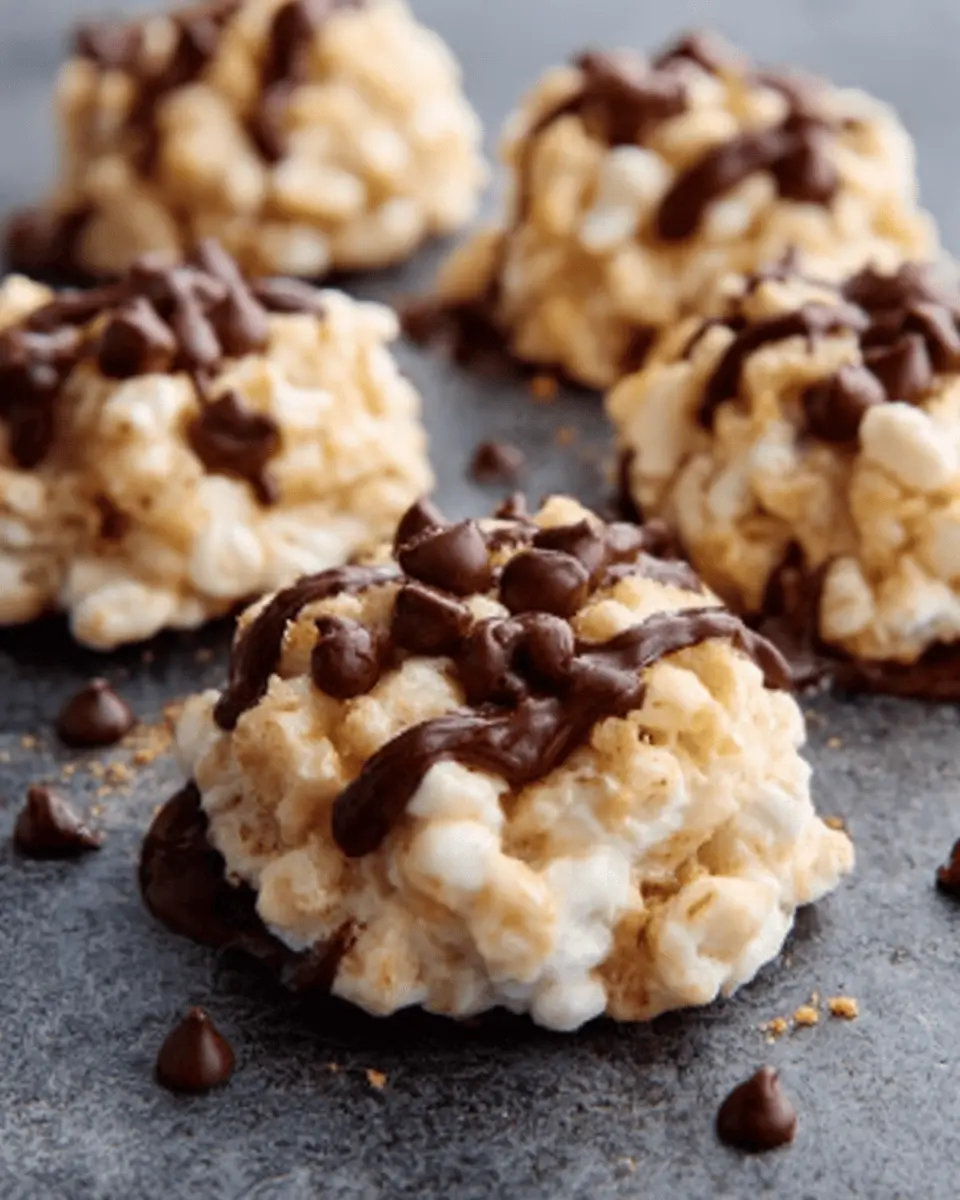
Form the Cookies and Add Toppings
Here comes the creative part! Using a spoon, scoop out portions of the mixture and form them into cookie shapes on your lined baking sheet. Don’t worry about them being perfectly uniform; the charm of no-bake avalanche cookies is in their homemade feel. If you’d like, sprinkle some additional toppings on each cookie, whether it’s more mini marshmallows, nuts, or colorful sprinkles to jazz them up.
Chill Until Set
The final step is critical — you need to let your cookies chill so they firm up nicely. Pop the baking sheet into the refrigerator for about an hour. This is the time to tidy up your kitchen and maybe grab a snack. The anticipation of tasting your no-bake cookies will be worth it!
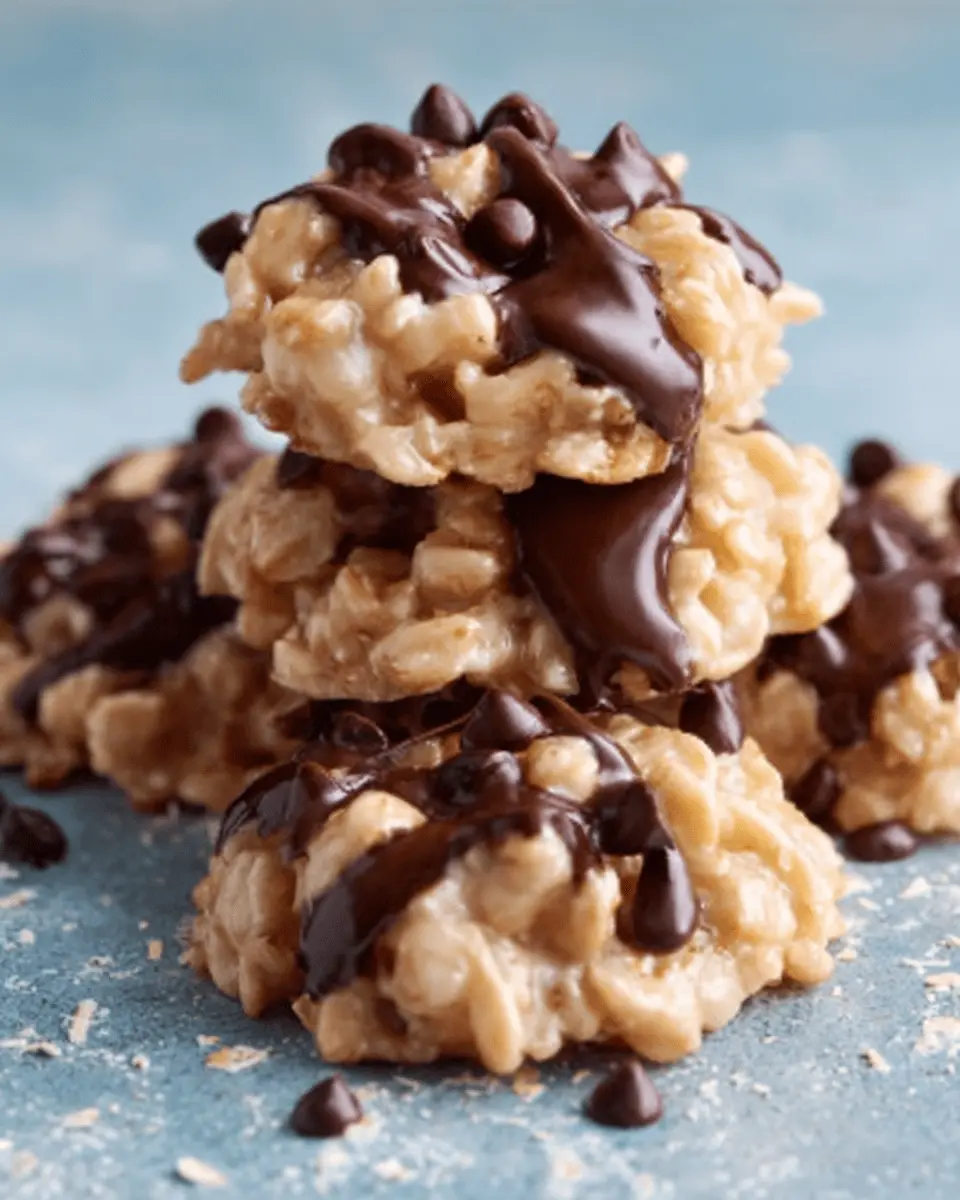
After they’ve chilled and firmed up, it’s time to indulge in your homemade no-bake avalanche cookies. They’re perfect for sharing, or perhaps just keeping all to yourself!
By following this simple guide, you’ll have a delicious batch of cookies ready in no time. These treats are versatile, so feel free to get creative with your mix-ins and toppings! Happy baking, or should I say, no-baking!
Variations on No-Bake Avalanche Cookies
Adding Nuts for Extra Crunch
If you’re looking to elevate your no-bake avalanche cookies, consider incorporating nuts! Nuts not only add a delightful crunch but also pack in some added nutrition.
- Almonds: Their subtle flavor pairs beautifully with chocolate.
- Pecans: Add a bit of sweetness and a chewy texture.
- Walnuts: Rich in omega-3 fatty acids, they offer a hearty bite.
Feel free to experiment with different varieties or even a mix. Toasting your nuts beforehand can enhance their flavor, giving your cookies an extra depth that’s hard to resist.
Exploring Different Chocolate Options
Chocolate is the star of no-bake avalanche cookies, and there are numerous ways to let it shine even brighter! While classic chocolate chips work wonders, why not explore other chocolate varieties?
- Dark Chocolate: For a rich, sophisticated twist, use dark chocolate chips or melted dark chocolate. This variation not only tastes divine but also adds antioxidants that can benefit your health.
- White Chocolate: If you’re in the mood for something sweeter, replace some of the chocolate with white chocolate chips. It creates a beautiful contrast with the other flavors.
- Peanut Butter Chips: For a nutty kick, these chips can complement the other elements perfectly, adding a cozy, comforting taste.
Don’t hesitate to include flavors from local sources too. Sites like The Spruce Eats provide fantastic ideas for gourmet chocolate options that you could integrate into your cookies.
In a world where flavor and texture collide, your no-bake avalanche cookies can become a canvas of creativity. What combinations will you try?
Cooking Tips and Notes for No-Bake Avalanche Cookies
Preventing Cookies from Sticking
Enjoying your no-bake avalanche cookies shouldn’t come with the frustration of sticky remnants clinging to your baking tray. To prevent this, line your tray with parchment paper before dropping the cookie mixture. This not only helps them release effortlessly but also makes for easy cleanup! If you have a silicone mat, that’s an excellent alternative as well. Additionally, consider lightly spraying the parchment with non-stick cooking spray for extra insurance.
Storage Tips for Freshness
To keep your no-bake avalanche cookies fresh and delicious, store them in an airtight container at room temperature. They’re best enjoyed within a week, but you can also refrigerate them to extend their shelf life up to two weeks. If you plan to enjoy them later, try freezing them. Just layer the cookies between parchment paper and place them in a freezer-safe container. When you’re ready to indulge, simply thaw them in the fridge for a few hours.
For more tips on food storage, check out resources from the USDA for best practices. Happy baking!
Serving suggestions for No-Bake Avalanche Cookies
Creative ways to serve and enjoy
No-bake avalanche cookies are wonderful on their own, but there are plenty of ways to elevate your serving game! Here are some fun ideas that will make these delightful treats even more enjoyable:
-
Cookie Sandwiches: Pair two no-bake avalanche cookies with a scoop of your favorite ice cream or yogurt in between. This creates an adorable and indulgent dessert that’s perfect for warm days.
-
Mix It Up: Consider adding chocolate drizzle or a sprinkle of sea salt on top before serving. This little touch can make them look gourmet while enhancing flavor.
-
Flavor Variations: Try introducing different mix-ins like dried fruits or nuts for personalized flavors. These small changes can transform your no-bake avalanche cookies into a unique and exciting treat.
-
Pairing Suggestions: Serve these cookies alongside a hot cup of coffee or herbal tea for a cozy afternoon snack.
When hosting friends or family, these serving suggestions can elevate the no-bake avalanche cookies experience from simple to spectacular!
For more creative ideas on dessert pairings, check out The Spruce Eats for inspiration.
Time breakdown for No-Bake Avalanche Cookies
When you’re craving a sweet and indulgent treat without the hassle of baking, these no-bake avalanche cookies are a perfect choice! Let’s take a closer look at how you can manage your time effectively while making these delicious cookies:
Preparation time
Getting your ingredients ready and mixing everything together takes about 15 minutes. Just gather your ingredients like oats, chocolate chips, and peanut butter, and you’ll be well on your way!
Chilling time
Once you’ve formed the cookie dough, place it in the fridge for 1 hour. This allows the cookies to firm up perfectly, ensuring the best texture when you bite in.
Total time
In total, you’ll spend approximately 1 hour and 15 minutes from start to finish. The wait time is definitely worth it when you sink your teeth into these scrumptious no-bake avalanche cookies!
For further tips on optimizing your time in the kitchen, check out this article on meal prep for techniques that can save you even more time. And if you’re interested in more sweet treats, consider exploring the benefits of using natural sweeteners found in this detailed guide.
Nutritional Facts for No-Bake Avalanche Cookies
Calories per serving
You’re probably wondering about the calories in no-bake avalanche cookies. Typically, one cookie packs around 150-200 calories. This makes them a delightful treat without the guilt, especially when enjoyed in moderation.
Breakdown of key nutrients
When indulging in these cookies, it’s important to recognize their nutritional benefits:
- Protein: These cookies often include ingredients like peanut butter, which provides a boost of protein—great for those who lead an active lifestyle.
- Fats: The healthy fats from nut butters contribute to satiety, helping you feel full longer. This is key for maintaining energy throughout your day.
- Carbohydrates: With sugars from chocolate and oats, you’ll get an instant energy kick. However, the oats also offer fiber, which is beneficial for digestion.
These nutritional attributes make no-bake avalanche cookies not just a treat but a somewhat wholesome choice, especially when compared to store-bought options. For more information on healthy eating, check out sources like the USDA Nutrition Guidelines.
FAQs about No-Bake Avalanche Cookies
Can I make these cookies vegan?
Absolutely! Making no-bake avalanche cookies vegan is quite simple. Instead of using regular chocolate or butterscotch chips, opt for dairy-free versions. For the sticky element, substitute regular butter with coconut oil or a plant-based margarine. Also, you can replace traditional peanut butter with almond butter or sun butter for a nut-free alternative. This way, you can enjoy delicious cookies without any animal products!
How long do they last in the fridge?
Once you’ve whipped up a batch of those no-bake avalanche cookies, you might wonder how long you can store them. Typically, these cookies last about 1 week in the fridge if stored in an airtight container. Just a quick tip: to keep them fresh longer, make sure they are completely cooled before sealing them. Need a snack to share during your next gathering? These cookies can hold up quite well for a week!
Can I use different types of cereal?
Yes, one of the best aspects of making no-bake avalanche cookies is that you can customize them! Feel free to swap out the recommended cereal for your favorites. Rice Krispies, Cheerios, or even granola can all work beautifully in this recipe. Just remember to keep an eye on the texture—some cereals might add a bit more crunch, while others can create a chewier bite. Explore these delightful options and make the recipe your own!
For more variations, check out this recipe resource for inspiration. Happy baking (or no-baking)!
Conclusion on No-Bake Avalanche Cookies
Recap of why these cookies are a delightful choice
In summary, no-bake avalanche cookies offer a simple yet satisfying dessert option that fits perfectly into a busy lifestyle. These cookies are not only quick to prepare but also provide a delightful combination of flavors and textures that everyone will love.
- Ease of Preparation: With no baking required, these cookies eliminate the stress of monitoring the oven.
- Customizable Ingredients: Feel free to tweak the recipe by adding your favorite nuts or swapping in a different type of chocolate.
Plus, they’re an excellent way to impress guests at your next gathering. Check out this recipe guide for more fun and unique dessert ideas. So, whip up a batch of no-bake avalanche cookies and enjoy all the sweet, gooey goodness without any of the hassle!
PrintNo-Bake Avalanche Cookies: The Best Sweet Treats You’ll Make

Experience the delightful combination of flavors and textures with these easy-to-make no-bake avalanche cookies, perfect for a sweet treat.
- Prep Time: 15 minutes
- Cook Time: 0 minutes
- Total Time: 15 minutes
- Yield: 24 cookies
- Category: Dessert
- Method: No-Bake
- Cuisine: American
- Diet: Vegetarian
Ingredients
- 2 cups rice cereal
- 1 cup mini marshmallows
- 1 cup white chocolate chips
- 1/2 cup creamy peanut butter
- 1/4 cup powdered sugar
Instructions
- In a large mixing bowl, combine the rice cereal and mini marshmallows.
- In a saucepan over low heat, melt the white chocolate chips and peanut butter together until smooth.
- Pour the melted mixture over the cereal and marshmallows, stirring until well coated.
- Add the powdered sugar and mix until fully incorporated.
- Drop spoonfuls of the mixture onto a parchment-lined baking sheet and let them cool until set.
Notes
- For added flavor, consider mixing in some chopped nuts or drizzling chocolate on top.
Nutrition
- Serving Size: 1 cookie
- Calories: 120
- Sugar: 10g
- Sodium: 50mg
- Fat: 7g
- Saturated Fat: 3.5g
- Unsaturated Fat: 2.5g
- Trans Fat: 0g
- Carbohydrates: 14g
- Fiber: 0g
- Protein: 2g
- Cholesterol: 2mg