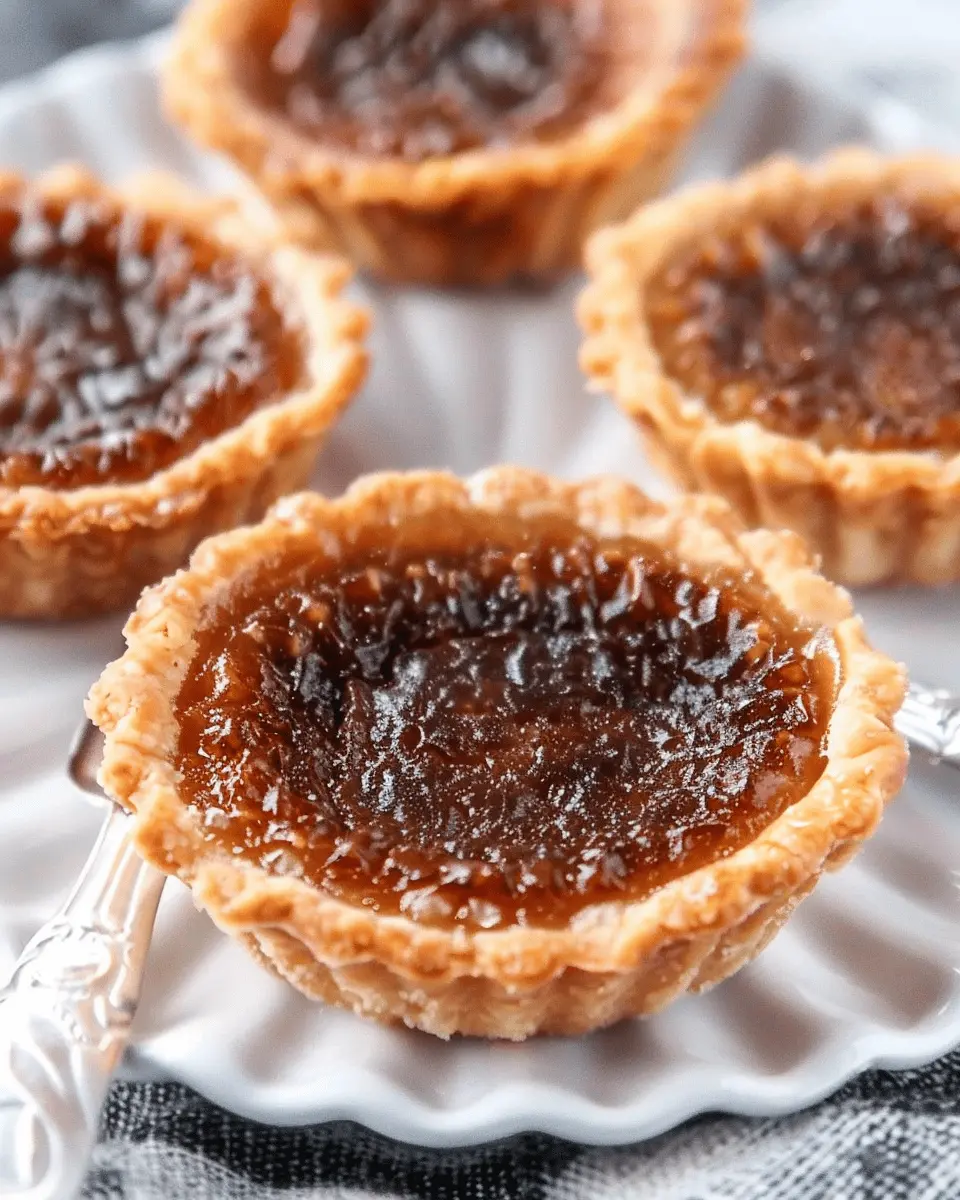
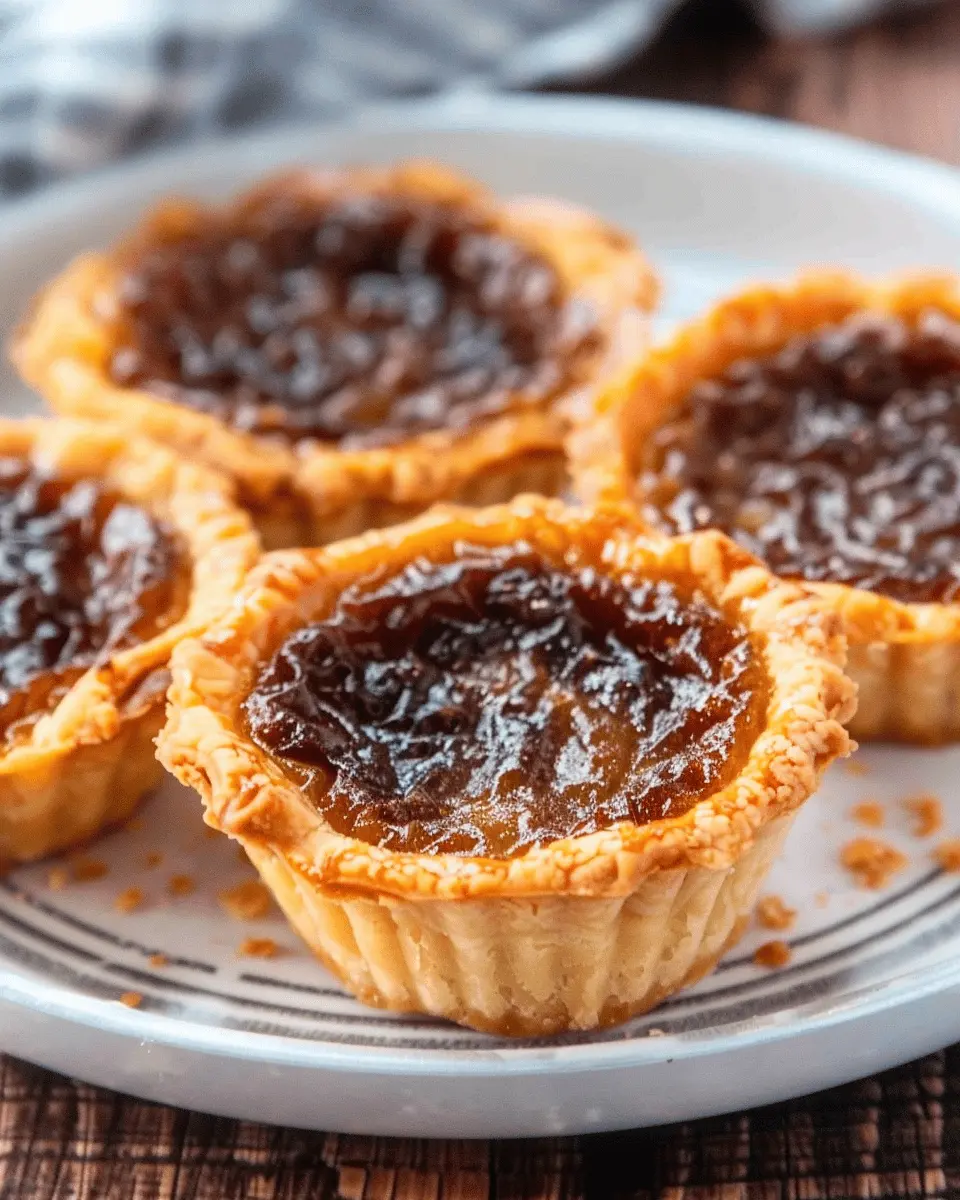
Introduction to Classic Canadian Butter Tarts
Whether you’re a fan of sweet indulgences or just exploring the rich tapestry of Canadian desserts, classic Canadian butter tarts are a delightful must-try. Originating in Ontario during the 19th century, these little pastries pack a punch of flavor and texture that’s hard to resist.
What makes classic Canadian butter tarts a must-try?
At their heart, butter tarts are all about simplicity yet deliver an irresistible combination of sweetness and a gooey filling. Traditionally made with a flaky pastry shell, they’re filled with a luscious mixture of butter, sugar, and eggs, a beautiful marriage that gives the tart its signature melt-in-your-mouth texture. What sets them apart from other desserts is the option to add a touch of creativity—some enthusiasts opt for raisins or pecans, while others keep it classic and let the buttery goodness shine.
Imagine biting into a warm tart, the buttery crust crumbles just slightly, revealing that sweet, syrupy filling that pools in the center. It’s that mix of crunchy and gooey that leaves you wanting more. A perfect treat to serve at gatherings, taking them home to friends, or even indulging in solo after a long day—it’s a pastry experience that resonates with many nostalgic memories.
Did you know that according to a survey by the Canadian Living magazine, approximately 80% of Canadians have their own variation of this beloved dessert? That kind of connection to a dish really tells you something about its popularity!
In addition to being delicious, classic Canadian butter tarts are a testament to the beauty of simplicity in baking. With just a handful of ingredients and a little love, you can create a dessert that feels truly special.
Stay tuned as we dive into the recipe and tips for crafting the perfect batch of these exquisite tarts. Whether you choose to experiment with fillings or stick to tradition, you’ll quickly see why these little gems are a staple in Canadian cuisine. Don’t miss the chance to savor a bite of this iconic dessert!
Ingredients for Classic Canadian Butter Tarts
When it comes to baking one of Canada’s most beloved treats, assembling the right ingredients is key. Classic Canadian butter tarts are simple yet decadent, and the beauty lies in using fresh, quality components. Here’s what you’ll need:
For the Pastry
- All-purpose flour: 1 ½ cups for a flaky crust
- Cold butter: ½ cup, diced, to create that rich flavor
- Ice water: About 2-3 tablespoons, for binding
For the Filling
- Brown sugar: 1 cup, bringing sweetness and caramel notes
- Maple syrup: ½ cup, a quintessential Canadian addition
- Eggs: 2 large, for that perfect custard-like texture
- Vanilla extract: 1 teaspoon, to amplify the flavors
- Salt: A pinch to enhance sweetness
Optional Add-ins
- Nuts: Chopped pecans or walnuts for crunch
- Raisins: A classic twist for a chewy texture
Using quality ingredients can elevate your classic Canadian butter tarts from average to extraordinary! If you’re looking for tips on baking techniques or ingredient substitutes, check out this guide for more insights. Happy baking!
Step-by-step Preparation of Classic Canadian Butter Tarts
Making classic Canadian butter tarts is easier than you might think, and they’re the perfect treat to impress your friends or simply enjoy on a cozy evening at home. Let’s walk through each step together for a delicious dessert that highlights the simple yet wonderful flavors of Canada.
Preheat the oven
Start by preheating your oven to 375°F (190°C). This is a crucial step because it ensures that the butter tarts bake evenly. While your oven is warming up, you can focus on preparing your pastry and filling, which makes the process feel seamless.
Prepare the pastry shells
For the tarts, you can either make your own pastry or use store-bought pie pastry for convenience. Here’s a quick rundown of how to make your own:
- Ingredients for pastry:
- 1 ½ cups all-purpose flour
- ½ cup unsalted butter (cold and cubed)
- 1/4 teaspoon salt
- 4-5 tablespoons ice water
- In a mixing bowl, combine the flour and salt.
- Cut in the butter using a pastry cutter or your fingertips until the mixture resembles coarse crumbs.
- Gradually add the ice water, mixing until the dough comes together.
- Roll the dough out on a floured surface and cut into circles to line each muffin tin cup.
Ensure your pastry is not too thick; a good thickness is about 1/8 inch. This will allow for that crisp texture we all love.
Melt the butter
Now, let’s melt the butter. You’ll need about 1/2 cup of unsalted butter for the filling. Gently melt it in a saucepan over low heat or in the microwave. Just make sure it doesn’t bubble up; we’re looking for liquid gold here.
Combine butter and brown sugar
In a large mixing bowl, take your melted butter and add 1 cup of packed brown sugar. This ingredient is key for that deep, sweet flavor profile typical of classic Canadian butter tarts. Whisk them together until the mixture is smooth and well combined.
Mix together the other ingredients
Now, let’s add some deliciousness to that mixture. You’ll need:
- 2 large eggs
- 1 tablespoon of vanilla extract
- A pinch of salt
- 1 cup of raisins or chopped nuts (pecans or walnuts) – optional, depending on your preference.
Add the eggs one at a time to the butter and brown sugar mix, whisking until fully incorporated. Then add the vanilla and salt to enhance the flavor. If you’re feeling adventurous, toss in your raisins or nuts for a bit of texture.
Fill the pastry shells
With your pastry shells prepared and filling mixed, it’s time to fill those crusts! Pour in the filling until it’s about three-quarters full, leaving room for the tarts to puff up a bit while baking.
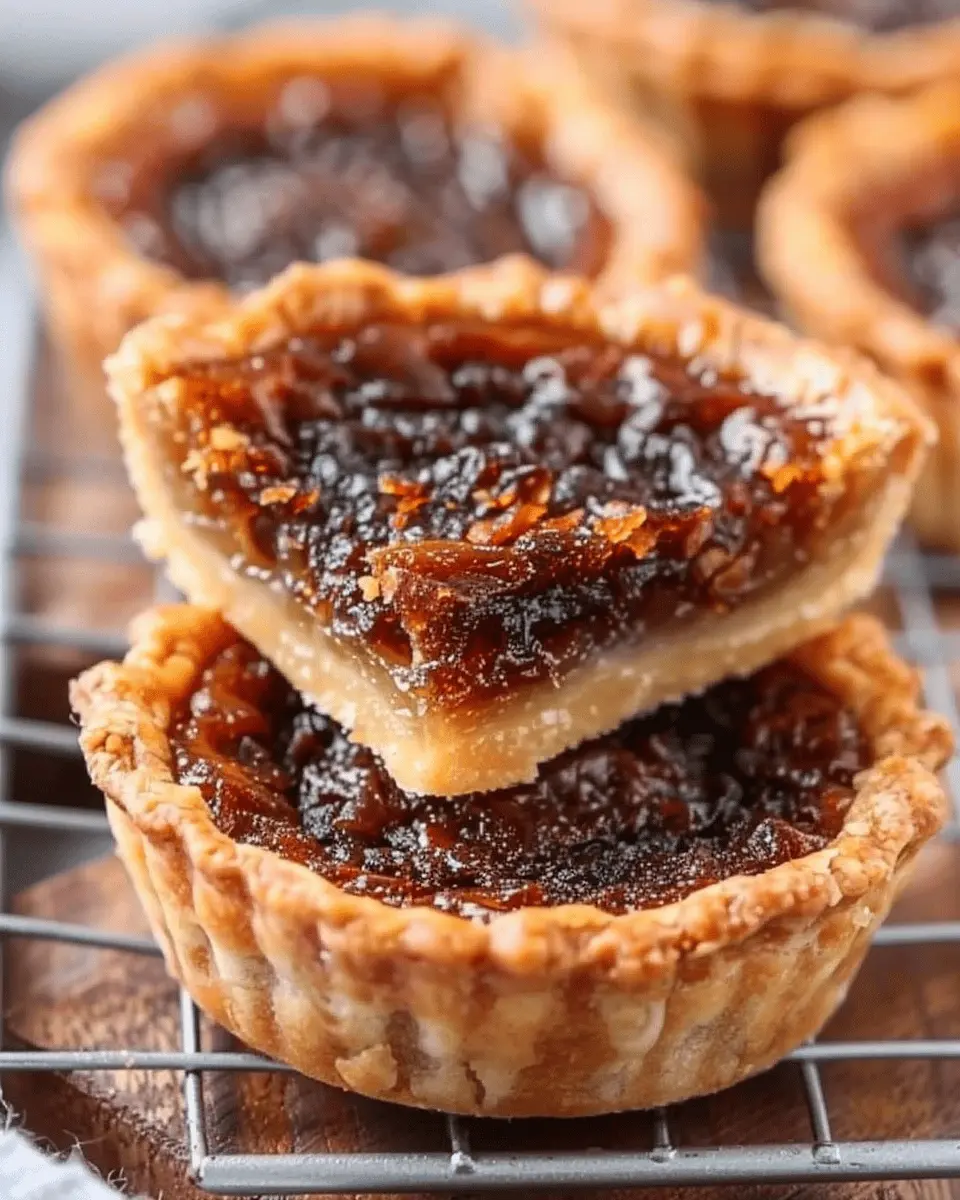
Bake to perfection
Place your filled tarts in the preheated oven and bake for 15 to 20 minutes, or until the filling is set and lightly browned. Keep a close eye on them—this is where the magic happens! You’ll know they’re done when they jiggle just slightly in the center.
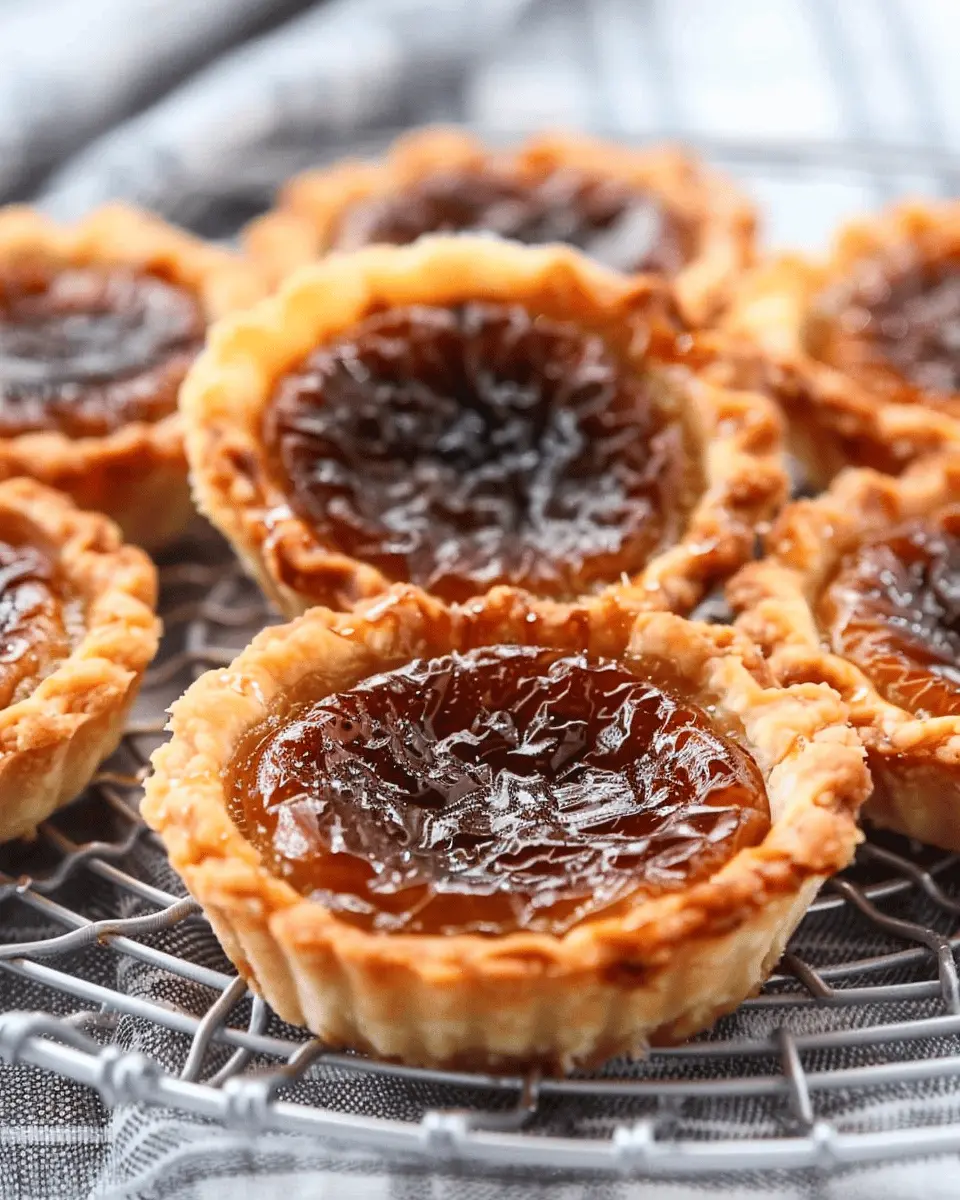
Cool and serve
Once out of the oven, let your classic Canadian butter tarts cool in the pan for about 10 minutes. Then, transfer them to a wire rack to cool completely. They’re best served at room temperature, but if you can’t resist, indulge while they’re still a bit warm!
As you enjoy these delightful tarts, you might find it helpful to pair them with a cup of tea or coffee. They’re not just desserts; they’re a slice of Canadian culture, perfect for sharing and creating memories. Enjoy your baking adventure, and don’t forget to share this recipe with friends. Happy baking!
For more fantastic baking tips, check out resources at Baking.com and AllRecipes.
Variations on Classic Canadian Butter Tarts
When it comes to classic Canadian butter tarts, there’s so much room to twist and play with the flavors. These delightful desserts have stood the test of time, but that doesn’t mean we can’t get a little creative! Let’s dive into some variations that will impress your friends at your next gathering.
Butter Tarts with Raisins
One popular twist on the traditional recipe is adding raisins. Soaking the raisins in hot water or even in a splash of orange juice or apple cider adds a lovely burst of flavor.
- Preparation Tip: Simply chop ½ cup of raisins and stir them into the filling before pouring it into the tart shells. This will give your classic Canadian butter tarts a delightful chewiness and added sweetness.
- Flavor Enhancement: If you want to elevate the taste further, consider incorporating a touch of cinnamon or nutmeg for warmth.
Chocolate-Dipped Butter Tarts
For chocolate lovers, this variation can transform your butter tarts into something truly indulgent.
- Dipping Delight: Once your tarts have cooled, simply melt some dark or milk chocolate and dip the edges of each tart for a sumptuous finish.
- Fun Presentation: Drizzle more melted chocolate over the top for an elegant touch that makes them perfect for entertaining.
No matter which variation you choose, these delicious takes on classic Canadian butter tarts are sure to become favorites! Experimentation is all part of the fun in the kitchen—what unique ingredients would you try? For detailed tips on baking techniques, check out King Arthur Baking for expert advice!
Cooking Tips and Notes for Classic Canadian Butter Tarts
Ensure the butter is at room temperature
When making classic Canadian butter tarts, the temperature of your ingredients can be crucial. Always start with butter that’s at room temperature. Why? Softened butter mixes more easily with sugar and other ingredients, ensuring a smooth filling that melts in your mouth. No one wants a lumpy tart! If you forget to take out the butter ahead of time, you can cut it into smaller pieces to encourage quick softening.
Avoid overfilling pastry shells
While it might be tempting to pour in as much filling as possible, controlling the amount you use is key to crafting the perfect tart. Overfilling can lead to messy spills in the oven, which may ruin the lovely crust you worked hard to create. Aim to fill the shells just to the brim, and remember that the filling will expand while baking. If you’re unsure, it’s always better to start with a little less, then adjust as needed.
For more insights about baking, check out King Arthur Baking for expert tips and techniques. Happy baking!
Serving Suggestions for Classic Canadian Butter Tarts
Pairing with Fresh Fruit
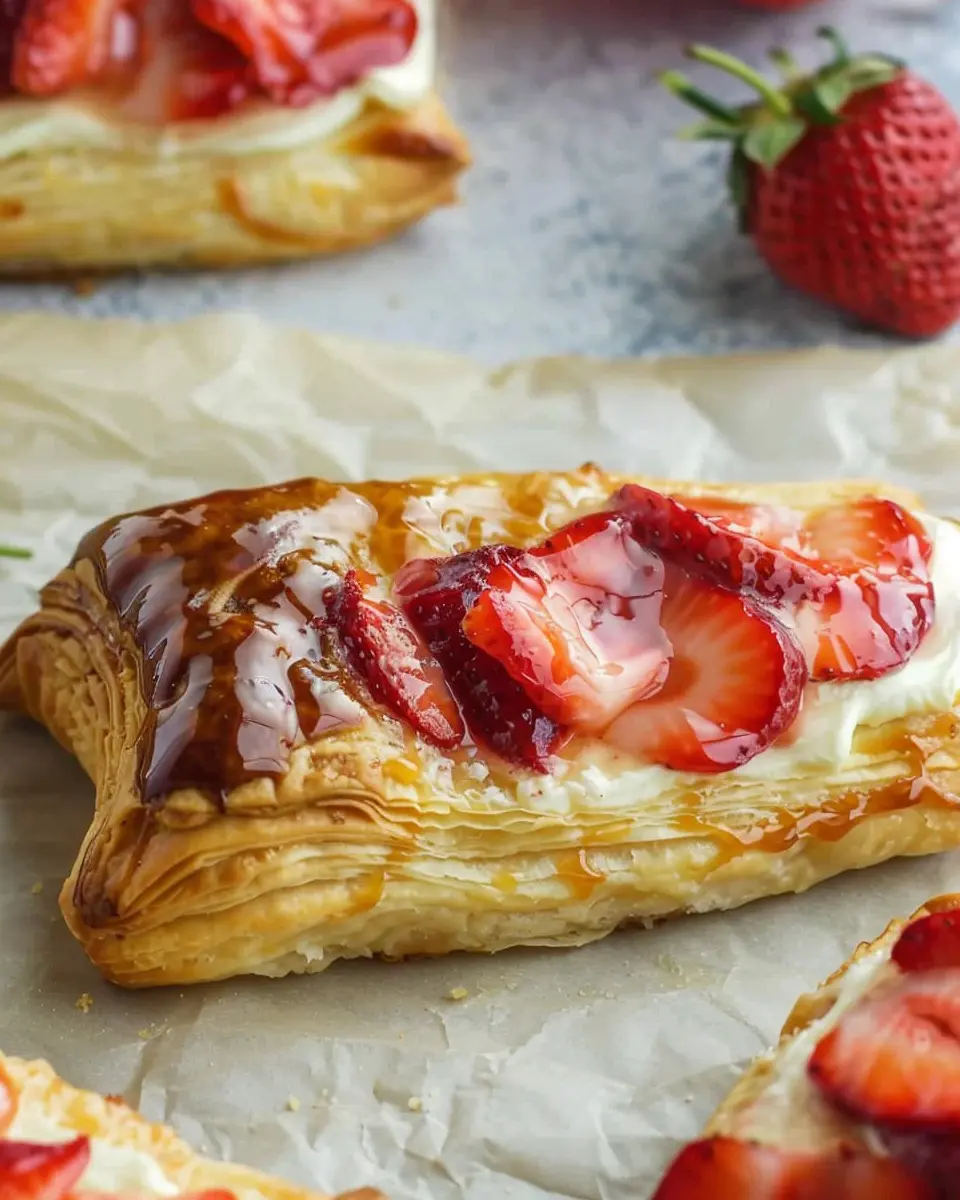
When it comes to serving classic Canadian butter tarts, fresh fruit is a delightful addition. Think about the vibrant sweetness of strawberries or the tartness of blueberries. Their natural flavors complement the rich, gooey filling of the tarts beautifully. Consider slicing up some seasonal fruits for a colorful platter alongside your tarts. Not only does this elevate your dessert table, but it also adds a refreshing contrast, making for a perfect afternoon treat or a delightful dessert at a gathering.
Serving Alongside a Cup of Tea or Coffee
Imagine enjoying classic Canadian butter tarts with a warm cup of tea or coffee. The rich buttery flavor of the tarts pairs nicely with a robust brew, whether it’s a bold dark roast or a soothing herbal tea. According to a study from the Coffee Association, 64% of adults enjoy their coffee during dessert time, making it a cherished ritual. So, set the scene: brew a pot of your favorite beverage, serve it in your best mugs, and savor each bite of your tarts. It’s the perfect way to transform a simple snack into an elevated experience. For more creative beverage ideas, check out this guide on food pairings with desserts.
Time Breakdown for Classic Canadian Butter Tarts
When you’re craving a sweet treat, classic Canadian butter tarts fit the bill perfectly. Here’s a handy breakdown of the time you’ll need for this delightful recipe.
Preparation Time
Getting everything ready for your classic Canadian butter tarts takes about 15-20 minutes. You’ll want to gather your ingredients, prepare the crust, and mix the filling without rushing. It’s a great opportunity to enjoy some tunes or chat with a friend while you bake!
Baking Time
Once you pop those tarts into the oven, they’ll need about 25-30 minutes to reach that golden-brown perfection. Monitor them closely—watching them rise is half the fun!
Total Time
In total, you’re looking at around 45-50 minutes from start to finish. Not a bad investment of time for such a delicious reward! You can easily whip them up for a weekend gathering or a cozy night in.
For more on how to easily prepare your ingredients, check out this helpful guide on meal prep basics. Happy baking!
Nutritional Facts for Classic Canadian Butter Tarts
When diving into the delightful world of classic Canadian butter tarts, it’s helpful to understand what you’re indulging in. Let’s break down the nutritional components of these sweet treats.
Calories per tart
Each classic Canadian butter tart packs approximately 200-250 calories, depending on the filling and crust thickness. While it’s tempting to enjoy more than one, moderation is key to maintaining a balanced diet!
Other important nutrients
Besides calories, here are some essential nutrients you’ll find in a typical tart:
- Fat: About 12-15g, mainly from the buttery crust
- Carbohydrates: Roughly 25-30g, predominantly from sugar and flour
- Protein: Around 2g, thanks to the egg filling
For more nutritional insights, you might want to check out NutritionValue to explore how these numbers fit into your dietary goals. Remember, enjoying these treats occasionally is part of what makes them special! Happy baking!
FAQ about Classic Canadian Butter Tarts
Can I make butter tarts ahead of time?
Absolutely! In fact, classic Canadian butter tarts are a perfect make-ahead dessert. You can prepare the pastry shells and the filling separately. Assemble them on the day you plan to serve them for the freshest taste. If you bake them early, simply allow the tarts to cool completely before storing them in an airtight container. They can be kept in the refrigerator for about three days. So, whether it’s for a cozy get-together or a potluck, preparing them ahead can save you time and stress!
What can I use instead of pastry shells?
If you’re seeking alternatives to traditional pastry shells, there are plenty of creative options! Consider using:
- Graham cracker crusts for a sweet, crunchy twist.
- Tart shells from store-bought dough, which cut down on prep time.
- Almond flour crusts for a gluten-free option that’s not compromised on flavor.
Each alternative brings a unique flavor to your classic Canadian butter tarts, so don’t hesitate to experiment!
How do I store leftover butter tarts?
Leftover butter tarts are a delicious treat for the next few days! To preserve their yummy goodness, place them in an airtight container at room temperature if you plan to consume them within 24 hours. For longer storage, refrigerate them, where they’ll stay fresh for up to a week. Just be sure to let them come to room temperature before serving to enhance that delightful caramel richness!
For more handy tips on storing desserts, feel free to check out resources from trusted culinary sites like Food Network or BBC Good Food. Enjoy your baking journey!
Conclusion on Classic Canadian Butter Tarts
In summary, classic Canadian butter tarts are more than just a dessert; they are a delightful experience that brings people together. Whether you’re making them for a family gathering or a casual get-together with friends, these little treats are sure to impress. The balance of a flaky crust and a rich, gooey filling creates a perfect harmony that’s hard to resist.
- Try experimenting with various fillings, like nuts or chocolate, to add your personal touch.
- Don’t forget the importance of quality ingredients for the best taste.
As you dive into this recipe, remember that the joy of cooking lies not just in the end product but in the love and creativity you put into each step. For more on Canadian desserts, check out this Canadian food site. Enjoy your baking adventure!
PrintClassic Canadian Butter Tarts: A Sweet Indulgence You’ll Love
Classic Canadian Butter Tarts are a delightful dessert that combines a flaky pastry with a rich, sweet filling.
- Prep Time: 30 minutes
- Cook Time: 20 minutes
- Total Time: 50 minutes
- Yield: 12 tarts
- Category: Dessert
- Method: Baking
- Cuisine: Canadian
- Diet: Vegetarian
Ingredients
- 1 1/4 cups all-purpose flour
- 1/2 cup unsalted butter, cold
- 1/4 cup granulated sugar
- 1/4 teaspoon salt
- 2-3 tablespoons ice water
- 1/2 cup packed brown sugar
- 1/4 cup corn syrup
- 1 large egg
- 1 teaspoon vanilla extract
- 1/2 cup raisins or pecans (optional)
Instructions
- Preheat the oven to 375°F (190°C).
- In a mixing bowl, combine flour, cold butter, sugar, and salt. Mix until crumbly.
- Add ice water, one tablespoon at a time, until the dough holds together.
- Roll out the dough and cut into circles to fit a muffin tin.
- In another bowl, mix brown sugar, corn syrup, egg, and vanilla until smooth.
- Pour the filling into each pastry shell, adding raisins or pecans if desired.
- Bake for 15-20 minutes until the filling is set and the crust is golden.
- Let cool before serving.
Notes
- For best results, store tarts in an airtight container.
- These tarts can be frozen for up to 3 months.
Nutrition
- Serving Size: 1 tart
- Calories: 230
- Sugar: 18g
- Sodium: 100mg
- Fat: 10g
- Saturated Fat: 6g
- Unsaturated Fat: 3g
- Trans Fat: 0g
- Carbohydrates: 32g
- Fiber: 1g
- Protein: 2g
- Cholesterol: 40mg