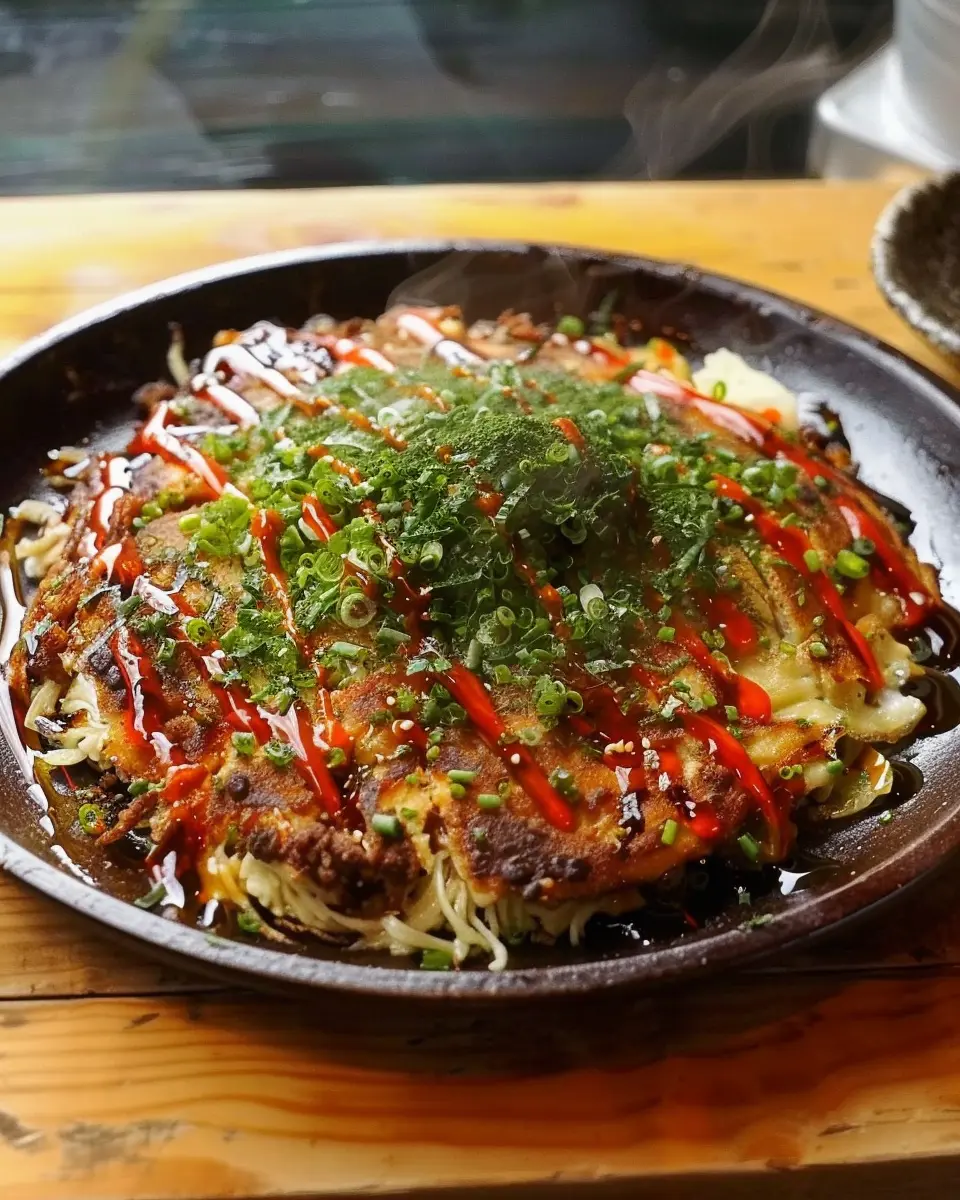
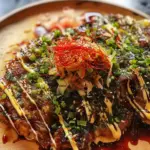
Introduction to Osaka-Style Okonomiyaki
What is Okonomiyaki and why should you make it?
If you’re looking for a delicious, customizable dish that’s as fun to make as it is to eat, Osaka-Style Okonomiyaki is where it’s at! Originating from the bustling streets of Osaka, this savory Japanese pancake combines a variety of ingredients in a unique, satisfying way. The name itself translates to “as you like it,” highlighting its versatility. You can tailor it to your taste by incorporating everything from vegetables to proteins.
Why is this dish worth mastering? For one, it’s a fantastic way to surprise your friends at a dinner party or to whip up a cozy meal on a relaxed weekend night. The beauty of Okonomiyaki lies in its adaptability; you can use what you already have in your kitchen. Have some leftover vegetables or meats? Toss them in! The result is a hearty meal that is both fulfilling and incredibly tasty.
Making Osaka-Style Okonomiyaki is also an excellent option for those who love to explore culinary traditions. It’s more than just food; it’s an experience. As you prepare the batter, the aromas will transport you straight to the vibrant streets of Japan. Plus, the cooking process involves a fun interaction, whether you’re grilling it on a hotplate or in a skillet at home.
Some great ingredients to include in your mix are shredded cabbage, green onions, and your choice of protein, like Turkey Bacon or Chicken Ham, which adds a lovely depth of flavor. Don’t forget to top it off with delicious sauces and perhaps a sprinkle of seaweed for an authentic finish.
To dive deeper into the world of Okonomiyaki, explore resources like Just One Cookbook for authentic recipes and tips. Or check out Serious Eats for a thorough culinary breakdown.
So why not try making Osaka-Style Okonomiyaki today? Embrace the joy of cooking and discover your new favorite comfort food!
Ingredients for Osaka-Style Okonomiyaki
Essential ingredients for the best okonomiyaki
To whip up a delicious and authentic Osaka-Style Okonomiyaki, you’ll need a handful of essential ingredients that create the perfect balance of flavor and texture:
- All-purpose flour: This forms the base of your batter and gives your pancake a nice structure.
- Dashi stock: A Japanese broth that adds depth to the flavor. You can create your own or find instant varieties at Asian grocery stores.
- Cabbage: Thinly sliced, it provides the signature crunch and sweetness.
- Green onions: Chopped, these enhance both the taste and visual appeal.
- Turkey bacon: For that smoky, protein-packed flavor!
- Chicken ham: Adds a savory touch while keeping everything light.
- Eggs: Essential for binding the ingredients together.
Optional ingredients to customize your pancake
What’s great about Osaka-Style Okonomiyaki is the flexibility to personalize it! Consider these additional ingredients to elevate your pancake:
- Seafood: Shrimp, squid, or scallops offer a delicious twist.
- Cheese: Melty cheese can take the flavor to another level.
- Mushrooms: Add earthiness and enhance the texture.
- Kimchi: For a spicy kick and an interesting flavor profile.
Feel free to mix and match your add-ins so you can explore what makes your own perfect okonomiyaki! For further inspiration, check out this article on customizing Japanese pancakes for even more ideas.
Preparing Osaka-Style Okonomiyaki
Cooking can be both an art and a science, and if you’ve got your sights set on making the deliciously savory Osaka-Style Okonomiyaki, you’re in for a treat! This iconic Japanese dish, often referred to as a “Japanese pancake,” combines a hearty mix of ingredients and flavors that will undoubtedly impress your friends and family. Let’s dive into the process of preparing this delightful meal, step by step.
Get Your Vegetables and Ingredients Ready
The first step in crafting your Osaka-Style Okonomiyaki is to prepare your ingredients. You want to ensure that everything is fresh and ready to go. Here’s what you’ll need:
- 1 cup all-purpose flour
- 1 cup dashi broth (or a vegan alternative)
- 2 cups finely shredded cabbage
- 1/2 cup green onions, chopped
- 2 large eggs
- 1/2 cup cooked chicken ham, chopped
- 1/2 cup cooked turkey bacon, chopped
- Optional: shredded cheese, seafood like shrimp or squid, or your choice of protein
Having your ingredients prepped not only makes for seamless cooking but also enhances the flavors as they mingle in the pan. Did you know that using fresh ingredients can significantly elevate your dish? According to a study by the Culinary Institute of America, fresh produce retains nutrients better, enhancing both taste and health benefits.
Perfect Your Batter Consistency
Now that your veggies and proteins are prepped, it’s time to mix up the batter. In a large bowl, combine the flour and dashi broth, stirring thoroughly to avoid any lumps. Add the eggs and mix until you achieve a smooth consistency.
A pro tip: The batter should be thick but pourable. If it’s too runny, your okonomiyaki will fall apart; if it’s too thick, you won’t achieve that delightful pancake-like texture. You can adjust the consistency by adding a little more dashi broth or flour as necessary.
Cooking the Okonomiyaki on the Stovetop
Heat a non-stick skillet or a griddle over medium heat and lightly oil the surface. This is where the magic begins! Pour half of your batter onto the skillet, spreading it into a round shape about 1 inch thick.
Add your shredded cabbage, green onions, chicken ham, and turkey bacon on top of the batter, pressing them in a bit so they fit snugly. The layering technique not only adds depth of flavor but also presents beautifully when you flip it over. Cook for about 5 minutes until the bottom is golden brown, then get ready for the next step!
Flipping the Pancake Like a Pro
Here’s the moment that separates kitchen novices from seasoned home chefs: the flip. Taking a flat spatula, gently slide it beneath the pancake and use another spatula for leverage. In one smooth motion, flip it over. If you hesitate or flip it too slowly, you might risk a broken pancake—don’t fret, just tuck in any loose bits!
Cook the other side for an additional 4-5 minutes until it’s golden brown. If you want to ensure it cooks uniformly, feel free to cover the skillet for a minute.
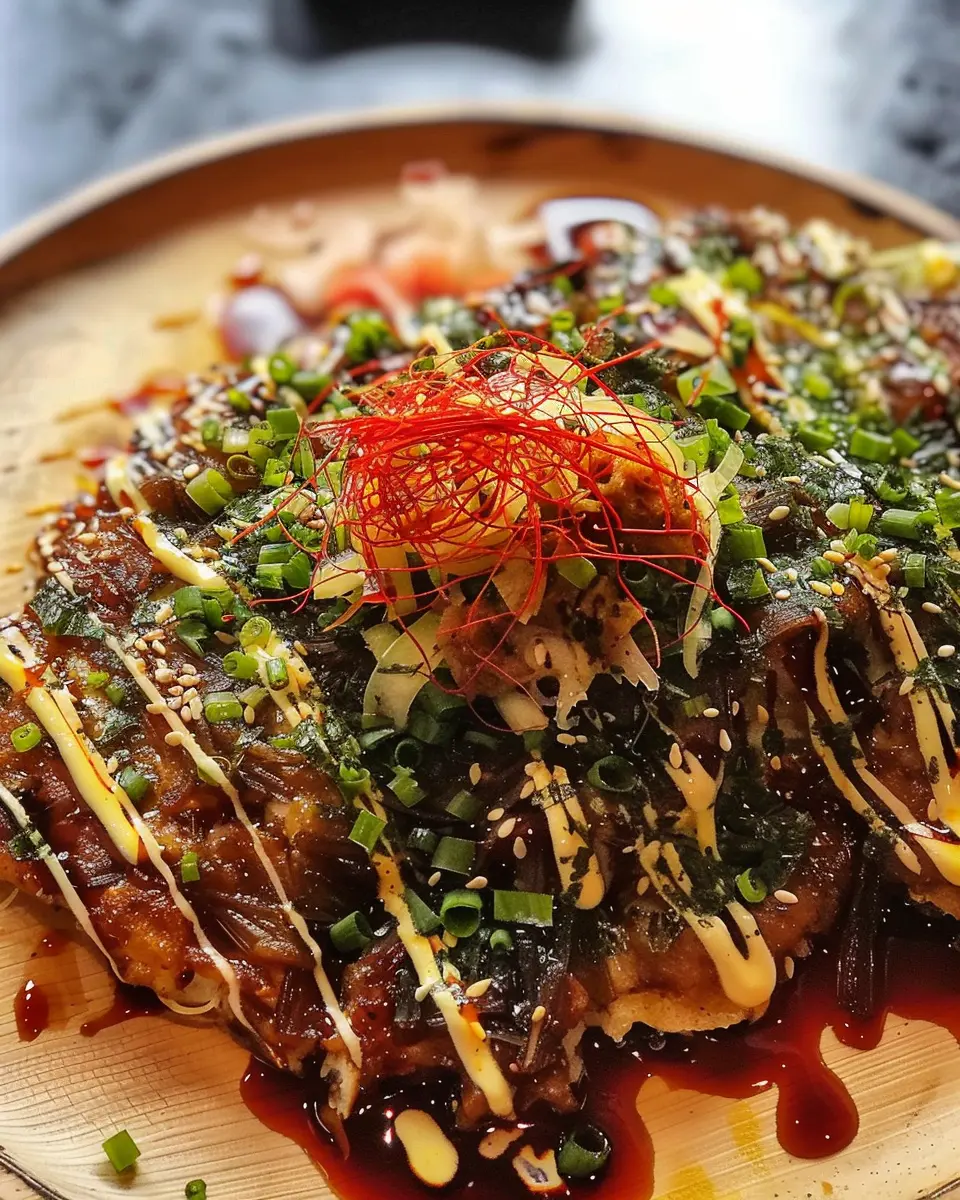
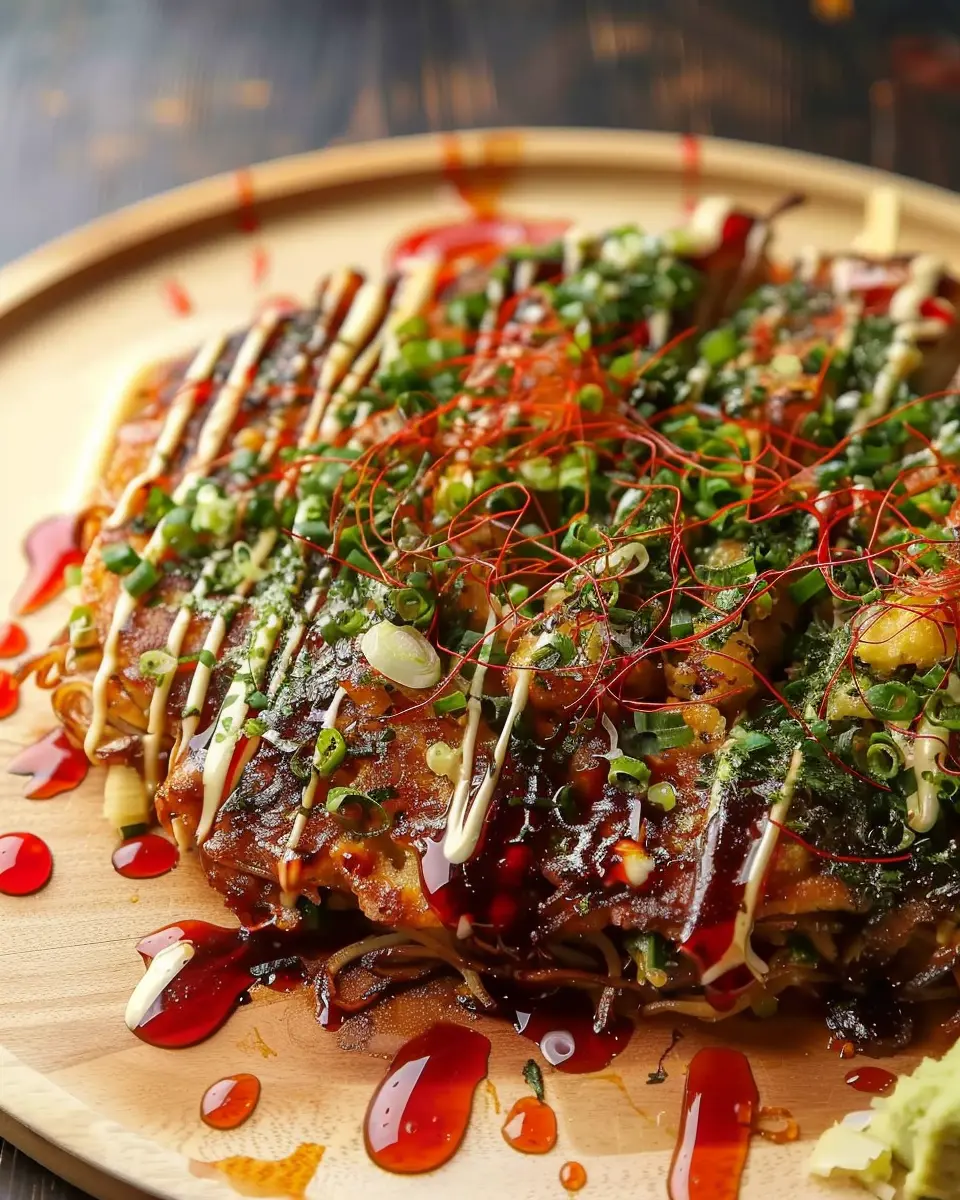
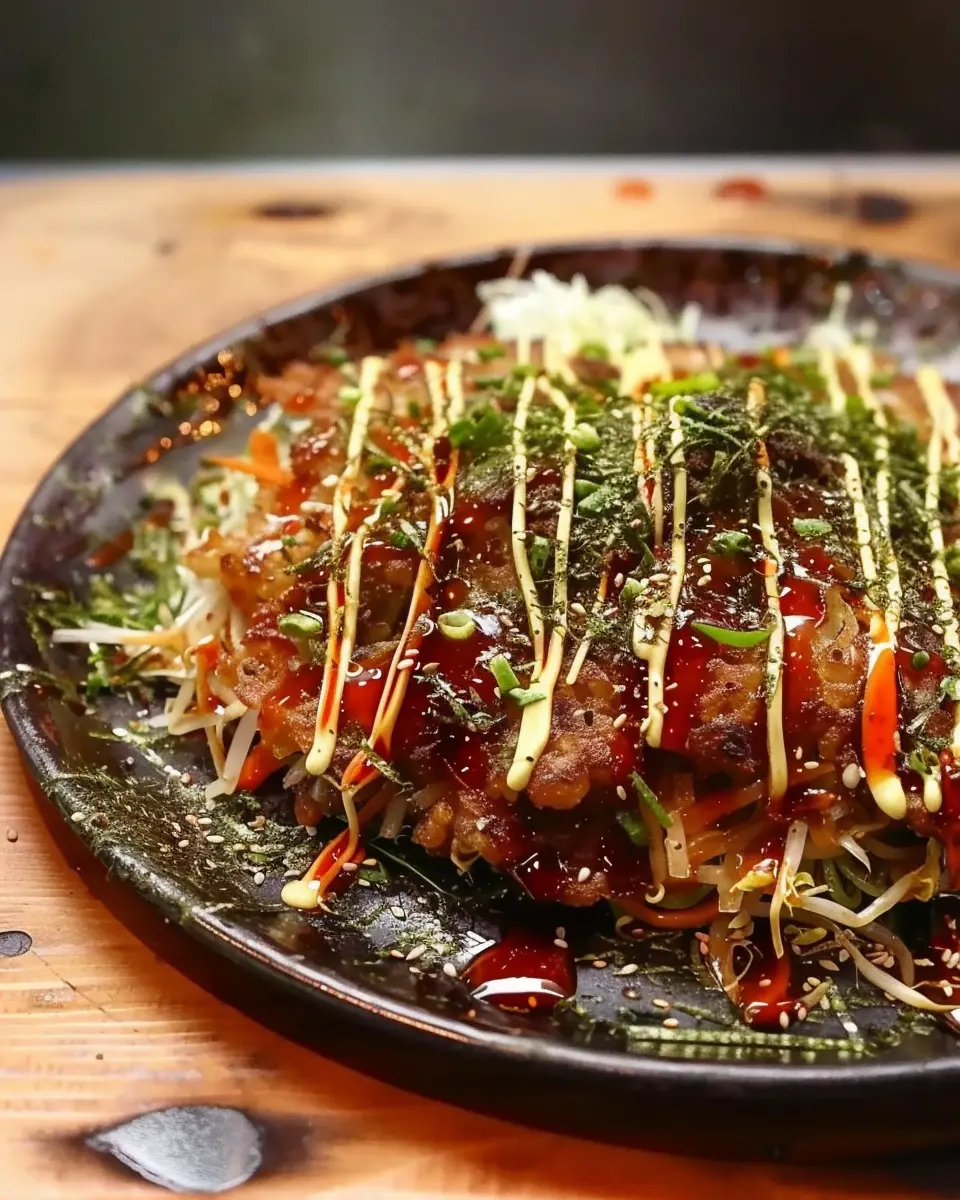
Adding Finishing Touches Before Serving
To make your Osaka-Style Okonomiyaki shine, garnish it with your favorite toppings:
- Okonomiyaki sauce (a savory-sweet blend)
- Mayonnaise (Japanese mayo if you can find it for enriched flavor)
- Katsuobushi (bonito flakes) for a touch of umami
- A sprinkle of aonori (seaweed flakes)
The beauty of Osaka-Style Okonomiyaki lies in its versatility! Feel free to experiment with various additional toppings like pickled ginger or even a drizzle of teriyaki sauce based on your flavor preferences.
In no time, you’ll have a delicious, visually stunning pancake that’s sure to become a new favorite in your household. Whether shared at a lunch gathering or enjoyed solo at home, this delightful dish brings a little piece of Osaka right to your kitchen!
For more culinary inspiration and variations of this dish, check out resources from sites like Serious Eats or Just One Cookbook for tips and tricks on Japanese cooking. Happy cooking!
Variations on Osaka-Style Okonomiyaki
Exploring variations of Osaka-Style Okonomiyaki can elevate your culinary experience, adding exciting twists to this beloved dish. Whether you’re a seafood lover, a vegetarian, or an adventurous foodie, there’s a version for everyone.
Seafood Okonomiyaki: Adding Shrimp and Squid
For those who adore maritime flavors, incorporating shrimp and squid into your Osaka-Style Okonomiyaki is a game changer. Simply chop shrimp and squid into bite-sized pieces and fold them into your batter. This addition not only enhances flavor but also elevates the dish’s texture. For a bit of inspiration, check out how traditional versions of this dish retain their umami essence at Japan National Tourism Organization.
Vegetarian Okonomiyaki: Flavorful Alternatives for Non-Meat Eaters
If you’re looking for a vegetarian-friendly take, consider using mushrooms, bell peppers, and green onions as your main ingredients. A bit of grated yam can add a delightful moisture to the mix. Topping with avocado or a tangy sauce made from soy and sesame oil can make your Osaka-Style Okonomiyaki shine. Vegetable-based options can be just as fulfilling and delicious as their meat counterparts, proving that you don’t need meat to make a delicious, hearty pancake.
Fusion Okonomiyaki: Experimenting with International Flavors
Why not think outside the box? Fusion flavors can add a whole new dimension to your Osaka-Style Okonomiyaki. Infuse Mediterranean spices like oregano and feta cheese, or even try a Mexican twist with black beans and corn. The world is your oyster when it comes to whipping up your own unique creation. Plus, experimenting helps you discover new combinations that suit your palate perfectly!
No matter which variation you choose, Osaka-Style Okonomiyaki is a canvas just waiting for your culinary creativity!
Cooking Tips for Osaka-Style Okonomiyaki
Importance of temperature and timing
When preparing Osaka-Style Okonomiyaki, achieving the right temperature is crucial. A medium heat allows the batter to cook through without burning the outside. Preheat your griddle or frying pan before adding any ingredients, and maintain a consistent heat throughout the cooking process. Cooking each side for about 3-4 minutes usually does the trick, but keep an eye on it!
Tips for achieving that perfect flip
Flipping your okonomiyaki can be a nerve-wracking moment. To nail it, use a large spatula to slide under the pancake, ensuring you support it fully. When you do flip, don’t hesitate! A quick, confident motion often leads to the best results. You can also practice with a smaller version of the pancake to gain confidence.
Best practices for ingredient selection
Selecting fresh, high-quality ingredients is paramount for your Osaka-Style Okonomiyaki. Use fresh cabbage for a crunchy texture and opt for turkey bacon or chicken ham for a savory kick. Don’t forget to include dashi or soy sauce for that umami flavor! Check out Serious Eats for tips on sourcing quality ingredients suitable for this dish.
These minor adjustments can transform your okonomiyaki from average to extraordinary, ensuring a delightful experience for you and your friends!
Serving suggestions for Osaka-Style Okonomiyaki
Presentation ideas for a communal dining experience
One of the best things about Osaka-Style Okonomiyaki is that it’s perfect for sharing! Consider serving your okonomiyaki on a large wooden platter, allowing guests to help themselves. You can even create a “build your own” bar with various toppings like chopped scallions, seaweed flakes, and a drizzle of bonito flakes to let everyone customize their slices. Pairing the okonomiyaki with small, vibrant dipping sauces adds a fun twist. For a cozy touch, set up some small tea lights around the dining area to create a warm ambiance that sparks conversation.
Best sides and beverages to complement okonomiyaki
To round out your meal, think about sides that enhance the flavors of your Osaka-Style Okonomiyaki. A light side salad with sesame dressing or steamed edamame adds freshness, while tangy pickled vegetables can provide a nice crunch. As for drinks, non-alcoholic options like iced green tea or a sparkling fruit soda work wonderfully, keeping things refreshing without overpowering the main dish.
For more ideas on perfect pairings, check out various food blogs focused on Japanese cuisine, like Just One Cookbook.
Time breakdown for making Osaka-Style Okonomiyaki
Preparation time
When aiming to whip up a delicious Osaka-Style Okonomiyaki, you’ll want to set aside about 15-20 minutes for preparation. This includes gathering your ingredients, chopping veggies, and mixing your batter to create that perfect savory pancake base. Having everything prepped makes the cooking process smoother, ensuring your mouth-watering meal is just around the corner!
Cooking time
Once you’re all prepped, cooking takes about 20-25 minutes. You’ll be flipping those golden-brown pancakes on your skillet or griddle, allowing time for that gooey center and crispy edges that define this tasty dish. Keep an eye on your okonomiyaki to achieve the perfect texture!
Total time
All in all, you’re looking at approximately 35-45 minutes from start to finish for your Osaka-Style Okonomiyaki. It’s a wonderfully satisfying way to spend an evening, sharing delicious food with friends or family! So grab your ingredients and let’s get cooking!
If you’d like to dive deeper into the history of this dish, you can check out this article from Japan Travel for more insights!
Nutritional Facts for Osaka-Style Okonomiyaki
Calories per serving
When you’re whipping up a delicious plate of Osaka-Style Okonomiyaki, one serving typically contains around 350 to 400 calories, depending on your ingredients and portion size. It’s a satisfying meal that can fit nicely into a balanced diet, especially when enjoyed in moderation.
Breakdown of macronutrients
A delightful Osaka-Style Okonomiyaki is not just tasty but can also provide a well-rounded nutrient profile:
- Protein: Approximately 15–20 grams. Turkey bacon or chicken ham adds a nice protein boost.
- Carbohydrates: Roughly 50–60 grams, mostly from flour and any added veggies.
- Fats: Around 10–15 grams, depending mainly on the cooking oil and meats used.
Feel free to experiment with your toppings and fillings for added nutrition! For more details on healthy eating, check out resources from Harvard Health Publishing or Mayo Clinic. Eating well doesn’t have to be complicated; enjoy making this Osaka-Style Okonomiyaki and savor every bite!
FAQs about Osaka-Style Okonomiyaki
What’s the history of okonomiyaki?
Osaka-style okonomiyaki has a rich history that reflects Japan’s culinary evolution. This savory pancake originated in the Kansai region during the Edo period but gained popularity in Osaka post-World War II as a comfort food. Street vendors began selling it, contributing significantly to its status as a staple in Osaka nightlife. What makes it special is its versatility; you can customize it to your taste using various ingredients, making it truly “what you like, grilled.”
Can I make okonomiyaki ahead of time?
Absolutely! Osaka-style okonomiyaki is meal-prep friendly. You can prepare the batter and chop your preferred fillings in advance. Just keep everything in airtight containers in the fridge. When you’re ready to eat, simply mix the components and cook on your griddle or skillet. This simplifies your cooking process on busy weeknights.
How do I store leftover okonomiyaki?
Leftover okonomiyaki can be stored easily for future enjoyment! Here’s how:
- Refrigerator: Wrap pieces in plastic wrap or store them in an airtight container. They can last up to 2-3 days.
- Freezer: For long-term storage, freeze pieces wrapped individually. When reheating, simply place them in the oven or toaster oven to restore their crispiness.
For further insights into preserving Japanese cuisine, check out Japanese Cooking 101 for expert advice. By following these simple tips, you can ensure your Osaka-style okonomiyaki stays delicious, even the next day!
Conclusion on Osaka-Style Okonomiyaki
Making Osaka-Style Okonomiyaki at home is not just an enjoyable cooking experience; it’s a wonderful way to connect with Japanese culture right in your kitchen. This savory pancake, packed with fresh ingredients and customizable toppings, offers the perfect blend of flavors that can delight anyone’s palate.
Imagine gathering friends and family for a memorable meal where everyone can personalize their own okonomiyaki. Plus, it’s a healthier alternative using Turkey Bacon and fresh vegetables! So why not take the plunge? Dive into this delicious culinary adventure and enjoy the satisfaction of creating your very own delightful dish.
For more delicious recipes, check out Just One Cookbook for other amazing Japanese dishes!
PrintOsaka-Style Okonomiyaki: Easy Recipe with Turkey Bacon and Chicken Ham
Enjoy the delicious blend of flavors in this Osaka-Style Okonomiyaki, featuring turkey bacon and chicken ham for a unique twist on a classic dish.
- Prep Time: 15 minutes
- Cook Time: 20 minutes
- Total Time: 35 minutes
- Yield: 4 servings
- Category: Main Dish
- Method: Pan-frying
- Cuisine: Japanese
- Diet: Gluten-Free
Ingredients
- 1 cup all-purpose flour
- 1/2 cup dashi stock
- 1 large egg
- 2 cups shredded cabbage
- 1/2 cup turkey bacon, chopped
- 1/2 cup chicken ham, chopped
- 1/4 cup green onions, chopped
- 1/4 cup okonomiyaki sauce
- 1/4 cup mayonnaise
- 1 tablespoon bonito flakes
- 1 tablespoon seaweed flakes
Instructions
- In a large bowl, mix the flour and dashi stock until smooth.
- Add the egg, cabbage, turkey bacon, chicken ham, and green onions to the batter and mix well.
- Heat a skillet over medium heat and pour in some oil.
- Pour a portion of the mixture into the skillet, forming a round pancake shape.
- Cook for about 3-4 minutes until golden brown, then flip and cook the other side.
- Repeat with remaining batter.
- Serve hot drizzled with okonomiyaki sauce and mayonnaise, and sprinkle bonito flakes and seaweed flakes on top.
Notes
- Adjust the toppings according to your preference.
- Serve with pickled ginger for extra flavor.
Nutrition
- Serving Size: 1 pancake
- Calories: 300
- Sugar: 2g
- Sodium: 600mg
- Fat: 15g
- Saturated Fat: 4g
- Unsaturated Fat: 10g
- Trans Fat: 0g
- Carbohydrates: 35g
- Fiber: 4g
- Protein: 12g
- Cholesterol: 60mg