Introduction to the Cutest Gnome Cookies
If you’re looking to brighten up a gathering or simply indulge in some delightful baking, look no further than the cutest gnome cookies. These whimsical treats capture the hearts of both children and adults alike, making them perfect for birthdays, holidays, or just a cozy afternoon at home. But what makes gnome cookies so special? Let’s explore!
Why Gnome Cookies Are an Adorable Treat
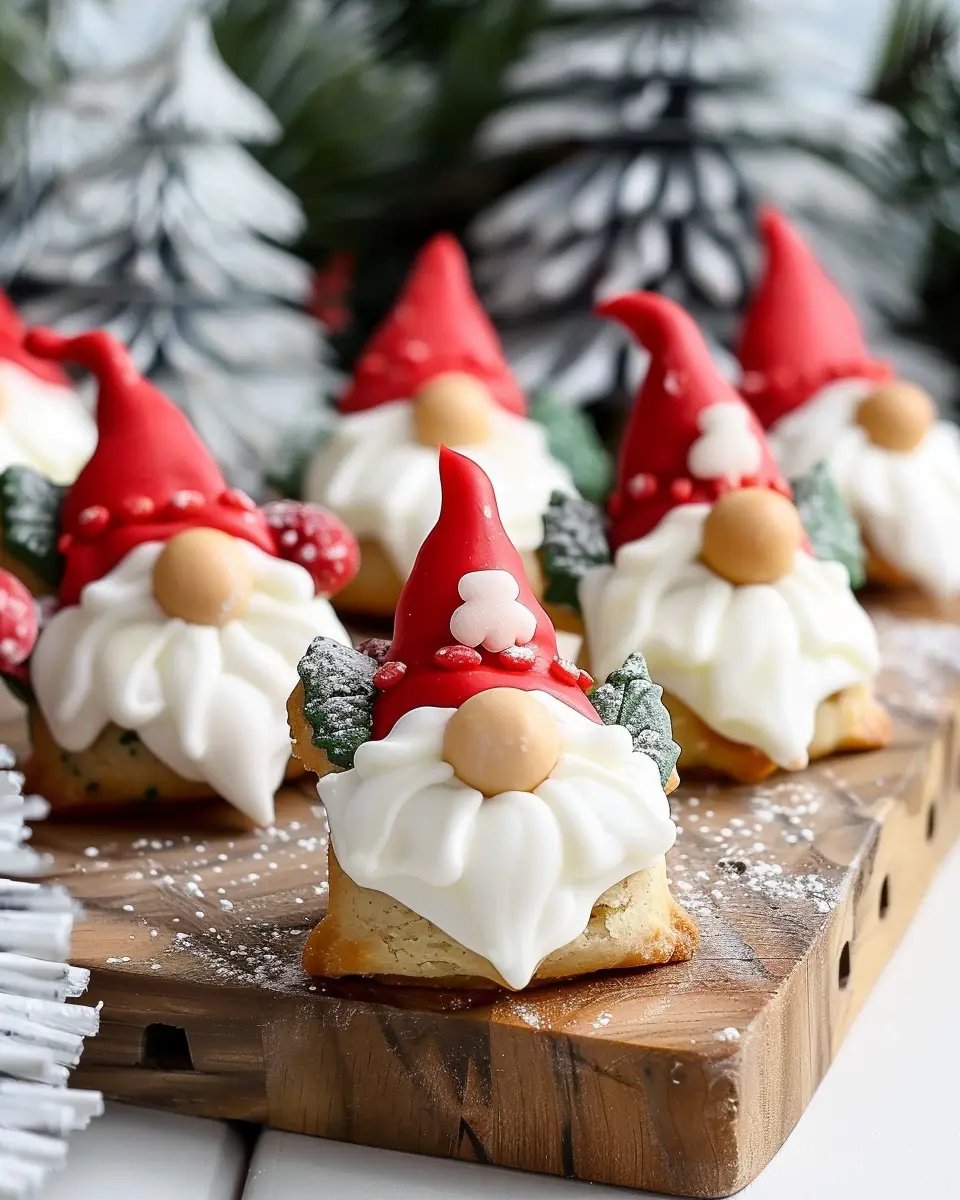
First and foremost, gnome cookies are absolutely charming. Their playful design—complete with little pointy hats and whimsical beards—makes them a feast for the eyes. They can instantly elevate your dessert display, transforming an ordinary gathering into a magical experience. Kids love helping decorate them, making this a perfect family baking project. Just imagine the smiles on their faces as they pipe colorful icing and add sprinkles!
Creating the cutest gnome cookies also allows for endless customization. You can play with colors, flavors, and toppings, making them as unique as you want. Moreover, if you’re looking for inspiration, sites like Food Network or BBC Good Food offer fantastic tips on creativity in cookie design.
Baking gnome cookies is more than just about aesthetics; it’s about connection and community. Bringing family and friends together in the kitchen not only creates tasty treats but also friendly memories that last a lifetime. Plus, with the right recipes, these cookies can be made with various dietary preferences in mind. Think gluten-free or vegan substitutes; the possibilities are endless!
In terms of flavors, you can keep it classic with vanilla or chocolate, or step outside the box with seasonal additions like peppermint or pumpkin spice. What’s more, these cookies are great for gift-giving. A beautifully packaged box of gnome cookies can make a sweet surprise for coworkers or neighbors.
So, are you ready to dive into the world of the cutest gnome cookies? With their delightful appearance and the joy of baking, you’re in for a fun adventure that will tickle your taste buds and warm your heart! Stay tuned for the full recipe that will help you create these adorable sweets right at home.

Ingredients for the Cutest Gnome Cookies
Baking cookies that look like the cutest gnomes is a delightful way to express your creativity! Here’s a rundown of the essential ingredients you’ll need for a fun baking session.
Essential Ingredients for Gnome Cookies
To craft these adorable gnome cookies, gather the following ingredients:
- All-purpose flour: The base of your cookies—choose a high-quality brand for the best texture.
- Unsalted butter: Softened to room temperature for easy creaming with sugar.
- Granulated sugar: Adds sweetness and helps create a beautiful golden color.
- Brown sugar: For that rich, caramel-like flavor.
- Eggs: Large and fresh, they provide moisture and stability.
- Baking powder and baking soda: For proper leavening, ensuring soft and chewy cookies.
- Vanilla extract: A must-have for flavor enhancement—try using pure vanilla for the best taste.
- Royal icing: This will be your go-to for decorating the gnome faces, so make a batch ahead!
For a useful resource on baking basics, check out King Arthur Baking. The only limit to your creativity is your imagination—so have fun!
Step-by-Step Preparation of Gnome Cookies
Creating the cutest gnome cookies is a delightful way to add a whimsical touch to any gathering. Whether you’re celebrating a birthday or just looking for a fun baking project, these cookie cups will certainly bring a smile to your face. Here’s your guide to crafting these adorable treats in a way that even novice bakers can follow easily.
Gather Your Ingredients and Tools
Before diving into the fun part of baking, take a moment to gather all your ingredients and tools. Here’s what you’ll need:
Ingredients:
- 1 cup of butter, softened
- 1 cup of granulated sugar
- 1 cup of brown sugar
- 2 large eggs
- 4 cups of all-purpose flour
- 2 teaspoons of baking soda
- A pinch of salt
- 1 teaspoon of vanilla extract
- Food coloring (red, putty, and white for decoration)
Tools:
- Muffin pan
- Mixing bowls
- Electric mixer
- Rolling pin
- Cookie cutters (a gnome-shaped one if you can find it)
- Piping bags
- Baking sheets
Having everything at arm’s reach makes for a smoother baking experience! Also, keep in mind that these cookies can be a bit messy—so grab an apron.
Preheat the Oven and Prepare the Muffin Pan
Now that you’re ready, it’s time to warm things up! Preheat your oven to 350°F (175°C). This step is crucial as it ensures that your cookie cups bake evenly and develop that lovely golden-brown color.
While the oven is preheating, grease your muffin pan lightly. You want to make sure that the cookie cups won’t stick. Alternatively, using silicone muffin molds can also work wonders and make cleanup easier.
Bake the Cookie Cups
In a large mixing bowl, cream together the softened butter, granulated sugar, and brown sugar until the mixture is light and fluffy. This can take about 2-3 minutes with an electric mixer.
Add the eggs one at a time, mixing well after each addition. Then stir in the vanilla extract. In a separate bowl, whisk together the flour, baking soda, and salt—then gradually add this dry mixture to the wet ingredients. With the dough ready, scoop about a tablespoon of cookie dough into each muffin cup.
Bake in the preheated oven for 10-12 minutes. The edges should be firm, while the center can look a bit underdone—that’s perfect! Once baked, let them cool in the pan for a few minutes before transferring to a wire rack.
Shape the Cookie Cups
After allowing your cookie cups to cool, it’s time for a little shaping action! While they’re still warm, you can gently press the centers down using a small glass or your thumb, creating a cup shape. This is essential for holding the delicious frosting and toppings later on.
Did you know that the texture of cookies can change based on how evenly the dough is shaped? That’s right! Uniform cups will bake at the same rate, ensuring a perfect end product.
Decorate with Frosting and Strawberries
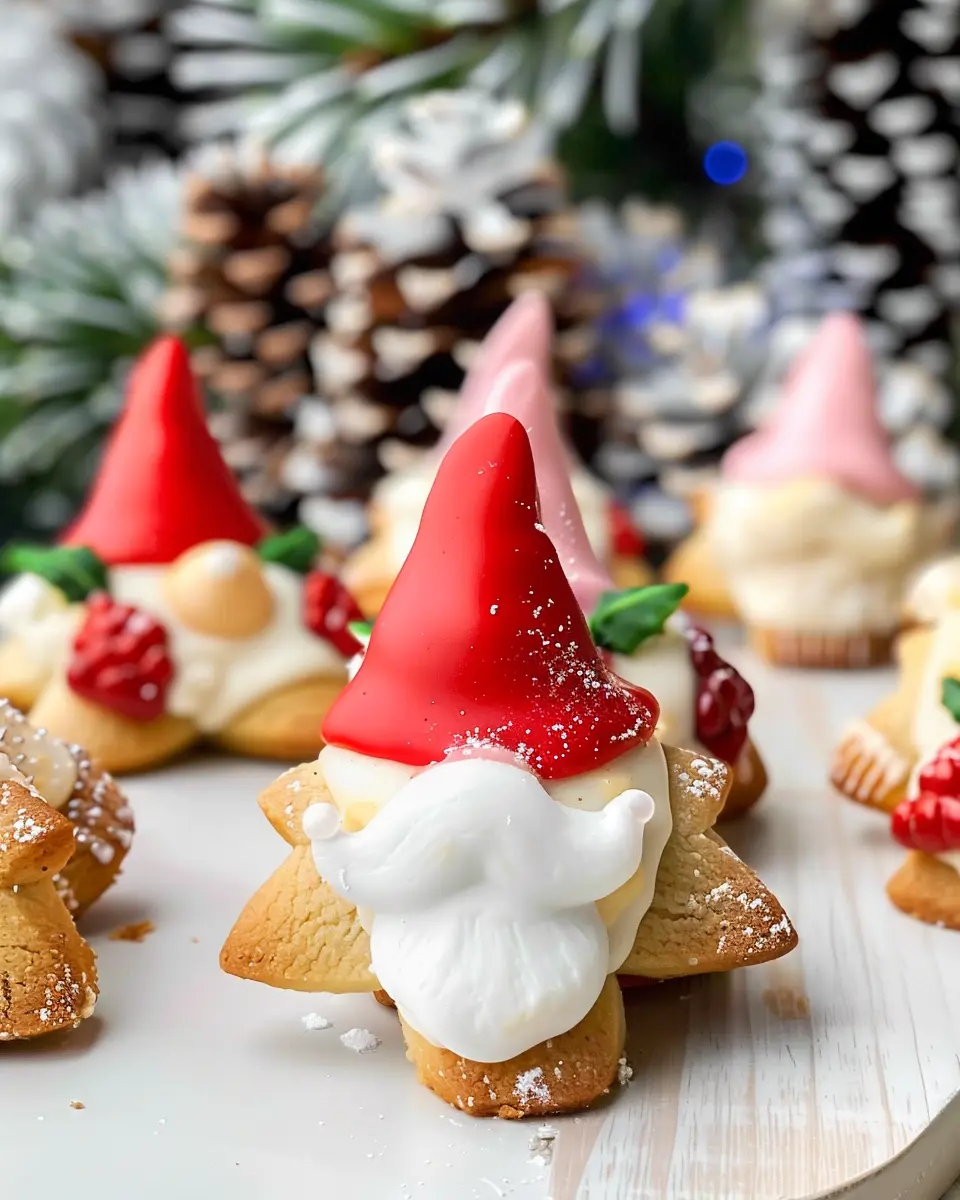
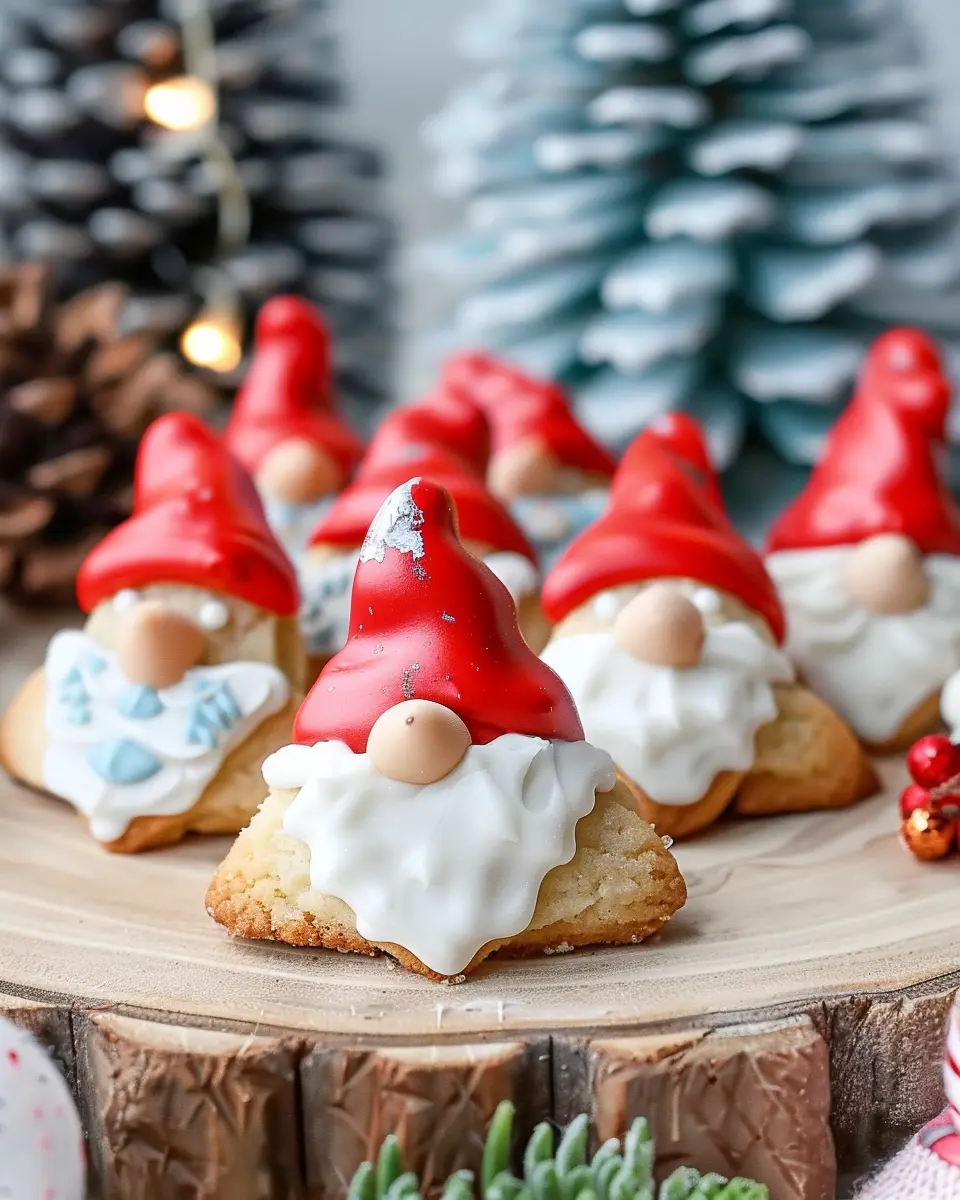
Here comes the fun part! Get your piping bags out—it’s time to decorate your the cutest gnome cookies. Using different colors of frosting, pipe a hat on the gnome cups. You can use white frosting for the gnome’s beard and a dot of red for the nose.
For an extra touch, place halved strawberries on the top to resemble a gnome’s hat or arms. Unleash your creativity! Want to delve deeper into decorative techniques? Check out expert tips on food styling from reputable culinary sites.
Final Thoughts
These gnome cookies not only taste great, but they also serve as a fantastic centerpiece at any gathering. Plus, they’re a great way to bring out your artistic side while baking. As you embark on this tasty adventure, remember that the real joy lies in the process. So grab your apron, put on some fun music, and let’s get baking!
Creative Variations on Gnome Cookies
When it comes to making the cutest gnome cookies, creativity is your best friend! After you’ve mastered the basic recipe, these delightful variations will sprinkle some extra fun and flavor into your baking adventures.
Rainbow Gnome Cookies with Different Berry Hats
Why settle for one color when you can have the whole rainbow? For a vibrant twist, use various berries—strawberries, blueberries, and raspberries—to create colorful hats for your gnome cookies. Simply mix some berry puree into your icing to achieve those stunning shades. Not only do these cookies look incredible, but they also pack a flavorful punch, as each berry brings its unique taste and health benefits. Did you know that berries are rich in antioxidants? You can learn more about their health benefits at Healthline.
- Tip: Use a light frosting base, then layer a different berry-flavored icing for each hat!
Chocolate Gnome Cookies for a Richer Flavor
If you’re a chocolate lover, consider whipping up chocolate gnome cookies. Just add unsweetened cocoa powder to your dough for that decadent flavor. The richness of chocolate pairs beautifully with creamy vanilla frosting, making for an enchanting dessert experience. To ensure they don’t get too dry, you might want to reduce the baking time slightly.
- Customization: Add dark chocolate chips for an extra surprise in each bite!
With these personalized touches, you won’t just have the cutest gnome cookies; you’ll have a whimsical dessert that’s incredibly satisfying. Now, aren’t these variations just the thing to set your cookie game apart? Happy baking!
Cooking Tips and Notes for Gnome Cookies
Tips for Perfectly Shaped Cookie Cups
Achieving those adorable, perfectly shaped cookie cups for the cutest gnome cookies starts with the dough. Here are a few tips to make your cookie cups stand out:
- Chill the dough: Refrigerating your dough for at least 30 minutes helps it hold its shape during baking.
- Use a muffin tin: For that perfect cup shape, press the dough into a greased muffin tin. Be gentle to ensure even thickness.
- Keep an eye on the bake time: Overbaking can lead to hard, crunchy cups. Aim for a slightly golden edge and a soft center.
Notes on Frosting and Decoration Techniques
When it comes to decorating, embrace creativity! Consider these pointers to elevate your gnome cookie game:
- Choose the right frosting: A thicker buttercream or royal icing can hold shape better for details. If you’re curious about various frosting types, check out this frosting guide.
- Decorate in layers: Allow your frosting to set a bit before adding details. This helps prevent colors from bleeding into each other.
- Have fun with edible decorations: Sprinkles, candies, or even fondant can add a whimsical flair. Each element brings your gnome cookie to life!
By keeping these tips in mind, you’re set to create delightful, tasty gnome cookies that aren’t just delicious but also a joy to look at!
Serving Suggestions for Gnome Cookies
Ideal Occasions for Gnome Cookies
When it comes to the cutest gnome cookies, the possibilities are endless! These charming treats are perfect for a variety of gatherings, such as:
- Birthday Parties: Brighten up any celebration with gnome cookies that add a whimsical touch to the dessert table.
- Baby Showers: Their playful appearance makes them a delightful addition to a sweet table for welcoming a new little one.
- Seasonal Celebrations: Use them for Halloween, Thanksgiving, or Christmas—we can always use more gnome magic during the holidays!
Presentation Ideas to Brighten Up Any Gathering
Creating a stunning display for your gnome cookies can elevate any event. Consider these festive presentation ideas:
- Cookie Tower: Layer the cookies on a tiered platter, arranging them by color for a vibrant look.
- Decorative Boxes: Package them in cute takeaway boxes adorned with twine for a thoughtful favor your guests can take home.
- Theme Compatibility: Match your gnome cookies with other themed treats, like mushroom cupcakes or floral cupcakes, for a cohesive display.
Remember to check out sites like Food Network or Taste of Home for more inspiration. Happy baking!
Time Breakdown for Preparing Gnome Cookies
Preparing the cutest gnome cookies is a delightful venture that won’t take all day. Here’s a handy breakdown to get you started on this cookie-making journey!
Preparation Time
You’ll need about 30 minutes to gather your ingredients and bring the magic to life. This includes mixing your dough and getting those adorable gnome decorations ready. Consider putting on some fun music while you work to make it more enjoyable!
Baking Time
Once your gnome cookies are shaped, pop them in the oven for 10–12 minutes. Keep an eye on them to ensure they bake perfectly. The aroma wafting through your kitchen will be irresistible!
Total Time
In just about 40–45 minutes, you can go from ingredients to a plate full of adorable gnome cookies. It’s a quick and satisfying way to impress your friends or family with your baking skills.
For more tips, check out this helpful guide on cookie baking perfection!
Nutritional Facts for Gnome Cookies
Calories Per Cookie
When diving into the delightful world of the cutest gnome cookies, you might wonder about the calories they pack. Each charming cookie contains approximately 120 calories. This makes them a perfect treat for those who want to indulge without going overboard.
Breakdown of Other Nutritional Information
Let’s break it down a bit more to give you a better picture:
- Fat: 6 grams (with healthy fats from butter)
- Carbohydrates: 18 grams (satisfying your sweet tooth)
- Protein: 2 grams (providing a tiny boost)
- Sugars: 8 grams (just the right amount for sweetness)
While enjoying these cookies, consider pairing them with a cup of herbal tea for a balanced experience that enhances the flavors. Interested in more health tips? Check out reputable sources like EatRight for guidance on nutrition.
Remember, moderation is key. Balancing treats like the cutest gnome cookies with a healthy diet can make your dessert experience that much sweeter!
FAQs about Gnome Cookies
How can I store gnome cookies for freshness?
Storing the cutest gnome cookies properly can make all the difference in keeping them delectable for days to come. Place your cookies in an airtight container at room temperature; this usually keeps them fresh for about a week. If you want to preserve their freshness even longer, consider freezing them. Just wrap each cookie individually in plastic wrap and place them in a freezer-safe bag. They can last up to three months frozen! When you’re ready to enjoy them again, simply let them thaw at room temperature for about an hour.
Can I make these cookies ahead of time?
Absolutely! Making the cutest gnome cookies ahead of time is a great idea, especially if you’re planning for an event or gathering. Prepare the dough and chill it in the refrigerator for up to 48 hours before baking. This not only saves you time but also enhances the flavors. Alternatively, you can bake the cookies in advance and store them, as mentioned above. Everyone loves a sweet surprise when you pull these adorable cookies from the jar!
Are there any ingredient substitutions for allergies?
If you or your guests have specific dietary needs, there are several ingredient substitutions you can make. For instance, you can replace regular flour with gluten-free flour blends or use coconut sugar as a healthier alternative to conventional sugar. If there’s an egg allergy, consider using flaxseed meals or applesauce as an egg substitute. The beauty of baking is that it can be adaptable while still delivering a fun and whimsical treat like gnome cookies. Always ensure to check ingredient labels and consult reliable sources for specific allergy information, such as the FDA guidelines for allergens.
Remember, experimentation can lead to delightful discoveries, so get creative and enjoy the baking process!
Conclusion on the Cutest Gnome Cookies
Why You Should Try Making Gnome Cookies at Home
If you’re looking for a delightful baking project, trying your hand at the cutest gnome cookies is a must. Not only do these whimsical treats add cheer to any gathering, but they’re also fun to decorate! Imagine surprising your friends with these adorable cookies at your next get-together or holiday party.
Crafting these little gnomes allows you to unleash your creativity, and each cookie can showcase your unique style. Plus, homemade cookies always taste better! You can control the flavors and adjust them to suit your preferences, swapping in your favorite ingredients.
Ready to embark on this charming baking adventure? Grab your tools, gather your ingredients, and get ready to have some fun! Don’t forget to share your creations on social media and inspire others. For more festive baking ideas, check out resources like the American Baking Guild for tips and tricks to elevate your cookie game!
PrintThe Cutest Gnome Cookies: Easy and Fun Treats for Everyone

The Cutest Gnome Cookies are an adorable and easy treat that everyone will love.
- Prep Time: 20 minutes
- Cook Time: 12 minutes
- Total Time: 32 minutes
- Yield: 24 cookies
- Category: Dessert
- Method: Baking
- Cuisine: American
- Diet: Vegetarian
Ingredients
- 2 cups all-purpose flour
- 1 cup sugar
- 1/2 cup unsalted butter, softened
- 1 large egg
- 1 teaspoon vanilla extract
- 1 teaspoon baking powder
- 1/2 teaspoon salt
- Food coloring for decorating
Instructions
- Preheat the oven to 350°F (175°C).
- In a large bowl, cream together the butter and sugar until light and fluffy.
- Add the egg and vanilla extract, mixing until well combined.
- In another bowl, whisk together the flour, baking powder, and salt.
- Gradually add the dry ingredients to the wet ingredients, mixing until a dough forms.
- Roll the dough into small balls and shape them into gnome figures.
- Place the shaped cookies onto a baking sheet lined with parchment paper.
- Bake for 10-12 minutes or until the edges are golden.
- Allow to cool completely before decorating with food coloring.
Notes
- These cookies can be customized to represent different gnome designs.
Nutrition
- Serving Size: 1 cookie
- Calories: 150
- Sugar: 10g
- Sodium: 50mg
- Fat: 7g
- Saturated Fat: 4g
- Unsaturated Fat: 2g
- Trans Fat: 0g
- Carbohydrates: 20g
- Fiber: 0g
- Protein: 2g
- Cholesterol: 30mg