Introduction to Moose Tracks Protein Ice Cream
Why choose Moose Tracks Protein Ice Cream?
If you’re on a quest for a dessert that’s both indulgent and packed with nutrition, look no further than Moose Tracks Protein Ice Cream. This delightful treat isn’t just about satisfying your sweet tooth; it’s also about fueling your body. With the right balance of protein, fat, and carbohydrates, this homemade indulgence can be a smart choice for health-conscious individuals.
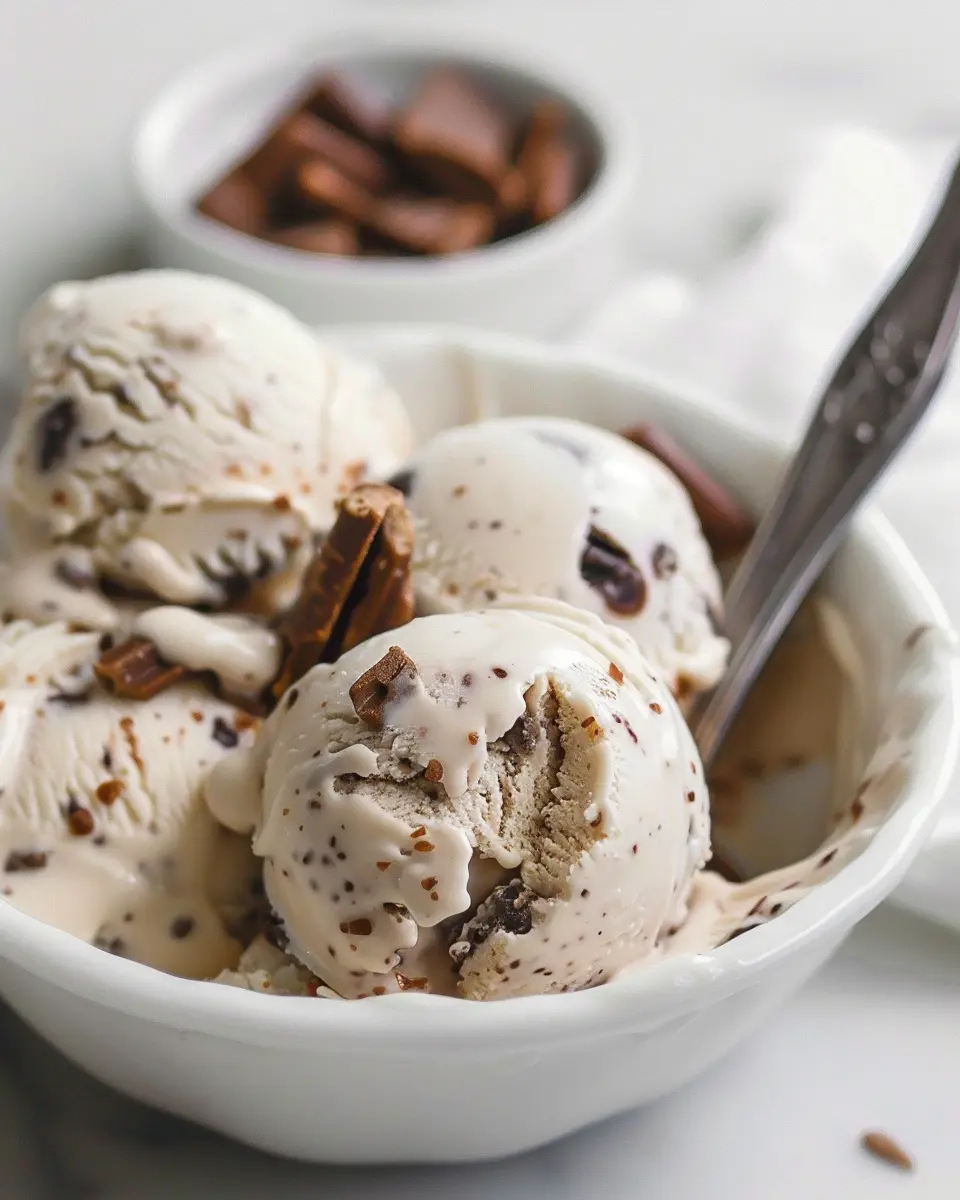
The unique combination of rich chocolate fudge, peanut butter cups, and naturally, that creamy base makes Moose Tracks a perennial favorite. Plus, the added protein means it can help with muscle recovery after a workout or serve as a satisfying snack that keeps you full longer. With customizable ingredients, you get to control what goes into your ice cream, making it as healthy or indulgent as you like.
The benefits of homemade treats vs. fast food
Making your own ice cream at home has numerous advantages over grabbing a quick scoop from your local shop. Here are some of the key benefits:
-
Control Over Ingredients: By opting for homemade Moose Tracks Protein Ice Cream, you choose the quality and quantity of every ingredient. This is particularly beneficial if you have dietary restrictions or specific nutritional goals.
-
Cost-Effective: While artisanal ice cream can be a delightful treat, it often comes with a hefty price tag. Making your own allows you to save money while enjoying the same delightful flavors.
-
Healthier Choices: Commercial ice creams are often loaded with added sugars and preservatives. By DIY-ing it, you can substitute in healthier alternatives like Greek yogurt or natural sweeteners, enhancing both flavor and nutrition.
-
Fun and Creative Outlet: There’s something deeply satisfying about creating something delicious from scratch. Play around with flavors or add-ins—who knows what new favorite you might discover?
Whether you want to impress guests or just treat yourself after a long day, homemade Moose Tracks Protein Ice Cream can elevate your dessert game. Plus, it’s a memory maker, perfect for gatherings or cozy nights in! Want to dive deeper into the benefits of homemade ice creams? Check out this article on health benefits.
Now that you’re enticed by the idea of whipping up your own Moose Tracks treat, let’s get into the recipe!
Ingredients for Moose Tracks Protein Ice Cream
Essential Ingredients List
Making delightful Moose Tracks Protein Ice Cream is all about choosing the right ingredients. Here’s what you’ll need:
- Protein powder: Opt for a flavor that complements chocolate and peanut butter.
- Nut butter: Creamy peanut butter works wonders for texture and taste.
- Coconut milk: Full-fat coconut milk adds richness and creaminess.
- Cocoa powder: Choose unsweetened for a deep chocolate flavor.
- Chocolate and peanut butter swirls: Look for high-quality brands or make your own.
- Sweetener: Use your favorite, whether it’s honey, maple syrup, or a sugar alternative.
Tips on Choosing High-Quality Ingredients
Selecting top-notch ingredients will elevate your Moose Tracks Protein Ice Cream experience. For protein powder, check out brands that prioritize natural ingredients—sites like Healthline provide excellent reviews of protein supplements. When it comes to nut butter, look for varieties with minimal additives; pure ingredients make a difference. Even cocoa powder matters—opt for Dutch-processed for the best chocolate flavor.
Remember, quality counts! These ingredients not only enhance your ice cream but also contribute to its nutrition. Do you have a favorite ingredient you can’t resist? Let’s hear about it!
Preparing Moose Tracks Protein Ice Cream
Creating your own moose tracks protein ice cream at home can be a fun and rewarding experience. It’s a delicious treat that allows you to indulge your sweet tooth while still fitting into your healthy lifestyle. Whether you’re trying to hit your protein goals or just love a unique flavor profile, I’ll walk you through each step so you can enjoy a creamy, dreamy dessert in no time.
Gather Your Tools and Ingredients
Before diving into the exciting world of homemade ice cream, you’ll want to ensure you have all your essentials on hand. Here’s a checklist to get you started:
-
Tools Needed:
-
Ninja Creami or a similar ice cream maker
-
Mixing bowl
-
Whisk or electric mixer
-
Measuring cups and spoons
-
Airtight container for storing your ice cream
-
Ingredients:
-
2 cups of unsweetened almond milk or coconut milk for a creamier texture
-
1 cup of protein powder (choose your favorite flavor; vanilla or chocolate work well!)
-
1/4 cup of natural sweetener like maple syrup or agave nectar
-
1/2 teaspoon of vanilla extract
-
1/2 cup of chocolate chips or chunks for that classic moose tracks experience
-
Optional: 1/2 cup of chopped nuts or your favorite mix-ins
Gathering everything ahead of time will make your ice cream-making journey smoother and more enjoyable!
Mix the Base Ingredients
Now that you have your tools and ingredients ready, it’s time for the fun part: mixing! In a large mixing bowl, combine your almond milk, protein powder, sweetener, and vanilla extract. Whisk everything together until it reaches a smooth consistency without any clumps.
If you prefer a thicker consistency, consider using less milk or adding in some Greek yogurt, which can elevate both the protein content and the creaminess of your base. Once mixed, taste it to see if it’s sweet enough for your liking; this is your chance to tailor it to your preferences!
Freeze and Prepare for the Ninja Creami
After achieving the desired consistency and flavor, pour your mixture into an airtight container. Make sure to leave a little space at the top to account for expansion as it freezes. Seal it up tightly and let it freeze for at least 8 hours or until solid.
You can also prepare a base in smaller batches if you want to play around with flavors. Did you know that the cubes of frozen ice cream base can last up to a month in your freezer? Just be sure to label the containers!
Spin It to Perfection
When the base is nice and frozen, it’s time to grab your Ninja Creami. If you haven’t experienced this amazing machine, you’re in for a treat! Remove your frozen mixture from the container and place it into the Ninja Creami’s pint. Select the “Lite Ice Cream” setting and let it spin magic into your base. It usually takes about 3-5 minutes.
Once done, you should have a creamy and smooth texture that rivals store-bought ice creams. And yes, you really made this from scratch!
Add Your Mix-Ins
Now comes the best part—adding your favorite mix-ins! Gently fold in the chocolate chips, nuts, or anything else that tickles your fancy. Remember that the beauty of homemade moose tracks protein ice cream lies in personalizing it to fit your cravings.
After you’ve added your mix-ins, transfer the ice cream back into the container, seal it tightly again, and let it set for about 15-30 minutes in the freezer before enjoying. Trust me, the wait will be worth it!
Now you’re ready to scoop and savor your homemade moose tracks protein ice cream! It’s not only satisfying but also a healthier option than many store-bought versions. Don’t be afraid to experiment with your flavors and enjoy the process. For more fun recipes and healthy swaps, check out EatingWell or Healthline for inspiration. Happy ice cream making!

Variations on Moose Tracks Protein Ice Cream
Creating your own Moose Tracks protein ice cream opens the door to countless delicious variations. Don’t be afraid to experiment with flavors and ingredients that match your taste buds! Here are two irresistible versions that are sure to satisfy any ice cream lover.
Peanut Butter Explosion Variant
If you’re a fan of that irresistible combination of chocolate and peanut butter, this variant is a must-try. To transform your basic moose tracks protein ice cream into a peanut butter explosion, simply add a swirl of natural peanut butter during the mixing process. Here’s how to really amp up the flavor profile:
- Ingredients: Mix in a few tablespoons of creamy or crunchy peanut butter into your ice cream base.
- Reese’s Pieces: For extra texture, toss in some crushed Reese’s Pieces or even mini peanut butter cups.
- Peanut Butter Drizzle: Top with a peanut butter drizzle when serving for that added indulgence.
This version is rich in protein and perfect for a post-workout treat.
Chocolate Lover’s Version
For those who can’t get enough chocolate, this moose tracks protein ice cream variant will surely hit the sweet spot. Imagine dense chocolate ice cream with bits of chocolate fudge and chocolate-covered treats! Here’s how to craft your ultimate chocolate delight:
- Double Chocolate Base: Start with a chocolate-based ice cream. Using protein-rich chocolate whey will add not just flavor but also some serious nutritional value.
- Chocolate Chips and Fudge: Fold in dark chocolate chips and a ribbon of fudge sauce. The combination will give you a creamy, dreamy texture.
- Chocolate Shavings: For a fancy touch, sprinkle chocolate shavings on top before serving.
Both of these variations are easily customizable to fit your specific cravings, making your moose tracks protein ice cream the star of any dessert table. Plus, it’s an excellent way to combine indulgence with nutrition! Consider checking out Healthline’s guide on protein intake for more information on how to incorporate protein effectively into your diet.
Cooking tips and notes for Moose Tracks Protein Ice Cream
Troubleshooting Texture
Achieving the perfect texture in your Moose Tracks Protein Ice Cream can sometimes be tricky. If your ice cream feels too icy or hard, consider these tips:
- Churn well: Make sure to churn the mixture in your ice cream maker for the recommended time—this incorporates air and helps create a smooth texture.
- Temperature moderation: After churning, let your ice cream sit at room temperature for about 10 minutes before serving to soften slightly.
If it turns out too soft, try adding a bit more stabilizer like a small amount of cornstarch or using a bit of coconut milk to help thicken it up.
Storage Tips for Ice Cream
To keep your Moose Tracks Protein Ice Cream fresh and delicious:
- Proper containers are key: Use an airtight container to help prevent freezer burn.
- Consider layering: Add a layer of parchment paper directly on the surface of the ice cream before sealing it, which can help keep ice crystals from forming.
Don’t forget, homemade ice cream is best enjoyed within a week or two. For more tips on storing ice cream, you can check out advice from experts at the National Ice Cream Association.
By following these simple tips, you’re sure to enjoy your delicious Moose Tracks Protein Ice Cream at its best!
Serving suggestions for Moose Tracks Protein Ice Cream
Creative Serving Ideas
When it comes to Moose Tracks Protein Ice Cream, the possibilities for serving are endless! Here are some fun and creative ideas to elevate your ice cream experience:
- Sundae Style: Pile scoops of Moose Tracks onto a bowl and top with chopped nuts, a drizzle of chocolate syrup, or even a sprinkle of granola for a bit of crunch.
- Ice Cream Sandwiches: Grab two cookies of your choice and sandwich a generous scoop of Moose Tracks in between. It’s a delightful way to treat yourself!
- Protein Smoothie Bowl: Blend a scoop of Moose Tracks with some almond milk and a banana for a creamy smoothie bowl, topped with seeds and fresh fruit.
Pairing Recommendations
Enhancing your Moose Tracks Protein Ice Cream can be as simple as knowing what flavors complement it well:
- Fruits: Fresh berries or banana slices pair beautifully with the rich, chocolatey flavor and give a fresh twist.
- Nut Butter: A spoonful of peanut or almond butter can add a protein punch and delicious creaminess.
- Coffee: For a sophisticated touch, enjoy your ice cream alongside a shot of espresso or cold brew.
Thinking outside the box can take your ice cream game to the next level! Looking for more creative ways to use ice cream in your meals? Check out this guideline on serving ice cream for some fantastic inspiration!
Time breakdown for Moose Tracks Protein Ice Cream
Preparation time
Making Moose Tracks Protein Ice Cream is a breeze! You’ll spend about 15 minutes gathering ingredients and mixing everything together. Just imagine the delightful aromas and textures you’ll be working with as you create this delicious treat.
Freezing time
Once you’ve whipped up the mixture, it’s all about patience. Let your ice cream freeze for around 4-6 hours. This gives it a chance to develop that perfect, creamy consistency you’re craving.
Total time
In total, you’re looking at around 4 hours and 15 minutes to enjoy your homemade Moose Tracks Protein Ice Cream. It’s a small investment for a rewarding and healthful dessert! If you’re eager to learn more about the benefits of protein in ice creams, check out this article on health benefits of protein.
Now, get ready to indulge in a guilt-free treat that satisfies your sweet tooth while keeping your nutrition in check!
Nutritional facts for Moose Tracks Protein Ice Cream
When it comes to indulging in a delicious dessert without the guilt, Moose Tracks Protein Ice Cream stands out as a delightful option. This sweet treat combines flavor with nutrition, making it a favorite among health-conscious sweet enthusiasts.
Calories
A serving of Moose Tracks Protein Ice Cream packs around 200 calories, ensuring you can satisfy your cravings without overdoing it. It’s a great way to indulge while still keeping your overall health goals in check!
Macronutrient Breakdown
Let’s dive into the good stuff! Each serving typically offers:
- Protein: Approximately 20 grams
- Fat: About 10 grams, primarily from creamy base ingredients
- Carbohydrates: Around 15 grams, balanced to provide energy
With a solid protein content, it’s not just a dessert—it can be a post-workout reward or a guilt-free snack. For those eager to learn more about balanced nutrition, the USDA has excellent resources on dietary guidelines.
Indulging in Moose Tracks Protein Ice Cream allows you to enjoy a classic treat while nourishing your body. Whether you enjoy it after a long day or right after a workout, it feels good knowing it’s a smart choice!
FAQs about Moose Tracks Protein Ice Cream
Can I substitute ingredients?
Absolutely! One of the best things about Moose Tracks Protein Ice Cream is its versatility. If you’re looking to mix things up, feel free to substitute ingredients based on your preferences or dietary needs. For example, you can use almond milk instead of regular milk for a dairy-free option, or choose a plant-based protein powder if you’re vegan. Want to cut down on sugar? Try using a sugar substitute like stevia or monk fruit sweetener. Just keep in mind that some substitutions might alter the final texture slightly, but with a bit of experimentation, you can find a combination you love!
How long does it last in the freezer?
Once you’ve made your delicious Moose Tracks Protein Ice Cream, be sure to store it properly. It can last in the freezer for about 2-3 weeks if kept in an airtight container. For the best texture and flavor, try to consume it within the first week. If you notice any iciness or freezer burn, that’s a sign it’s time to whip up a fresh batch!
Is it suitable for dietary restrictions?
Definitely! This Moose Tracks Protein Ice Cream can easily cater to various dietary restrictions. Whether you’re lactose intolerant, gluten-sensitive, or following a high-protein diet, you can adjust the recipe to suit your needs. By focusing on clean, wholesome ingredients, you can enjoy a dessert that aligns with your health goals. Just make sure to check any store-bought ingredients, as they may contain allergens.
For more dietary tips and recipes, you might find resources on Healthline or EatingWell helpful!
Conclusion on Moose Tracks Protein Ice Cream
Recap of the Key Benefits
In summary, Moose Tracks Protein Ice Cream is your delicious partner in healthy indulgence. Packed with protein and bursting with flavorful swirls of chocolate and peanut butter, this treat offers a guilt-free way to satisfy your sweet tooth. Plus, it’s a fantastic option for post-workout recovery, making it perfect for young professionals looking to nourish their bodies without compromising on taste.
I encourage you to try making this incredible recipe at home! With simple, wholesome ingredients, you can whip up a delightful dessert that’s both nutritious and satisfying. So why not take the plunge and create your own Moose Tracks Protein Ice Cream today? You won’t regret it! For more inspiration, check out Healthline’s guide on protein intake and find out how you can incorporate more protein into your diet.
PrintMoose Tracks Protein Ice Cream: Easy Indulgence for All Ages

A delicious and nutritious treat that is loved by all ages, Moose Tracks Protein Ice Cream combines the rich flavors of chocolate and peanut butter with the benefits of protein to make a satisfying dessert.
- Prep Time: 15 minutes
- Cook Time: 0 minutes
- Total Time: 4 hours 15 minutes
- Yield: 4 servings
- Category: Dessert
- Method: Churning
- Cuisine: American
- Diet: High Protein
Ingredients
- 2 cups protein ice cream base
- 1/2 cup chocolate peanut butter cups, chopped
- 1/4 cup chocolate syrup
- 1/4 cup peanut butter
- 1/2 cup crushed nuts (optional)
Instructions
- In a large bowl, combine protein ice cream base and peanut butter, mixing until smooth.
- Fold in chopped chocolate peanut butter cups and chocolate syrup.
- Pour the mixture into an ice cream maker and churn according to the manufacturer’s instructions.
- If desired, add crushed nuts during the last minute of churning.
- Transfer the ice cream to a container and freeze for at least 4 hours before serving.
Notes
- For a dairy-free version, use a plant-based protein ice cream base.
- Adjust sweetness to taste by adding more chocolate syrup or using flavored protein powder.
Nutrition
- Serving Size: 1 cup
- Calories: 250
- Sugar: 15g
- Sodium: 100mg
- Fat: 10g
- Saturated Fat: 4g
- Unsaturated Fat: 6g
- Trans Fat: 0g
- Carbohydrates: 30g
- Fiber: 2g
- Protein: 15g
- Cholesterol: 25mg