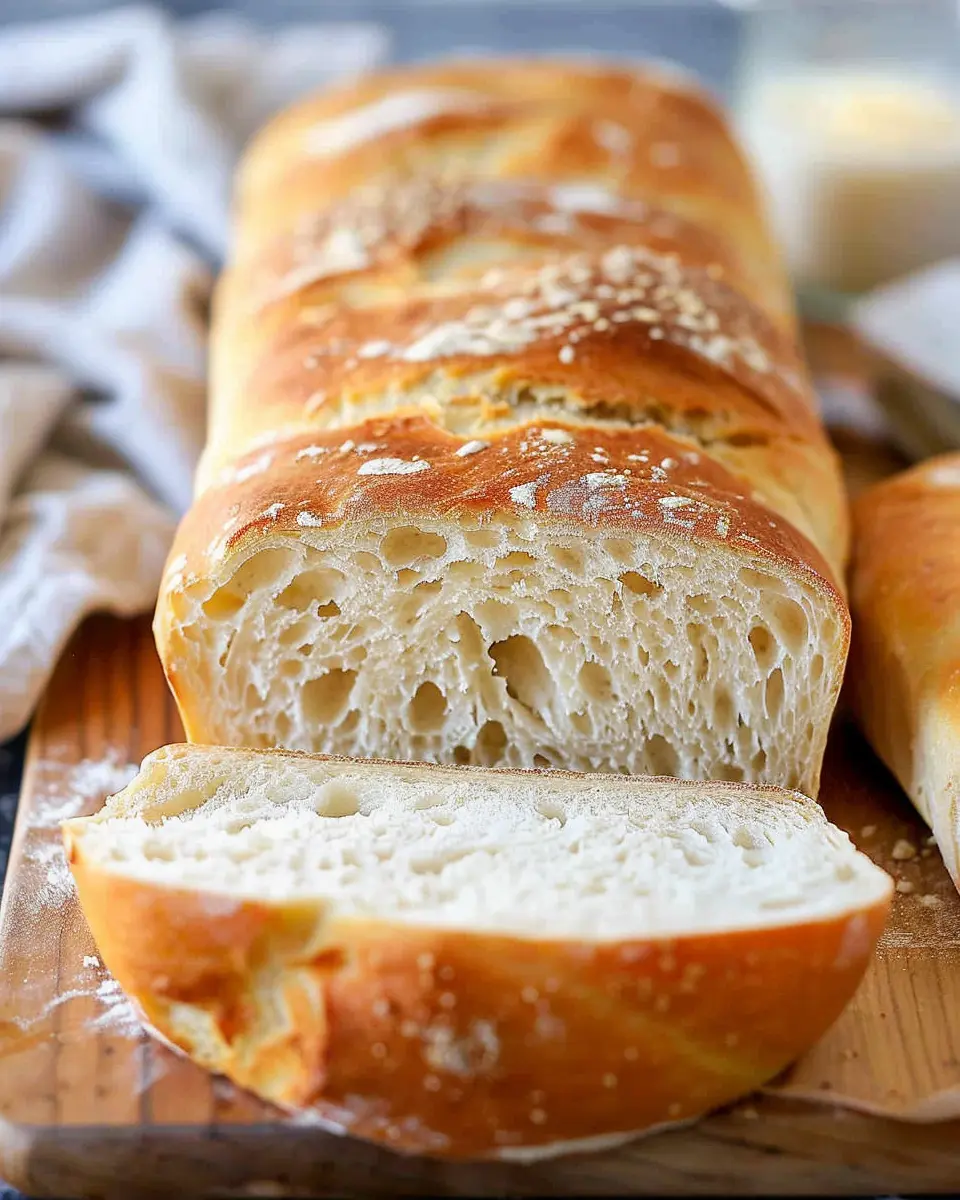
Introduction to Homemade Bread
Why Homemade Bread is a Game Changer for Young Professionals
As a young professional, you might often find yourself juggling between work deadlines, social outings, and perhaps a bit of self-care too. In this bustling life, the allure of homemade bread is not just about deliciousness; it’s also about efficiency and cost-effectiveness. You’re likely aware that store-bought bread can often be packed with preservatives and unrecognizable ingredients.
On the other hand, creating your own bread gives you control over what goes into it. Imagine the satisfaction of pulling a warm loaf from your oven, knowing exactly what’s in it because you made it yourself! Research shows that baking at home can also be a form of stress relief, reducing anxiety, and enhancing mood (source: Psychology Today). It’s an efficient way to fuel yourself with wholesome ingredients after a long day.
The Joy of Baking and Sharing Bread with Friends
One of the most rewarding aspects of baking homemade bread is the joyful experience of sharing it with friends. When you invite your friends over and serve them a slice of your freshly baked loaf, you’re not just offering them food; you’re providing an experience. The warm aroma wafting through the kitchen, the tantalizing crust, and the soft, fluffy interior all contribute to a wonderful atmosphere that fosters connection.
Consider hosting a casual bread-tasting night where everyone bakes their version of homemade bread. This not only sparks creativity but also encourages community among your circle. According to a survey by The American Baker’s Association, bread remains a staple food appreciated in shared moments, whether it’s a casual sandwich or served as a side at dinner.
So, as you set out to embark on your bread-baking journey, remember that you’re not merely making a loaf; you’re creating new traditions and memories with those you value. Grab some flour, yeast, and a dash of adventure, and let’s dive into the wonderful world of baking homemade bread together!
Ingredients for Homemade Bread
Essential ingredients you probably already have
Making homemade bread is simpler than you might think, and the essential ingredients list is likely already in your pantry. Here’s what you’ll need:
- Flour: All-purpose flour works perfectly, but you can get creative with whole wheat or bread flour for texture.
- Water: Room temperature works well; it activates the yeast effectively.
- Yeast: Instant or active dry yeast will get your bread rising beautifully.
- Salt: Just a pinch enhances the flavor, making every bite delightful.
- Sugar: A bit of it feeds the yeast, giving your bread that soft, fluffy texture.
Optional ingredients for flavor variations
Want to spruce up your homemade bread? Here’s where it gets fun! Consider adding:
- Olive Oil or Butter: For richness and a tender crumb.
- Herbs and Spices: Think rosemary, garlic powder, or even a sprinkle of cinnamon!
- Seeds: Flaxseed or sunflower seeds for added crunch and nutrition.
- Cheese: A handful of shredded cheese can give your loaf a savory kick.
By incorporating these optional ingredients, you can customize your bread to suit your taste. The beauty of homemade bread is that it allows for personalization—so experiment and find your favorite combinations! For more tips on bread-making, check out King Arthur Baking for expert advice.
Making homemade bread not only fills your kitchen with mouthwatering aromas but also provides a warm, comforting experience. Why not invite friends over for a baking session? It’s a great way to bond while creating something delicious!
Preparing Homemade Bread
Making homemade bread is a rewarding journey that fills your kitchen with warmth and delicious aromas. Whether you’re a seasoned baker or a novice, this step-by-step guide will help you prepare amazing bread from scratch. Let’s dive into the essentials of the process.
Proofing the yeast
The first step in creating your delicious homemade bread begins with proofing the yeast. This key step ensures that your bread rises perfectly, giving it that lovely airy texture. To start, gather:
- 2 teaspoons of active dry yeast
- 1 tablespoon of sugar
- 1 cup of warm water (about 110°F or 43°C)
In a small bowl, combine the yeast and sugar, then pour over the warm water. Give it a gentle stir and let it sit for about 5-10 minutes. You’ll know it’s ready when it becomes frothy and bubbly, indicating that the yeast is active. According to the Bread Bakers Guild of America, this frothy texture is a sign of good yeast, essential for perfect bread.
Mixing the dough
Once your yeast is proofed, it’s time to mix the dough. In a large mixing bowl, combine:
- 4 cups of all-purpose flour
- 1 teaspoon of salt
- The frothy yeast mixture
Start stirring with a wooden spoon or your hands until the ingredients roughly come together. This is where the magic begins! You can also experiment with different types of flour, like whole wheat or bread flour, for added flavor and nutrition. If you want to dive deeper into flour types, check out this useful guide on flour varieties.
Kneading the dough
It’s time to turn that shaggy mixture into a smooth, elastic dough! Transfer the dough to a lightly floured surface and knead it for about 8-10 minutes. To knead, push the dough away from you with the heel of your hand, fold it back over, and repeat. You’ll know it’s ready when it’s smooth and springs back when pressed gently. This is where you can really work off any stress from the day—kneading dough can be quite therapeutic!
First rise and what to expect
Now, let’s give your dough some love and let it rise. Place it in a lightly greased bowl, cover it with a kitchen towel or plastic wrap, and let it rise in a warm, draft-free spot. Ideally, you should aim for 1-2 hours, or until it has doubled in size. This is your first rise, and it’s essential for developing the flavor and texture of your homemade bread.
Shaping the loaves
After the first rise, it’s time to shape your dough into loaves. Punch it down gently to release any air bubbles, then turn it out onto your floured surface. Divide the dough into two equal portions. Shape each portion into a loaf by flattening it into a rectangle and then rolling it tightly. Place the shaped loaves into greased loaf pans, ensuring they fit snugly.
Second rise before baking
Your bread needs one more rise before it’s ready for the oven! Cover the shaped loaves with a cloth and let them rise again for about 30-45 minutes. This second rise ensures your loaves achieve that light, fluffy texture we all love. Keep an eye on them! They should puff up nicely, but don’t worry if they don’t double in size again.
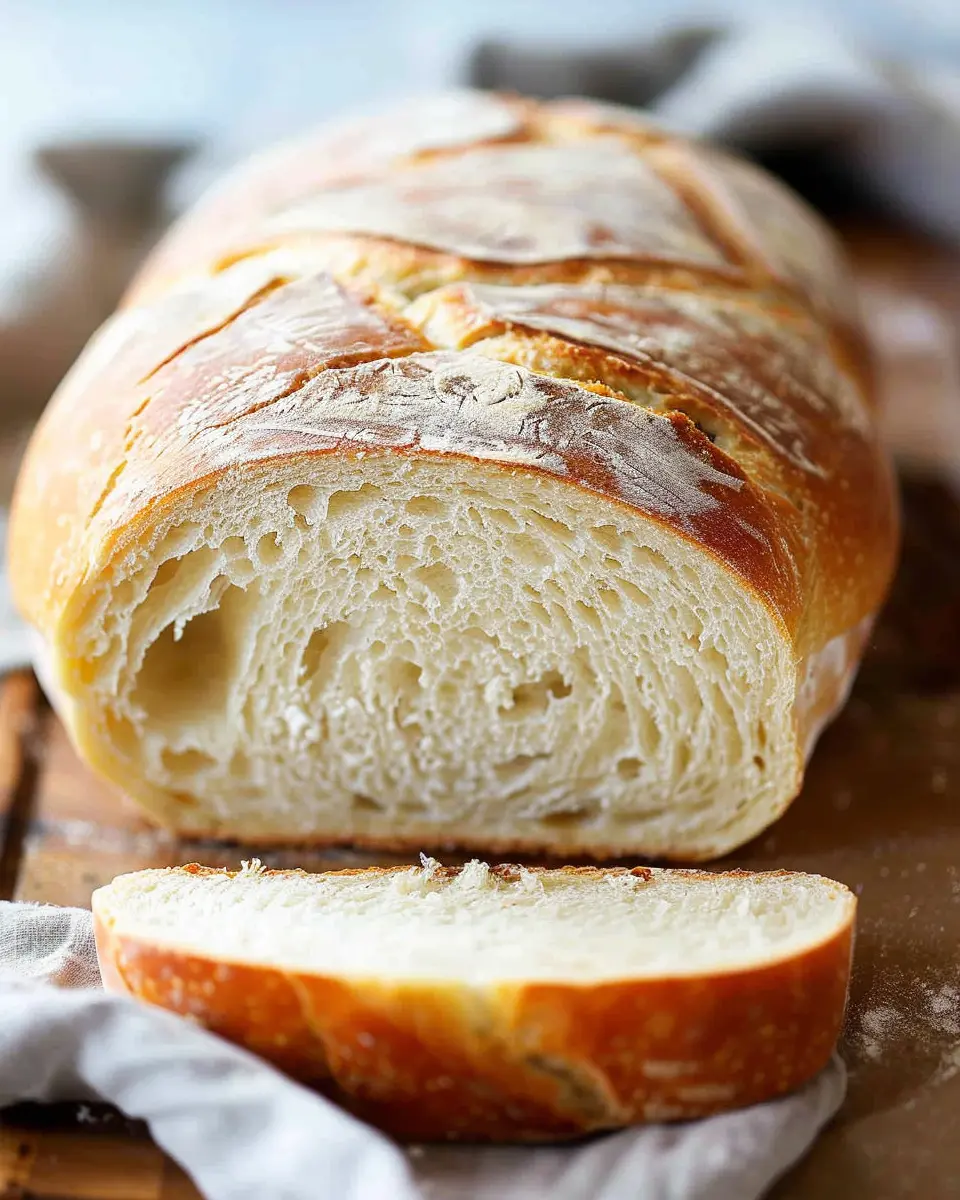
Baking the bread
Finally, it’s time to bake your homemade bread! Preheat your oven to 375°F (190°C). Before placing the loaves in, consider scoring the top with a sharp knife. This allows steam to escape and helps the loaves expand. Bake for about 30-35 minutes or until the tops are golden brown and the loaves sound hollow when tapped on the bottom. Let them cool on a wire rack before slicing—and enjoy the wonderful aroma that fills your home!
By following these steps, you’ll soon be enjoying your delicious homemade bread, perfect for sandwiches, toasts, or simply slathered with butter. Baking is an art, so feel free to experiment with ingredients, shapes, and flavors. Happy baking!
Variations on Homemade Bread
Homemade bread is a fantastic way to bring a little warmth and comfort into your life—and the possibilities are endless! Let’s explore some exciting variations that can elevate your baking game.
Whole Wheat Bread for Added Nutrition
If you’re on the lookout for a more nutritious loaf, consider whole wheat bread. Not only does it provide more fiber than white bread, but it also contains essential nutrients like iron and magnesium. By substituting whole wheat flour for some or all of the all-purpose flour in your recipe, you can create a heartier, healthier bread that’s perfect for sandwiches or toast. Plus, whole grains can help keep you satisfied longer—just what you need for a busy day ahead!
Herb-Infused Bread for a Flavor Boost
For those who want to take their homemade bread to the next level, adding fresh herbs can be a game-changer. Think rosemary, thyme, or even a hint of garlic. Simply chop up your favorite herbs and incorporate them into the dough for an aromatic loaf that’s bursting with flavor. A savory herb-infused bread pairs exceptionally well with soups and salads. You might even find yourself making this your go-to recipe for dinner parties!
Sweet Bread Options for Breakfast or Dessert
Who says bread can’t be sweet? Sweet breads like banana bread or cinnamon roll dough provide a deliciously decadent option for breakfast or dessert. For a delightful twist, try adding chocolate chips, dried fruits, or nuts into your sweet bread batter. These variations not only taste amazing but also make for wonderful gifts!
By experimenting with these variations, you’re bound to find a flavor profile that you—along with family and friends—will adore. Happy baking!
Interested in boosting your bread-baking skills? Check out King Arthur Baking for expert tips and recipes!
Cooking Tips and Notes for Homemade Bread
Common Mistakes to Avoid
When diving into the world of homemade bread, it’s easy to make a few missteps. Here are some common pitfalls to steer clear of:
- Incorrect Yeast Activation: Ensure your water is warm (about 110°F). Too hot can kill the yeast, while too cold won’t activate it.
- Measuring Flour: Spoon your flour into the measuring cup and level it off. Scooping directly can lead to compacted flour, resulting in a dense loaf.
- Not Kneading Enough: A well-kneaded dough creates structure and texture. It should be smooth and elastic when ready.
Storage Tips for Freshness
To keep your homemade bread fresh longer:
- Cool Completely: Always let your bread cool completely before storing it to avoid moisture buildup.
- Use a Bread Box: This helps to maintain the ideal humidity without trapping too much moisture, extending shelf life.
- Slice and Freeze: If you can’t finish your bread within a few days, slice it and freeze. This way, you can enjoy homemade bread whenever you crave it.
For more in-depth tips on bread storage, check out sources like King Arthur Baking. Happy baking!
Serving Suggestions for Homemade Bread
Best toppings and spreads for your bread
When it comes to enjoying your homemade bread, the possibilities are endless! Here are some delightful toppings and spreads to elevate your sandwich game:
- Avocado Smash: A creamy spread made with ripe avocados, a sprinkle of salt, and a squeeze of lemon. It’s nutrient-packed and oh-so-delicious.
- Nut Butters: Try almond or peanut butter for a satisfying protein boost. Add a drizzle of honey for extra sweetness!
- Cream Cheese & Herbs: Mix plain or flavored cream cheese with fresh herbs for a tasty breakfast treat.
Each of these choices pairs beautifully with your warm, freshly baked loaf!
Creative meal ideas using homemade bread
Switching up how you use your homemade bread can open a world of culinary creativity. Think beyond traditional sandwiches:
- Breakfast Toast: Top slices with Turkey Bacon, scrambled eggs, and fresh spinach for a hearty morning meal.
- Bruschetta: Dice some tomatoes and toss them with basil, garlic, olive oil, and balsamic vinegar, then pile onto toasted slices for a fresh appetizer.
- Bread Soups: Transform day-old bread into a comforting bowl of soup. Try a classic tomato basil or a hearty vegetable soup that soaks up the flavors.
Don’t hesitate to experiment! Your homemade bread can be the star of any meal or snack, so get creative and enjoy! For more ideas, check out this article on Delicious Bread Combinations for inspiration.
Time Breakdown for Homemade Bread
When diving into the world of homemade bread, it’s essential to understand how your time will be spent. Here’s a quick breakdown to help you manage your schedule:
Preparation Time
Getting everything ready takes about 15-20 minutes. This includes measuring ingredients, mixing, and kneading the dough to create that perfect texture.
Rising Time
Patience is key! You’ll want to let the dough rise for approximately 1 to 2 hours. This allows the yeast to do its magic—creating a light, airy loaf. Check out this insightful guide on yeast if you’re curious about how it works.
Baking Time
The baking itself typically takes around 25-30 minutes. You’ll be rewarded with an enticing aroma that’ll have your neighbors wondering what’s cooking!
Total Time
In total, you’re looking at a commitment of about 1.5 to 3 hours, including rising time. It sounds like a lot, but trust me—the delicious end result is worth every minute spent!
Nutritional Facts for Homemade Bread
Calories per Slice
Homemade bread usually contains around 80-120 calories per slice, depending on the ingredients used. Unlike store-bought varieties, which may have added preservatives and sugar, your homemade bread offers more control over your calorie intake and nutrient profile.
Nutritional Benefits of Homemade Bread
Making your own bread means you can prioritize wholesome ingredients. Consider these benefits:
- Whole Grains: Using whole wheat flour not only boosts fiber content but also provides essential vitamins and minerals. Whole grains can help maintain a healthy digestive system and keep you feeling full longer.
- Customization: You can tailor your recipe to suit your dietary needs, whether it’s gluten-free or packed with seeds and nuts for added protein and omega-3s.
- Lower Added Sugars: Many commercial breads contain excess sugars, but with homemade bread, you control what goes in. This can be beneficial for maintaining stable blood sugar levels.
For more insights on the health benefits of whole grains, check out resources from the Whole Grains Council. Remember, your homemade bread not only satisfies your cravings but also nourishes your body!
FAQs about Homemade Bread
Baking homemade bread can seem intimidating, especially for first-timers. But don’t worry—many common questions can help guide you along the way!
How can I tell if my bread is done baking?
Knowing when your bread is perfectly baked is crucial for achieving that sought-after texture. A reliable method is the “tap test.” Gently tap the bottom of the loaf; if it sounds hollow, it’s done! Additionally, you can use a food thermometer. The internal temperature should be around 190°F to 200°F. If your loaf is a little pale but taps hollow, don’t fret. It might just need a few more minutes in the oven.
Can I use whole wheat flour instead of all-purpose?
Absolutely! Whole wheat flour can replace all-purpose flour in your homemade bread recipe. While it adds a nutty flavor and more nutrients, it may absorb more liquid, so you might need to adjust the hydration slightly. Aim for a 25% substitution to start, then experiment until you find your preferred balance. For tips on adjusting recipes, you might find this article on flour substitutions helpful.
What should I do if my dough doesn’t rise?
If your dough isn’t rising, there are a few things to check. First, ensure the yeast is fresh—expired yeast can lead to disappointing results. Also, check your water temperature; too hot can kill the yeast, while too cold can impede activation. If your kitchen is chilly, try placing the dough in a slightly warm oven (turned off) to create a cozy environment.
Experimenting with homemade bread is part of the fun. Don’t be discouraged; each loaf is a learning experience!
Conclusion on Homemade Bread
Encouragement to Start Baking Today
Making homemade bread is not just about mixing flour and water; it’s a rewarding experience that brings a delightful aroma to your home and a sense of accomplishment to your day. So why wait? Grab your apron, and start your baking journey today!
Benefits Recap: Why Homemade Bread Is Worth It
Let’s recap the wonderful benefits of baking your own bread:
- Healthier Ingredients: You control what goes in, avoiding preservatives and sugars often found in store-bought varieties.
- Cost-Effective: You can make multiple loaves for a fraction of the price of artisanal breads.
- Customization: From whole grains to unique flavor additions, each loaf can be uniquely yours.
For more tips and baking wisdom, check out King Arthur Baking. Happy baking!
PrintHomemade Bread: Easy Tips for Perfect Loaves Every Time
Learn how to make delicious homemade bread with easy tips and tricks for achieving perfect loaves every time.
- Prep Time: 15 minutes
- Cook Time: 35 minutes
- Total Time: 1 hour 50 minutes
- Yield: 1 loaf
- Category: Bread
- Method: Baking
- Cuisine: American
- Diet: Vegetarian
Ingredients
- 4 cups all-purpose flour
- 1 tablespoon sugar
- 2 teaspoons salt
- 1 tablespoon active dry yeast
- 1 and 1/2 cups warm water
Instructions
- In a large bowl, combine warm water and yeast. Let it sit for about 5 minutes until frothy.
- Add sugar, salt, and flour gradually, mixing until a dough forms.
- Knead the dough on a floured surface for about 10 minutes until smooth.
- Place the dough in a greased bowl, cover, and let it rise for 1 hour.
- Preheat the oven to 375°F (190°C).
- Punch down the risen dough, shape it into a loaf, and place it in a greased loaf pan.
- Let it rise again for 30 minutes.
- Bake for 30-35 minutes until golden brown and sounds hollow when tapped.
Notes
- For a crustier loaf, place a pan of water in the oven while baking.
- Experiment with adding herbs or seeds for different flavors.
Nutrition
- Serving Size: 1 slice
- Calories: 120
- Sugar: 1g
- Sodium: 400mg
- Fat: 1g
- Saturated Fat: 0g
- Unsaturated Fat: 0g
- Trans Fat: 0g
- Carbohydrates: 24g
- Fiber: 1g
- Protein: 4g
- Cholesterol: 0mg